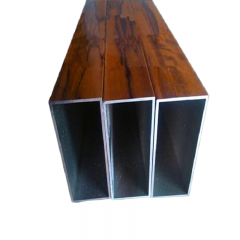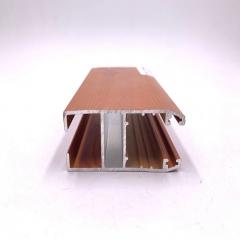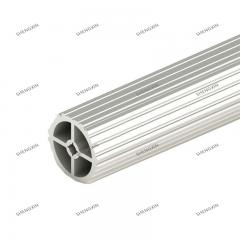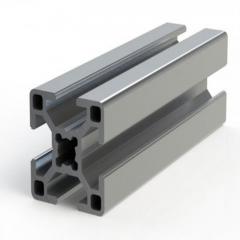
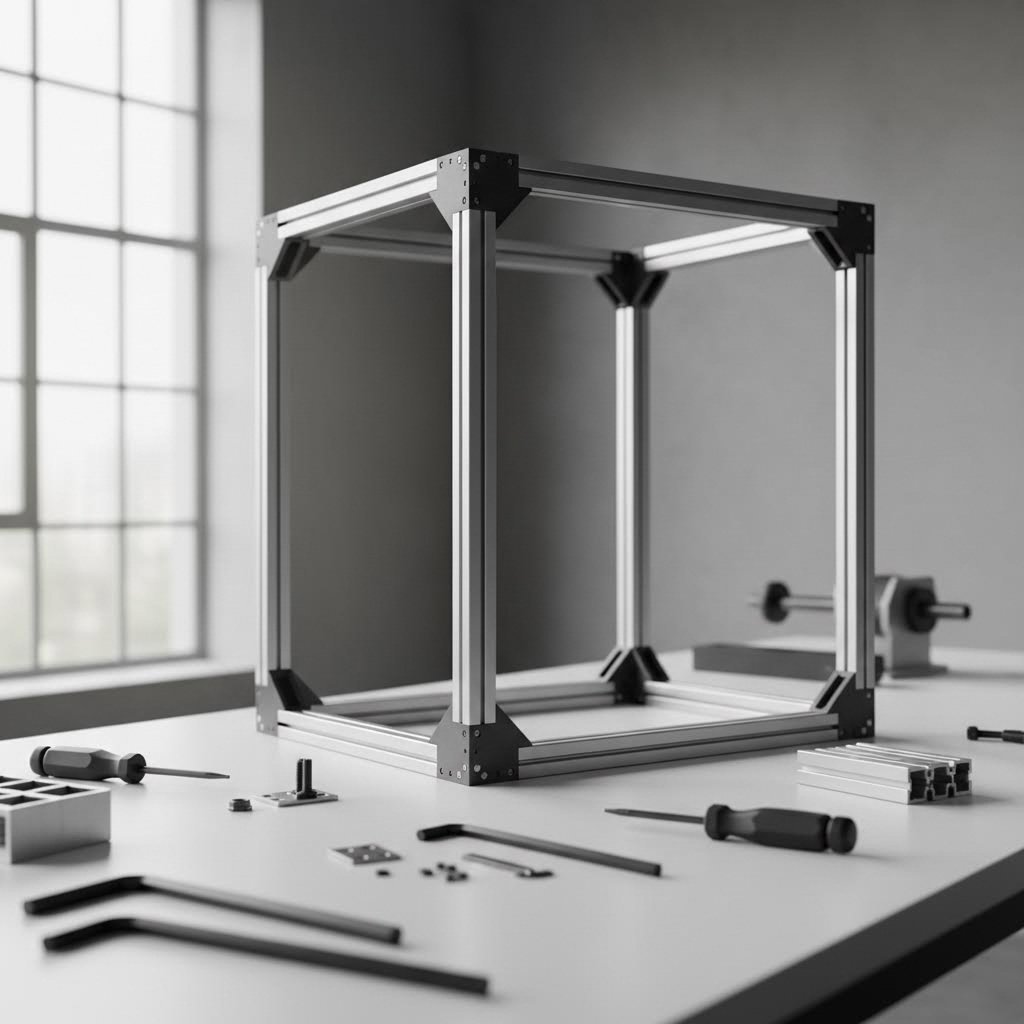
Imagine building a sturdy, professional-grade cabinet without welding a single joint or cutting complex wood joinery. That's exactly what an aluminum extrusion cabinet makes possible. These modular storage systems use lightweight yet incredibly strong extruded aluminum profiles that connect through specialized hardware, giving you the freedom to build, modify, and rebuild as your needs evolve.
Unlike traditional cabinets that lock you into permanent designs, this approach treats cabinet building more like assembling with high-performance building blocks. Whether you're outfitting a workshop, converting a van, or organizing a garage, understanding how these systems work opens up possibilities that conventional construction simply cannot match.
At the heart of every aluminum cabinet built with this method lies a simple yet ingenious design feature: the T-slot. Picture a square or rectangular aluminum profile with grooves shaped like the letter "T" running along its length. These channels accept specialized nuts, bolts, and brackets that slide into position anywhere along the profile, then lock firmly in place when tightened.
This design eliminates the permanence problem that plagues welded steel or wood construction. Made a measurement error? Simply loosen the hardware, adjust, and retighten. Need to add a shelf later? Slide new brackets into the existing slots without drilling a single hole. The T-slot system creates solid, stable joints that can withstand heavy loads and vibration while remaining fully adjustable.
The aluminum itself brings additional advantages. It naturally resists corrosion, weighs roughly one-third as much as steel, and requires no painting or sealing to maintain its appearance. For a cabinet with 8020 components, you're getting industrial-grade durability in a package light enough to mount in vehicles or carry to job sites.
You'll often hear the term "80/20" used interchangeably with T-slot aluminum framing. Here's what you need to know: 80/20 is actually the brand name of the company that originated and popularized this modular building approach, calling it "The Industrial Erector Set." Much like how "Kleenex" became synonymous with tissues, the 80/20 name now commonly refers to T-slot construction systems in general.
The profiles themselves come in standardized sizes, with 8020 extruded aluminum available in dimensions like 1010 (1" x 1"), 1515 (1.5" x 1.5"), 2020 (2" x 2"), and metric equivalents such as 20-2020 and 40-4040. Each size serves different load-bearing requirements, allowing you to match profile strength to your specific aluminium cabinet project.
What makes this system revolutionary for 80 20 aluminum projects is the ecosystem of compatible components. Corner brackets join profiles at right angles. Joining plates connect profiles end-to-end. Panel mounting hardware secures walls, doors, and shelves. All these components share the same T-slot compatibility, meaning you can mix and match to create exactly what you envision.
For beginners, this standardization removes much of the guesswork from cabinet building. You're not fabricating custom joints or hoping parts will fit together. Instead, you're selecting from proven components designed to work together seamlessly, then assembling them with basic hand tools.
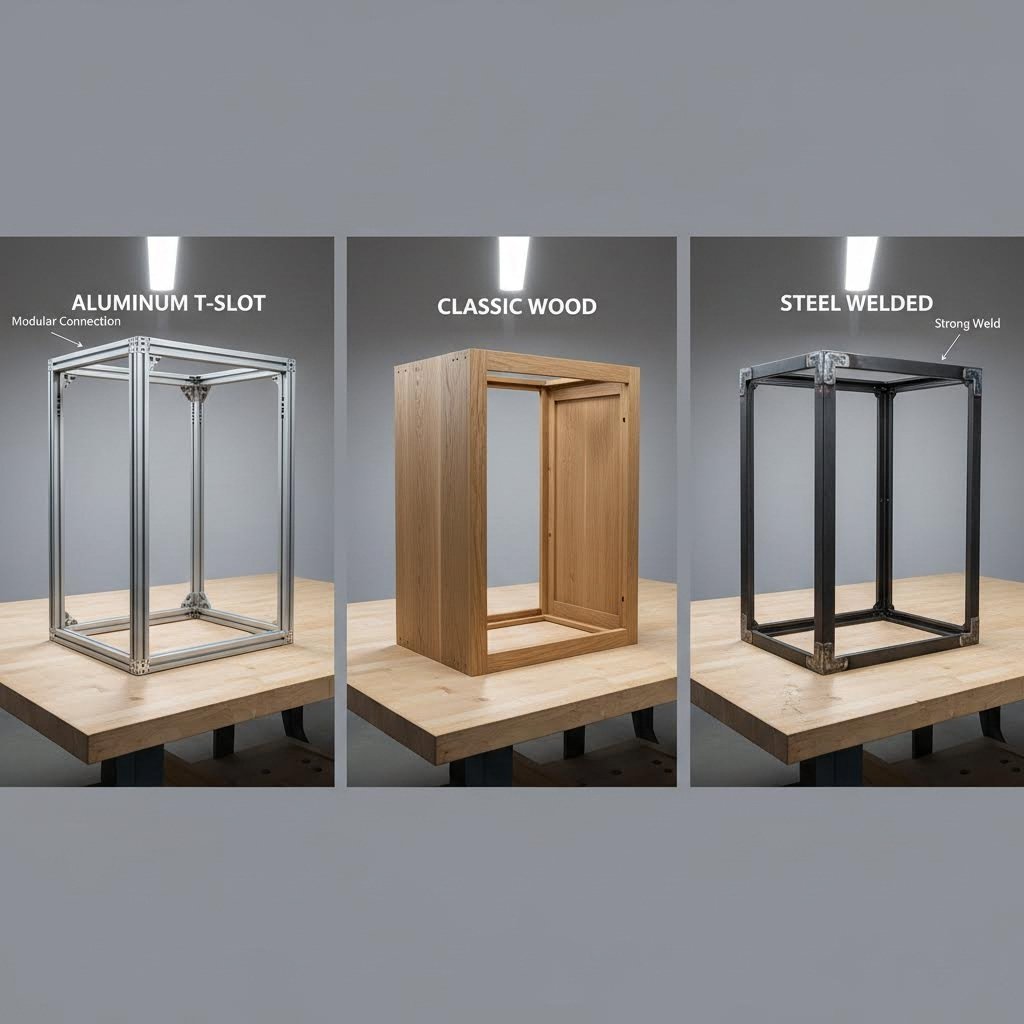
Now that you understand how T-slot systems work, the real question becomes: is aluminum the right choice for your specific project? The answer depends on where your cabinets will live, what they'll hold, and how much flexibility you need down the road. Let's break down exactly when aluminum cabinets outperform traditional alternatives and when you might consider other options.
Every cabinet material brings trade-offs to the table. Wood remains the go-to choice for home kitchens and furniture. Welded steel dominates heavy industrial applications. But aluminum extrusion occupies a unique middle ground that makes it ideal for specific situations that neither wood nor steel handles well.
Consider this side-by-side comparison across the factors that matter most:
| Factor | Aluminum Extrusion | Wood (Plywood/MDF) | Welded Steel |
|---|---|---|---|
| Weight | Lightest option; roughly 1/3 the weight of steel | Moderate; varies by wood type | Heaviest; limits mobility and payload |
| Durability | Excellent corrosion resistance; won't rot, warp, or attract pests | Susceptible to moisture damage, warping, and insects | Extremely strong but prone to rust without coating |
| Customization Ease | Fully reconfigurable; adjust anytime with basic tools | Permanent once assembled; modifications require rework | Permanent; changes require cutting and re-welding |
| Initial Cost | Higher upfront for profiles and hardware | Lowest material cost | Moderate to high depending on fabrication |
| Skill Required | Basic hand tools; no welding or advanced woodworking | Moderate woodworking skills needed | Welding certification required for quality joints |
| Long-Term Value | High; components can be reused in future projects | Low; typically discarded when worn | Moderate; can last decades if maintained |
The reconfigurability factor deserves special attention. Professional van builders increasingly prefer 8020 extruded aluminum because it allows adjustments after installation. Discover that your drawer placement doesn't work after a week on the road? Loosen a few bolts, reposition, and you're back in business. Try that with glued and screwed wood cabinets.
Weight becomes everything when your cabinets travel with you. Every pound of cabinet weight directly reduces your cargo capacity, affects fuel economy, and impacts vehicle handling. This is precisely why lightweight cabinets for van conversions and RV renovations have become the standard among serious builders.
Here's the math that matters: aluminum weighs significantly less than steel or wood while providing equivalent or superior strength. When comparing equally sized cabinets, the aluminum version also offers more internal storage space because the walls can be thinner without sacrificing rigidity. Less trailer weight equals better gas mileage, plain and simple.
Beyond weight, aluminum handles the demanding environments of mobile applications far better than alternatives. It won't absorb moisture like wood, eliminating rot and mold concerns. It resists the vibration that loosens nailed or screwed wood joints over time. And unlike steel, it naturally resists corrosion without requiring paint or protective coatings.
Temperature extremes present another consideration that competitors often ignore. Aluminum performs consistently across wide temperature ranges, from freezing winter nights to scorching summer days. It doesn't expand and contract as dramatically as wood with humidity changes, and it dissipates heat effectively rather than retaining it. For RV cabinets parked in desert sun or lightweight cabinets for campers facing mountain cold, this thermal stability prevents the warping and joint failures that plague wood construction.
Aluminum extrusion construction makes the most sense when your project matches these criteria:
If your van cabinets, food truck cabinets, or workshop storage fit any of these descriptions, aluminum extrusion deserves serious consideration. The higher initial investment pays dividends through longevity, adaptability, and the peace of mind that comes from building with materials designed for demanding conditions.
Of course, knowing that aluminum works for your application is just the first step. The next critical decision involves selecting the right profile sizes for your specific cabinet design and load requirements.
You've decided aluminum extrusion is the right material for your project. Now comes the question that trips up most first-time builders: which profile size should you actually use? Walk into any supplier's catalog and you'll find a dizzying array of options, from compact 1010 profiles barely an inch across to beefy 4040 sections measuring nearly two inches per side. Choosing wrong means either overbuilding (wasting money and adding unnecessary weight) or underbuilding (risking structural failure).
The good news? Profile selection follows logical principles once you understand how different sizes perform under load. Let's cut through the confusion and match specific profiles to your 8020 cabinet requirements.
Profile dimensions follow a simple naming convention: the numbers represent the cross-sectional size in millimeters. A 2020 profile measures 20mm x 20mm (roughly 3/4" x 3/4"), while a 4040 profile comes in at 40mm x 40mm (about 1.5" x 1.5"). Some manufacturers use inch-based sizing like 1010 (1" x 1") or 1515 (1.5" x 1.5"), but the principle remains identical.
Here's what most guides won't tell you: the 2020 profile's compactness makes it ideal for intricate designs requiring precision, while still maintaining impressive rigidity for lightweight structures. Meanwhile, the 4040 profile's larger cross-sectional area accommodates heavier loads, making it the go-to choice for applications demanding substantial structural integrity.
For an extruded aluminum cabinet, your profile choice should reflect where the cabinet sits and what it holds. Upper cabinets mounted to walls or vehicle structures face different stresses than base cabinets supporting heavy tools or equipment from below.
| Cabinet Type | Recommended Profile | Expected Load Capacity | Best Use Cases |
|---|---|---|---|
| Overhead Storage | 2020 or 1515 | Light to moderate (up to 50 lbs per shelf) | Clothing, lightweight tools, supplies |
| Upper Wall Cabinets | 2020 | Moderate (50-75 lbs per shelf) | Kitchen items, parts storage, office supplies |
| Base Cabinets | 2040 or 4040 | Heavy (100+ lbs per shelf) | Power tools, equipment, heavy materials |
| Drawer Systems | 2020 frame with 2040 runners | Moderate to heavy (75-100 lbs per drawer) | Tool organization, workshop storage |
| Workbench Frames | 4040 | Very heavy (200+ lbs distributed) | Industrial workstations, assembly tables |
| 80 20 Shelf Supports | 2020 (light) or 2040 (heavy) | Varies by span length | Open shelving, display units |
Notice something important in that table? The double-wide 2040 profile appears frequently for applications needing extra strength in one direction. This profile measures 20mm x 40mm, giving you enhanced rigidity along the longer axis without doubling your weight. It's the sweet spot for 8020 shelf supports spanning longer distances or drawer runners that see constant sliding loads.
Here's where beginners often go wrong: assuming bigger always means better. While a 4040 profile certainly handles more load than a 2020, it also weighs more and costs more. The best performance indicator is actually the area moment of inertia to surface area ratio, which measures how efficiently a profile resists bending relative to its weight.
Consider this real-world example: a 45mm x 45mm profile from one manufacturer might have an area moment of inertia of 162,325 mm⁴ while weighing 2.06 kg per meter. A seemingly identical profile from another source might only reach 107,780 mm⁴ while weighing 1.63 kg per meter. The first profile offers significantly more rigidity per unit of weight, making it the smarter choice for weight-sensitive applications like aluminum storage cabinet builds in vehicles.
For your 80 20 cabinets, apply these load-bearing principles:
Speaking of connections, your aluminum extrusion shelves and cabinet frames are only as strong as their joints. Corner brackets come in various configurations, from simple two-hole L-brackets for light duty to reinforced gussets with multiple fastener points for heavy loads. Joining plates connect profiles end-to-end or side-by-side, with strength varying by fastener count and plate material.
The rule of thumb? Match your bracket strength to your profile strength. A heavy-duty 4040 frame connected with undersized brackets creates a weak point that defeats the purpose of using larger profiles. Most manufacturers offer bracket recommendations specific to each profile series.
When planning your build, remember that profile cost increases roughly with cross-sectional area. A 4040 profile contains roughly four times the aluminum of a 2020 profile and prices accordingly. Build smart by using heavier profiles only where loads demand them, then stepping down to lighter sections for non-structural elements. This balanced approach delivers maximum strength at minimum weight and cost, which is exactly what makes an 8020 cabinet system so appealing in the first place.
With your profiles selected, you'll need the right tools to cut, drill, and assemble them into a finished cabinet.
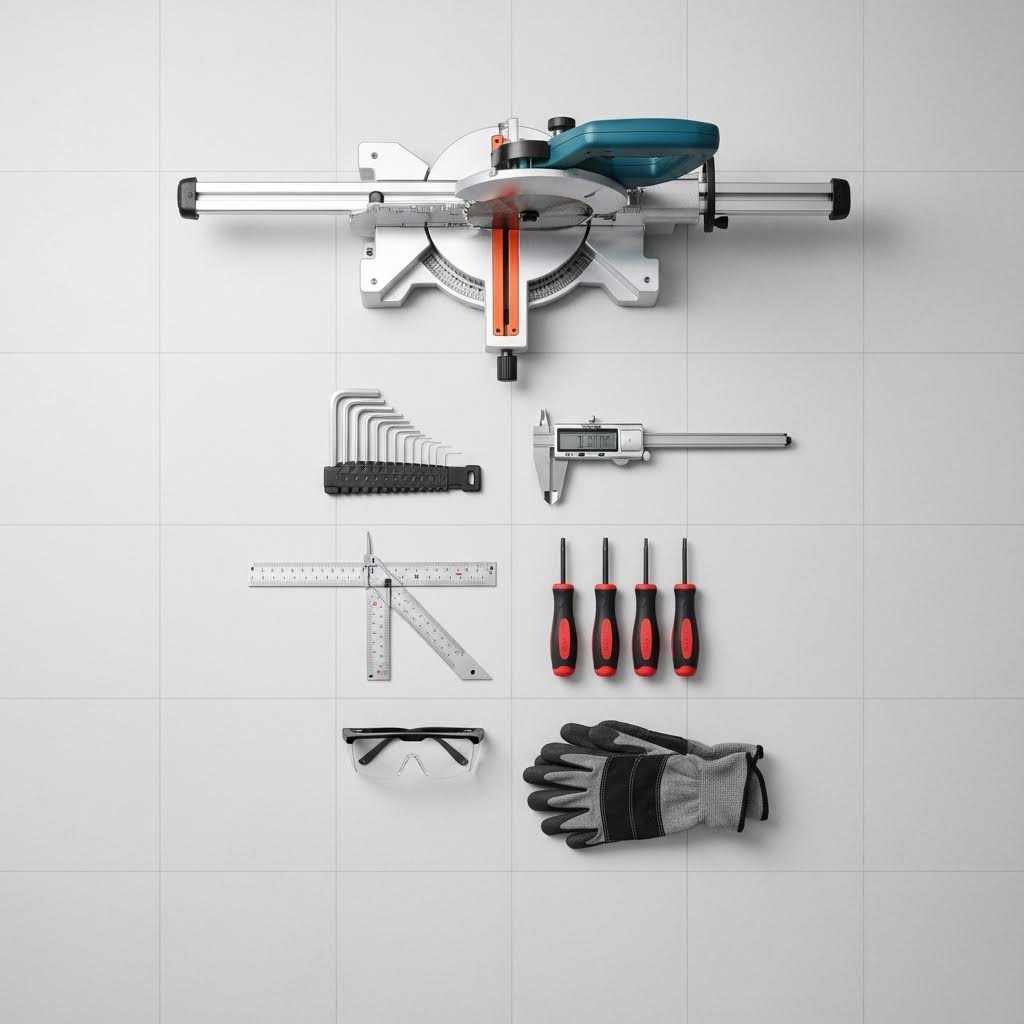
You've selected your profiles, planned your cabinet dimensions, and you're ready to build. But here's where many first-time builders hit an unexpected wall: realizing they don't have the right tools for working with aluminum. The good news? You probably own half of what you need already. The key is knowing which tools matter most and where cutting corners leads to frustrating results.
Whether you're building diy van cabinets for a weekend adventure rig or constructing an 8020 workbench for your garage, having the right equipment transforms a challenging project into a satisfying build experience.
Let's organize your tool requirements by category, starting with what you'll use most frequently and working toward specialized equipment.
Measuring and Marking Tools:
Assembly Tools:
Cutting aluminum extrusion cleanly requires the right blade, not necessarily expensive equipment. Even a standard circular saw can cut extruded aluminum when fitted with the proper carbide blade, though precision varies with technique and equipment quality.
Cutting Tools (DIY Level):
Cutting Tools (Professional Level):
Drilling Equipment:
Safety Equipment:
Here's a common beginner mistake that leads to poor results: using too much pressure when cutting can cause saw blades to flex, creating curved cuts and angled edges that throw off your entire assembly. The solution? Let the blade do the work with steady, controlled motions rather than forcing the cut.
Another frequent error involves using wood-cutting blades on aluminum. While technically possible, these blades create excessive burrs, rough edges, and can even grab and kick back. The small investment in a dedicated non-ferrous metal blade pays dividends in cleaner cuts and safer operation.
For those building from camper van cabinet kits or an aluminum trailer frame kit, some cutting may already be done for you. However, field modifications and custom additions still require at least basic cutting and drilling capability. Even if you outsource precision cuts, keep a hacksaw and file on hand for minor adjustments during assembly.
The difference between DIY-level and professional-grade tooling ultimately comes down to precision and throughput. A miter saw with a quality blade produces cuts accurate to within a degree or two. Dedicated aluminum cutting equipment holds tolerances of fractions of a degree. For a single 8020 drawer project or small cabinet, DIY tools work fine. For larger builds or production work, professional equipment eliminates the hand-fitting that eats up your time.
With your tools gathered and workspace prepared, you're ready to start the actual assembly process, beginning with the critical frame construction sequence.
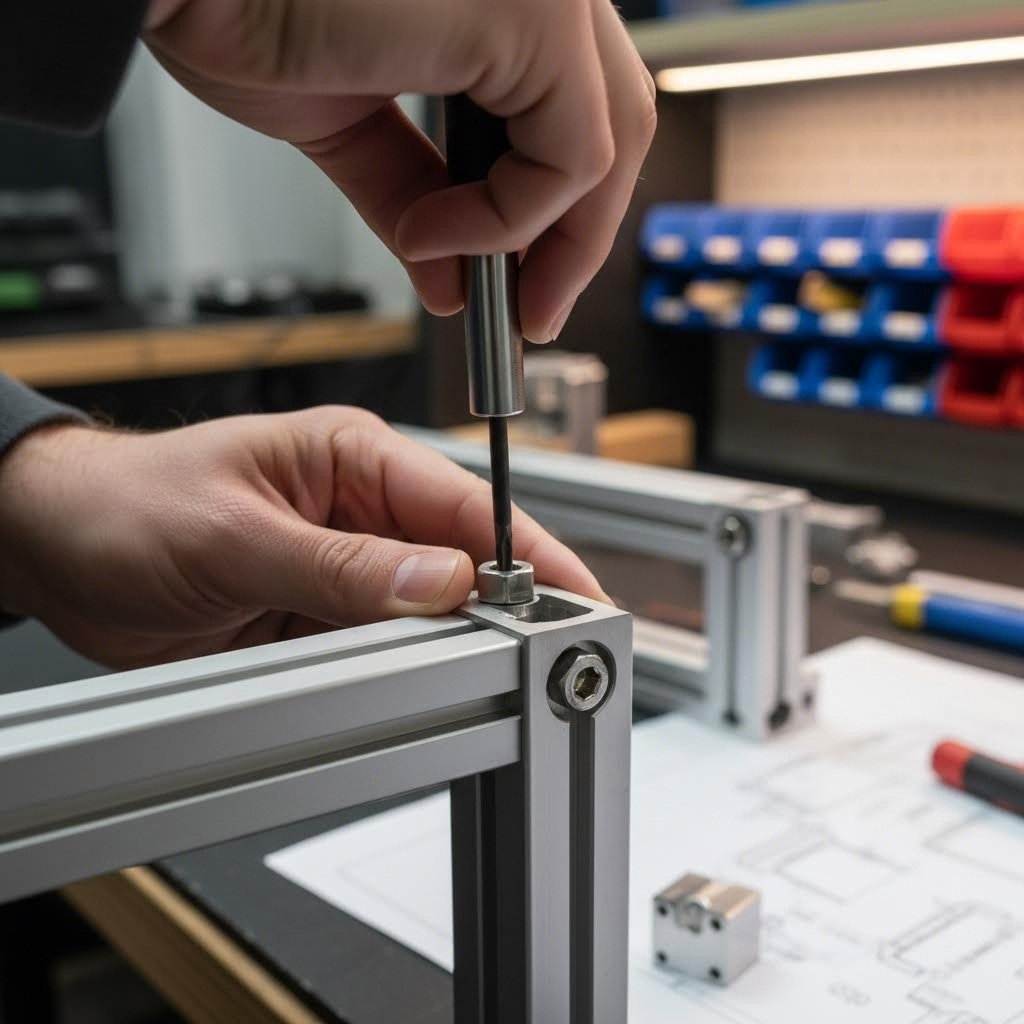
Tools gathered, profiles cut, and hardware sorted. Now comes the moment of truth: transforming those individual components into a solid, square cabinet frame. This is where many builders stumble, not because the process is difficult, but because they rush through steps or tackle them in the wrong order.
The difference between a wobby cabinet and a rock-solid one often comes down to assembly sequence. Follow these steps in order, and you'll avoid the frustrating cycle of loosening, realigning, and retightening that plagues builders who wing it.
Think of cabinet frame assembly like building with constraints. Once you tighten certain connections, others become difficult or impossible to adjust. The goal is working from the inside out and bottom up, keeping options open until the final tightening sequence.
Why does order matter so much? Consider what happens if you fully tighten the base before adding verticals: any slight misalignment in the base gets multiplied as you build upward, resulting in a twisted frame. By keeping everything loose until the complete structure exists, you can adjust the entire assembly as a unit before locking it in place.
A cabinet that's even slightly out of square creates cascading problems. Doors won't close properly. Drawers bind. Shelves sit at angles. And in mobile applications like a camper van cabinet or trailer cabinets aluminum construction, racking forces during travel will stress out-of-square joints until something fails.
Before you even begin the installation process, meticulous planning and accurate measurement are essential. But even perfect planning requires verification during assembly.
Essential squaring tools and techniques:
Troubleshooting common alignment issues:
When diagonal measurements differ, gently push on the longer diagonal's corners toward each other while pulling the shorter diagonal's corners apart. Recheck measurements after each adjustment.
Problem: Frame rocks on flat surface
Cause: One corner sits higher or lower than others. Solution: Identify which corner doesn't touch the surface. Loosen that corner's connections, press the frame flat, and retighten while holding pressure.
Problem: Corners won't reach 90 degrees
Cause: Usually a profile cut slightly too long or too short. Solution: If one profile is too long, it forces adjacent corners open. Loosen connections, identify the oversized piece, and either trim it or adjust bracket positions to compensate.
Problem: Frame squares on bench but twists when lifted
Cause: Connections aren't tight enough, or brackets are undersized for the load. Solution: Tighten all fasteners to proper torque. If twisting persists, add gusseted corner brackets or cross-bracing at critical joints.
Problem: Repeated loosening and retightening damages T-slot threads
Cause: Over-torquing or cross-threading fasteners. Solution: T-slot assemblies require adjusting one component which often forces another part out of place. Work patiently, use proper torque settings (typically 8-12 Nm for standard hardware), and consider using fresh T-nuts if threads strip.
For camper cabinets destined for life on the road, take extra time during squaring. The vibration resistance of your finished cabinet depends entirely on how precisely you align the frame now. A perfectly square frame distributes road forces evenly across all joints. An out-of-square frame concentrates stress at certain connections, accelerating wear and eventual failure.
Once your frame passes the squareness tests and all fasteners are properly torqued, you've completed the structural foundation of your aluminum extrusion cabinet. The next phase involves integrating panels, doors, and drawer systems that transform this frame into functional storage.
Your aluminum frame stands square and solid, but it's still just a skeleton. The transformation from structural framework to functional storage happens when you add panels, doors, and drawer systems. This is where your aluminum extrusion cabinet finally starts looking like actual furniture rather than an industrial assembly project.
The beauty of T-slot construction shines here: multiple mounting options mean you're not locked into one approach. Whether you prefer the warmth of wood panels, the durability of aluminum composite, or the visibility of clear acrylic, the same frame accepts them all.
Choosing panel materials involves balancing appearance, durability, weight, and budget. Each option brings distinct advantages to your rv kitchen cabinets or workshop storage build.
For aluminum kitchen cabinets or motorhome kitchen cabinets where hygiene matters, aluminum composite panels offer the easiest cleaning and best moisture resistance. For workshop applications where appearance takes a backseat to function, plywood delivers the best value. And for display cases or applications where you want to see contents at a glance, acrylic panels provide that visibility.
When mounting panel material, T-slot systems offer several hardware options. Panel retainers hold material firmly while allowing removal for cleaning or replacement. These require drilling through the panel itself. Panel blocks mount directly to the profile channel, providing stability and reducing vibration. For applications where rattling becomes annoying, panel gaskets create a cushioned connection that eliminates noise.
The mounting method you choose depends on whether panels will be permanent or removable. For an rv kitchen cabinet where you might swap panels seasonally or for cleaning access, retainer clips make sense. For permanent installations like kitchen aluminum cabinet backs, adhesive-backed panel blocks create clean, invisible mounts.
Drawers and doors transform your cabinet from open shelving into secure, organized storage. The T-slot system accommodates both with surprising elegance once you understand the mounting principles.
Installing Drawer Slides on Aluminum Frames:
Drawer slides may require running a lateral bar of extruded aluminum behind them to offer a mounting point. This is particularly true for under-mount slides that need a horizontal surface rather than a vertical one.
For 8020 drawers using side-mount slides, the process works like this: T-nuts slide into the profile channel, then bolts pass through the pre-drilled holes in your drawer slide and thread into those T-nuts. Most quality slides like Blum models include multiple mounting holes, so you'll typically use three or four fasteners per slide for rock-solid attachment.
The 80 20 drawers advantage becomes clear during installation. Unlike wood cabinets where misdrilled holes mean starting over, T-slot mounting allows infinite adjustment. If your drawer binds slightly, loosen the fasteners, slide the mounting point, and retighten. This adjustability proves invaluable when achieving the precise parallel alignment that smooth drawer operation requires.
Door Hinge Installation:
European-style concealed hinges have become the standard for aluminum cabinets kitchen applications, and for good reason. European hinges typically offer adjustment screws, so if things aren't perfectly square, you can fix it with the turn of the adjustment screw. This forgiveness is essential for amateur builders working with the tight tolerances that nice cabinetry demands.
Here's the installation approach that works: when aligning the hinge mounting plate on aluminum, the pre-drilled holes in the hinge likely won't align with the T-slot channel. The solution? Drill new holes in the hinge plate that match your framing. Then use T-nuts in the channel with button-head cap screws to bolt the hinge mount securely. This creates an unexpectedly beneficial side effect: by loosening the mounting point, you can slide the hinge along the slot for additional adjustability before locking it down.
The door itself requires a 35mm pocket to accept the hinge mechanism. A Forstner bit creates this recess cleanly. Hinge manufacturers provide specifications for exact placement, so follow their documentation for proper door overlay and clearances.
Keeping Doors and Drawers Closed:
For mobile applications, positive latches become essential. Friction or magnetic catches work fine in stationary cabinets but fail spectacularly when driving over rough roads. Stainless steel marine latches work well for mobile cabinetry, requiring a catch mounted to the frame for the latch to grab. These catches attach the same way as hinges: drill holes to match the T-slot, mount via T-nuts.
For overhead cabinet doors, lift struts hold them open without requiring you to prop them with one hand while grabbing items with the other. Quality struts include adjustment settings to dial in the perfect resistance, strong enough to hold the door open but gentle enough to close smoothly.
Raw aluminum works perfectly fine for workshop storage where appearance matters less than function. The natural oxide layer provides adequate corrosion resistance in dry environments. However, several situations call for upgraded surface treatments:
For most builders, raw or clear-anodized aluminum strikes the best balance between cost and appearance. The natural silver finish complements both modern and industrial aesthetics while eliminating the lead time and expense of custom finishing.
With panels secured, drawers gliding smoothly, and doors swinging properly, your cabinet has graduated from frame to furniture. The next consideration involves tailoring your design for specific applications, whether that's a van conversion, workshop organization, or mobile food service.
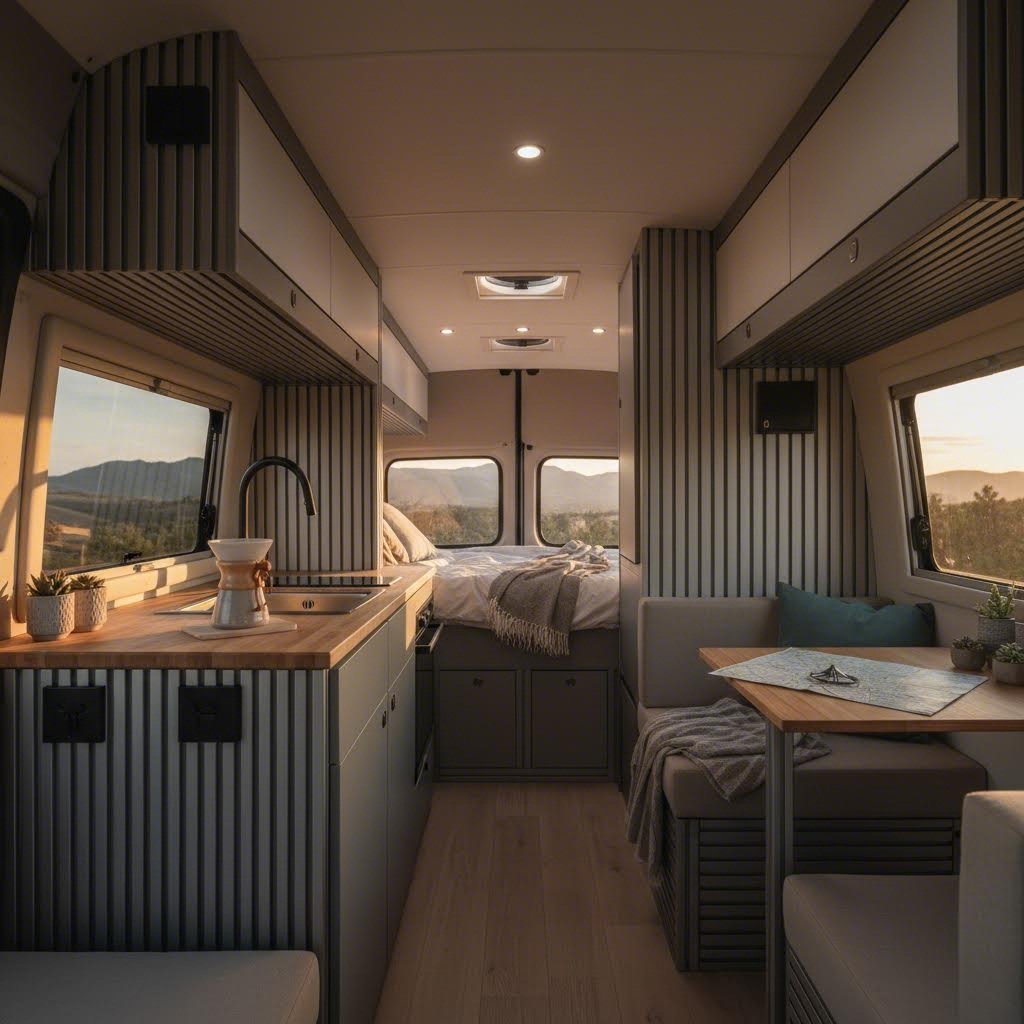
A cabinet destined for a workshop wall faces entirely different challenges than one bolted inside a camper van bouncing down a forest road. While the T-slot assembly process remains consistent, the design priorities shift dramatically based on where your cabinet will live and what it must endure. Understanding these application-specific demands before you finalize your build prevents costly modifications later.
Let's examine how design priorities change across the most common use cases, then dive into the specific considerations that make or break each application.
| Design Factor | Van Life Cabinets | RV Cabinet | Food Truck | Workshop | Garage |
|---|---|---|---|---|---|
| Primary Concern | Weight savings | Space efficiency | Sanitation compliance | Load capacity | Flexibility |
| Vibration Resistance | Critical | High | High | Low | Low |
| Weight Priority | Maximum reduction | Important | Moderate | Secondary | Secondary |
| Moisture Exposure | Variable (condensation) | Moderate | High (steam/wash-down) | Low | Variable |
| Temperature Swings | Extreme | Significant | Moderate | Controlled | Variable |
| Mounting Surface | Sheet metal/composite | Framed walls | Steel floor/walls | Studs/concrete | Studs/concrete |
| Reconfiguration Need | High | Moderate | Low | High | High |
When you're building cabinets for a camper or travel trailer cabinets, you're essentially designing furniture that must survive a daily earthquake. Every road vibration, sudden stop, and sharp turn stresses your cabinet joints in ways stationary furniture never experiences.
Vibration Resistance Strategies:
Your camper van goes through an earthquake a day living on the road, so something will eventually come loose if you don't plan accordingly. The T-slot system actually excels here compared to screwed wood construction, but only when you implement proper vibration countermeasures.
Weight Distribution Matters:
In van life cabinets and camper trailer cabinets, where you place weight affects vehicle handling. Heavy items stored high raise the center of gravity, increasing rollover risk and making the vehicle feel tippy in corners. Design your cabinets for motorhomes and vans with this principle: heavy storage low, lightweight items up high.
For cabinets for a camper van, consider building base cabinets with heavier 2040 or 4040 profiles while using lighter 2020 sections for overhead storage. This construction approach naturally encourages proper weight distribution while optimizing material costs.
Securing Cabinets to Vehicle Structure:
The strongest cabinet means nothing if it tears free during a sudden stop. Mobile cabinet mounting requires penetrating the vehicle's structural elements, not just its interior panels.
Thermal and Environmental Performance:
Here's what most guides ignore: aluminum's thermal behavior significantly impacts cabinet performance in mobile applications. Aluminum is naturally resistant to corrosion and rust, making it ideal for use in areas with moisture or coastal environments. Unlike wood, it won't warp or rot. Unlike steel, it won't rust or discolor.
However, aluminum conducts heat efficiently. In cold weather, metal cabinet frames can feel cold to the touch and may promote condensation when warm interior air meets cold surfaces. Mitigation strategies include:
In hot climates, aluminum's thermal conductivity actually becomes an advantage. It dissipates heat rather than retaining it, keeping cabinet contents cooler than insulated wood construction would.
Stationary applications flip the priority list. Weight matters far less when your cabinet sits on a concrete floor. Instead, maximizing storage density and integrating with existing layouts take center stage.
Maximizing Storage Density:
Without weight constraints, you can fully optimize for capacity. This means:
Integrating With Existing Layouts:
Workshops and garages rarely start as blank slates. Your aluminum extrusion cabinet must work around existing workbenches, tool chests, wall outlets, and traffic patterns. The T-slot system's adjustability proves invaluable here.
Start by measuring your available space precisely, noting any obstructions like electrical panels, plumbing, or HVAC equipment. Design cabinet depths to align with existing furniture edges, creating clean sightlines. The modular nature of T-slot construction means you can build around obstacles rather than fighting them.
Mounting to Different Wall and Floor Materials:
Workshop mounting strategies vary based on construction:
Outdoor and High-Humidity Environments:
Garages in humid climates, outdoor workshops, and semi-enclosed spaces subject cabinets to moisture and temperature extremes. Aluminum cabinets naturally resist termites, mold, mildew, and rodents, making them far more suitable for these environments than wood alternatives.
For maximum durability in challenging conditions:
Whether you're outfitting a Sprinter for cross-country adventures or organizing a garage workshop, matching your design to application-specific demands ensures your aluminum extrusion cabinet performs flawlessly for years. The next consideration involves sourcing quality materials and deciding how much fabrication to handle yourself versus outsourcing to professionals.
You've designed your cabinet, selected profile sizes, and planned every detail. Now comes a decision that significantly impacts both your build experience and final results: where do you source your aluminum, and how much processing do you handle yourself? The spectrum ranges from buying raw stock and doing everything in your garage to ordering fully finished, ready-to-assemble kits. Neither extreme works for everyone, so understanding your options helps you find the right balance.
Whether you're building custom aluminum cabinets for a workshop renovation or aluminum cabinets for trailers in a fleet conversion, your supplier choice affects cost, quality, and timeline in ways that aren't always obvious upfront.
Not all aluminum suppliers are created equal. The difference between a reliable partner and a frustrating vendor often comes down to capabilities you won't discover until mid-project. Selecting the right partner is critical to the success or failure of your project, so asking the right questions before placing orders saves headaches later.
Here's what separates quality suppliers from the rest:
For builders sourcing sprinter van cabinet kits or campervan kitchen kit components, supplier reliability becomes even more critical. Mobile application builds often happen on tight timelines, with vacation plans or travel dates driving schedules. A supplier who misses delivery dates can derail your entire project.
Here's where the decision gets interesting. Aluminum extrusions can be purchased in unmodified lengths or as pre-finished framing material, depending on your needs. The right choice depends on your equipment, skills, and time availability.
Option 1: DIY Everything
If you have the proper equipment to cut, drill, and machine aluminum extrusion, you can order unmodified aluminum extrusion in its full length and handle all fabrication yourself. This approach offers maximum flexibility and lowest material cost but requires:
For aluminum frame building kits where you're producing multiple identical cabinets, the upfront tool investment can make sense. For one-off projects, the tool cost often exceeds the savings from DIY fabrication.
Option 2: Pre-Cut to Length
The middle ground involves ordering profiles cut to your specifications. You provide a cut list with exact dimensions, and the supplier delivers pieces ready for assembly. This eliminates the most equipment-intensive step (precision cutting) while leaving drilling and assembly to you.
Just choose your extrusion, cut its length to millimeters or inches, and choose machine end finishes. These machine-end finishes include custom hole drilling, thread tapping, miter cutting, milling, and more.
Option 3: Fully Processed Components
For builders prioritizing speed over cost savings, fully processed components arrive ready to bolt together. This includes:
Shengxin Aluminium exemplifies this comprehensive approach, offering deep processing services through their CNC machining centers that handle cutting, drilling, and bending to exact specifications. With 35 advanced extrusion presses and over 30 years of industry experience, they provide end-to-end support from die development to mass production. This matters particularly for larger projects where consistency across dozens or hundreds of components becomes essential.
Option 4: Complete Ready-to-Build Kits
With all the extrusion profiles, connectors, and accessories pre-machined, cut-to-length, and organized, you won't have to worry about any extra fabrication work or guesswork. Kit suppliers work from your design (or help develop one), then deliver everything needed for assembly in labeled packages.
This approach trades higher per-project cost for dramatically reduced build time and eliminated risk of fabrication errors. For builders valuing their time highly or lacking workshop space for aluminum fabrication, kits offer the fastest path from design to finished cabinet.
The best approach matches your specific situation. Experienced builders with proper equipment often prefer raw materials for maximum flexibility. First-time builders or those on tight timelines benefit from pre-processed components that remove fabrication variables from the equation.
When evaluating processing options, request samples or detailed specifications for cut quality. A supplier claiming precision cutting should demonstrate tolerances, not just promise them. Ask about deburring, whether cuts arrive with sharp edges requiring hand finishing or smooth surfaces ready for assembly.
For factory-direct pricing on custom aluminum extrusions, manufacturers like Shengxin Aluminium eliminate distributor markups while providing the technical expertise that commodity suppliers lack. Their surface treatment capabilities, including anodizing in custom colors and PVDF for architectural applications, mean you can source finished components rather than coordinating separate finishing after fabrication.
With your supplier selected and processing approach determined, you're ready to finalize your project plan and begin the actual build. The final section brings everything together into an actionable roadmap for your aluminum extrusion cabinet project.
You've absorbed a lot of information, from T-slot fundamentals to application-specific design considerations. Now it's time to transform that knowledge into action. Whether you're tackling lightweight rv cabinets for sale in your conversion project or building workshop storage from scratch, success comes down to methodical planning and realistic assessment of your capabilities.
Let's crystallize everything into a clear roadmap you can follow regardless of project scope.
Every successful aluminum extrusion cabinet project follows the same fundamental sequence, scaled appropriately for complexity. Here's your decision framework distilled into actionable steps:
The three factors that determine project success: matching profile strength to actual load requirements, maintaining perfect squareness during assembly, and using appropriate mounting methods for your application environment.
Step 1: Assess Your Application
Before ordering a single profile, answer these questions honestly:
Step 2: Select Appropriate Profiles
Match profile dimensions to structural requirements. Use the table from earlier as your guide: 2020 profiles for overhead storage and light-duty applications, 2040 for drawer runners and medium spans, 4040 for base cabinets and heavy workstation frames. Remember that heavier isn't automatically better when weight savings matter.
Step 3: Gather Tools and Materials
Inventory what you already own against the tool list provided. Decide whether to invest in cutting equipment or outsource precision cuts. For rv cabinetry projects where you'll build multiple components, tool investment often pays off. For single cabinets, pre-cut components typically make more sense.
Step 4: Plan Your Build Sequence
Follow the assembly order outlined earlier: pre-install T-nuts, assemble base frame loosely, add verticals, complete the box, square everything, then tighten systematically. Rushing this sequence creates problems that compound through the entire project.
Step 5: Execute With Patience
The modular nature of T-slot construction means mistakes are fixable, but prevention beats correction. Measure twice, verify squareness frequently, and apply thread locker on final assembly for mobile applications.
Your project complexity should guide how you proceed from here. Consider these tiered recommendations based on where you're starting:
For Simple Shelf Units and First Projects:
For Medium-Complexity Builds (Garage Storage, Workshop Cabinets):
For Complete Van Buildouts and Large-Scale Projects:
For builders seeking professional-grade results without investing in extensive tooling, working with established manufacturers offers a practical pathway. Shengxin Aluminium's end-to-end support covers everything from die development to mass production, making them particularly valuable for campervan kitchen units for sale or fleet conversion projects requiring consistent quality across multiple builds. Their 30+ years of experience and factory-direct pricing provide both technical expertise and cost efficiency for larger undertakings.
The aluminum extrusion approach to cabinet building rewards preparation and patience. Unlike traditional construction where mistakes mean starting over, the T-slot system's inherent adjustability gives you room to learn as you build. Your first cabinet might take twice as long as expected. Your second will go faster. By your third, you'll wonder why you ever built cabinets any other way.
Whether you're building rv overhead cabinets for weekend adventures or outfitting an entire workshop, the principles remain consistent: match materials to application, plan before cutting, assemble methodically, and verify squareness throughout. Follow this framework, and your aluminum extrusion cabinet will deliver the lightweight durability and infinite reconfigurability that make this building system so compelling.
80/20 is actually a brand name that popularized T-slot aluminum framing systems, often called 'The Industrial Erector Set.' The term now commonly refers to any T-slot extrusion system. These profiles feature T-shaped grooves running along their length that accept specialized hardware for tool-free assembly and infinite reconfiguration. Unlike regular aluminum extrusions used in structural applications, T-slot profiles are specifically designed for modular construction, allowing components to connect, adjust, and disconnect without welding or permanent fasteners.
Building van cabinets with 8020 requires selecting appropriate profile sizes (typically 2020 for overhead storage, 2040 or 4040 for base cabinets), gathering essential tools including hex keys and a miter saw with non-ferrous blade, and following a specific assembly sequence. Start by pre-installing T-nuts, assemble the base frame loosely, add vertical posts, complete the box structure, square everything using diagonal measurements, then tighten systematically. For mobile applications, apply thread locker to all fasteners and use positive door latches to prevent vibration loosening during travel.
Profile size depends on load requirements and span length. For light overhead storage holding up to 50 lbs per shelf, 2020 or 1515 profiles work well. Upper wall cabinets with moderate loads (50-75 lbs) perform best with 2020 profiles. Base cabinets supporting 100+ lbs need 2040 or 4040 sections. For drawer runners, a 2020 frame combined with 2040 runners handles 75-100 lbs per drawer. The double-wide 2040 profile offers enhanced rigidity for longer spans without doubling weight, making it ideal for shelf supports.
Aluminum extrusion offers significant advantages for camper cabinets including one-third the weight of steel, natural corrosion resistance, and complete reconfigurability. Unlike wood, aluminum won't warp, rot, or attract pests in humid environments. It handles temperature extremes without expanding or contracting like wood does with humidity changes. The T-slot system allows adjustments after installation, so if drawer placement doesn't work after a week on the road, you can reposition without starting over. However, wood costs less upfront and provides a warmer aesthetic.
Essential tools include measuring equipment (tape measure, combination square, digital calipers), assembly tools (metric and imperial hex key sets, T-handle drivers, torque wrench), and cutting equipment. For DIY cutting, a miter saw with 80+ tooth non-ferrous blade works well. You'll also need a drill with cobalt or carbide bits, and safety equipment including glasses, cut-resistant gloves, and hearing protection. Alternatively, suppliers like Shengxin Aluminium offer pre-cut and pre-drilled components that eliminate the need for specialized cutting equipment.



 dịch vụ trực tuyến
 0086 136 3563 2360
 sales@sxalu.com
 +86 136 3563 2360
 Việt
 English
 français
 Deutsch
 русский
 español
 português
 العربية
 ไทย
 Українська