Have you ever wondered how buildings managed to stay comfortable before air conditioning existed? The answer lies in a remarkably simple yet effective concept called passive ventilation. This natural approach to air movement harnesses the power of physics to keep indoor spaces fresh, comfortable, and healthy—all without consuming a single watt of electricity.
Passive ventilation is a natural method of moving air through buildings using only wind pressure and thermal buoyancy, requiring no mechanical fans, ductwork, or electrical systems. Unlike mechanical HVAC systems that rely on powered equipment, this approach works silently around the clock, drawing fresh outdoor air inside while pushing stale air out through strategically placed openings.
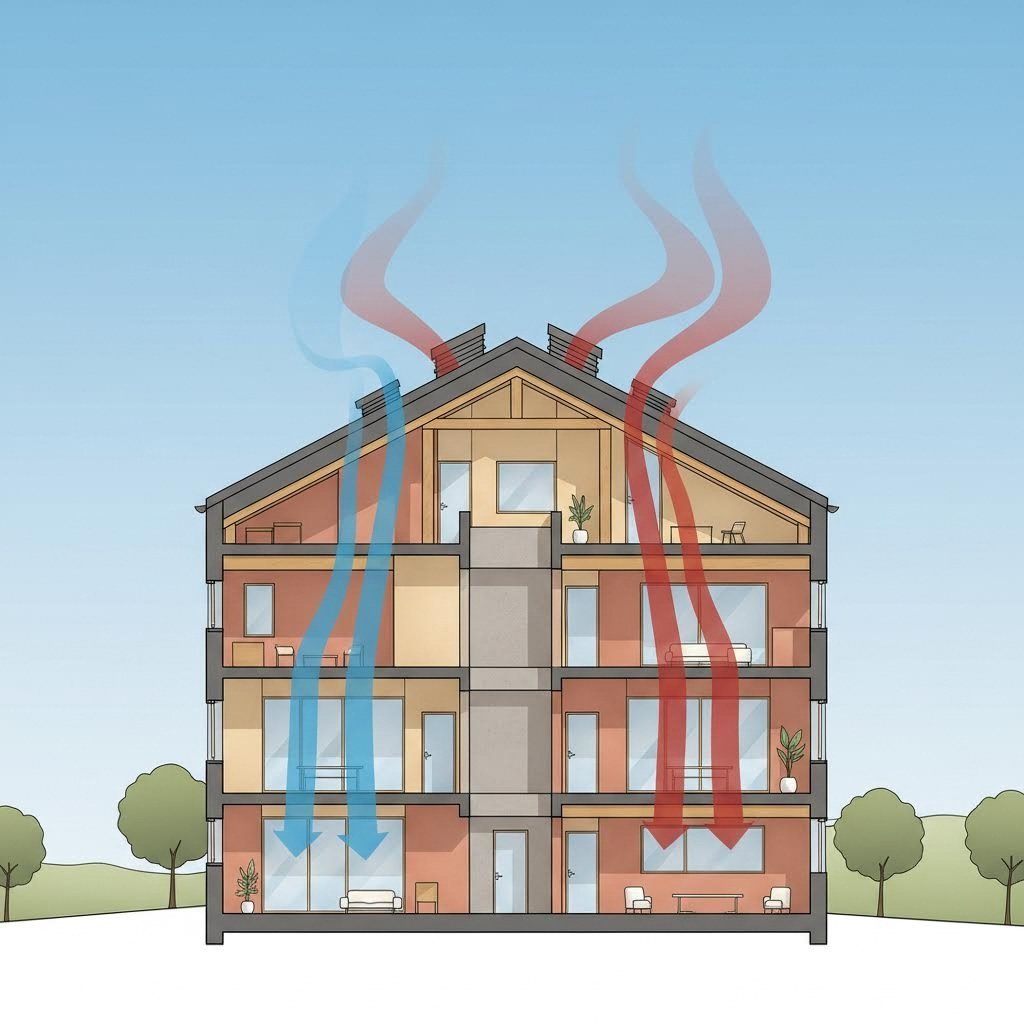
So, what is a passive ventilation system at its core? Think of it as your building breathing naturally. The fundamental principle is elegantly simple: warm air is lighter than cool air, so it rises. When warm, stale air inside a building rises toward the ceiling and exits through high openings, it creates a pressure differential. This pressure difference then draws cooler, fresher air in through lower openings—establishing a continuous cycle of natural air exchange.
This process, often called the stack effect or chimney effect, works because temperature differences between indoor and outdoor air create vertical air movement. According to building science research, the effectiveness of this natural ventilation depends on several key factors:
The greater the temperature difference and the taller the building, the stronger the natural airflow becomes. This self-regulating characteristic means that when internal heat loads increase, the ventilation passive system automatically responds by moving more air—a built-in feedback mechanism that mechanical systems cannot replicate without complex controls.
Beyond thermal buoyancy, wind pressure serves as another powerful driver of natural ventilation. When wind encounters a building, it creates positive pressure on the windward side and negative pressure on the leeward side. This pressure difference naturally pushes air through the structure when openings exist on both sides—a principle known as cross-ventilation.
What distinguishes passive ventilation from active and mechanical systems? The differences are significant:
The growing relevance of these systems in sustainable building design cannot be overstated. As energy costs rise and environmental concerns intensify, architects and builders are increasingly turning to natural ventilation strategies. Research published in the REHVA Journal indicates that well-designed naturally ventilated buildings can achieve significantly higher occupant satisfaction while consuming far less energy than their mechanically ventilated counterparts.
Interestingly, the principles of passive ventilation medical facilities have long relied upon are now being applied more broadly. Hospitals and healthcare buildings historically used natural ventilation to reduce airborne contamination—a strategy that modern green building standards are rediscovering. Whether you're a homeowner looking to reduce energy bills or a professional designing the next generation of sustainable structures, understanding how buildings can breathe without electricity opens doors to smarter, more resilient construction practices.

Now that you understand the basics of passive ventilation, let's dive deeper into the two primary forces that make it work. Imagine standing near an open window on a breezy day—you feel fresh air rushing in. But have you ever noticed how air seems to move through a building even when there's no wind outside? These phenomena aren't magic; they're the result of two distinct physical mechanisms that architects and engineers have harnessed for centuries.
When wind encounters a building, something fascinating happens. The windward side—the face directly exposed to incoming wind—experiences positive pressure as air pushes against it. Simultaneously, the leeward side and roof areas experience negative pressure, creating a suction effect. This pressure differential is the engine behind wind driven ventilation systems, and understanding it is key to designing effective cross ventilation systems.
Think of your building as a giant lung. When you place openings on opposite walls, air naturally flows from the high-pressure windward side to the low-pressure leeward side. According to research from SimScale, this principle—known as Bernoulli's effect—states that faster-moving air creates lower pressure. Since wind moves faster at higher elevations where there are fewer obstructions, upper-level openings experience stronger suction forces.
For optimal wind-driven airflow, consider these key factors:
Experts at Kolbe Windows and Doors recommend installing venting windows on east and west exterior walls for maximum effectiveness. When opposite walls aren't feasible, adjacent wall installations can still facilitate good airflow—just with slightly reduced efficiency.
What happens when the wind dies down? This is where stack ventilation becomes your building's best friend. Also called the chimney effect, this phenomenon relies on a simple truth: warm air rises. When indoor air is warmer than outdoor air, it naturally moves upward and escapes through high openings, creating negative pressure that pulls cooler fresh air in through lower vents.
A passive stack ventilation system essentially turns your building into a giant chimney. The temperature difference between inside and outside air creates buoyancy forces that drive continuous air circulation—no electricity required. This is particularly valuable at night when wind speeds typically decrease, making wind-driven strategies less reliable.
The effectiveness of a stack ventilation system depends on several critical variables:
The height of vent stack above roof matters significantly. Research shows that taller exhaust points create stronger negative pressure at lower inlet openings. In practical terms, this means a two-story atrium with roof-level vents will generate more powerful natural airflow than a single-story room with ceiling vents.
Here's an interesting detail: solar radiation can supercharge stack ventilation. By allowing sunlight to heat interior surfaces through strategically placed glazing, you increase room temperature and accelerate the upward movement of warm air. Double-hung windows offer a clever solution—opening both the upper and lower sashes creates localized stack ventilation within a single window unit, with cool air entering below and warm air exiting above.
The beauty of these two mechanisms is that they often work together. A building designed for stack ventilation typically benefits from Bernoulli's principle as well, since both require height differences between openings. Understanding these complementary forces helps explain why passive ventilation remains remarkably effective across diverse climates and building types—a topic we'll explore in detail next.
Here's a reality that many building guides overlook: a passive ventilation design that works brilliantly in Miami could fail miserably in Minneapolis. Climate isn't just a footnote in natural ventilation planning—it's the foundation upon which every successful strategy must be built. Whether you're dealing with sweltering humidity, bitter cold winters, or dramatic seasonal swings, understanding how your local climate interacts with natural airflow determines whether your passive ventilation system thrives or struggles.
If you live in a tropical or subtropical region, you're in luck—natural ventilation in buildings was practically invented for your climate. Hot and humid environments offer ideal conditions for passive ventilation systems because the primary goal is simple: move as much air as possible through the space to enhance evaporative cooling from occupants' skin.
According to research published in Sustainability, natural ventilation maintains a vital role in passive cooling methods by improving thermal comfort in hot climates. Studies show that naturally ventilated buildings in tropical regions can achieve significantly higher occupant satisfaction when designed correctly—with proper ventilation alone able to reduce indoor temperatures and eliminate the need for air conditioning during much of the year.
In hot and humid climates, your passive ventilation system should prioritize:
Moisture control presents the biggest challenge in humid climates. High relative humidity—often exceeding 70%—can lead to condensation, mold growth, and material degradation if not managed properly. The key is maintaining continuous air movement. Stagnant air allows moisture to accumulate on surfaces, while consistent airflow keeps humidity levels balanced and prevents the damp conditions that encourage mold proliferation.
Green roofs and walls work exceptionally well alongside natural ventilation of buildings in tropical regions. These vegetated surfaces prevent warming and overheating of underlying structures due to incoming radiation, reducing the heat load that ventilation must address. When combined with proper shading devices and building orientation, a well-designed naturally ventilated building in a hot-humid climate can maintain comfortable conditions year-round.
Temperate and cold climates flip the ventilation equation on its head. While tropical buildings want maximum airflow, cooler regions require a delicate balance—you need enough fresh air for healthy indoor air quality without losing precious heat through excessive ventilation.
The fundamental challenge? Every cubic foot of warm indoor air that escapes must be replaced by cold outdoor air that needs heating. According to guidance from the University of Kentucky Agricultural Extension, excessive air infiltration substantially increases the need for supplemental heat in cold weather. This makes controlling ventilation rates critical—you want just enough fresh air exchange to maintain healthy conditions without wasting energy.
For naturally ventilated buildings in cold climates, consider these strategies:
Cold air behaves differently than warm air in ventilation systems. When cold outdoor air enters through a sidewall opening, it falls immediately because it's heavier than the warm indoor air. This creates drafts at floor level that can trigger heating systems and cause occupant discomfort. The solution is directing incoming cold air toward the ceiling first, allowing it to mix and temper before reaching occupied zones. Some buildings achieve this through baffle inlet systems positioned above standard window openings.
In temperate climates—those with distinct warm and cold seasons—the best natural ventilation system designs incorporate seasonal adaptability. A building that operates with wide-open windows in summer needs mechanisms to reduce airflow dramatically during winter while still providing adequate fresh air. This might mean combining operable windows for warm-weather ventilation with smaller trickle vents for controlled cold-weather air exchange.
Imagine your ventilation system as a thermostat for fresh air—it needs regular adjustment to match changing outdoor conditions. The same opening size that provides comfortable airflow on a mild spring day might create uncomfortable drafts in winter or inadequate ventilation during a humid summer heat wave.
Practical seasonal adjustment starts with understanding what your building needs during each period:
| Season | Ventilation Goal | Recommended Actions |
|---|---|---|
| Spring | Moderate airflow; moisture control | Open windows strategically; avoid prolonged opening during rain; inspect for winter damage |
| Summer | Maximum cooling airflow | Fully open cross-ventilation pathways; utilize night purge ventilation; control indoor humidity sources |
| Fall | Transition; prepare for cold weather | Gradually reduce opening sizes; seal gaps around windows and doors; clean gutters to prevent moisture intrusion |
| Winter | Minimal controlled ventilation | Use trickle vents or minimal openings only; control condensation by wiping moisture; ensure heating systems are maintained |
Humidity and moisture control deserves special attention across all seasons—a topic that many resources on passive ventilation systems fail to address adequately. Environmental experts at Alliance Environmental Group note that seasonal changes create varying conditions for mold growth, making ventilation adjustments essential for maintaining healthy indoor environments.
During spring, increased humidity and moisture from rain can create breeding grounds for mold in poorly ventilated spaces. Open windows strategically—but avoid leaving them open during damp conditions, particularly in bathrooms and basements where moisture lingers. Summer brings indoor humidity challenges from activities like cooking and bathing; ensure exhaust ventilation in these spaces remains functional. Fall requires sealing gaps around windows and doors before winter rains arrive, while winter demands attention to condensation control as temperature differences between indoor and outdoor air increase.
Proper passive ventilation prevents condensation and mold growth through continuous air circulation. When air moves freely, moisture doesn't accumulate on cold surfaces where it can support mold development. The key is balancing fresh air needs against energy efficiency—providing enough ventilation to maintain healthy humidity levels (ideally below 50%) while minimizing heat loss during cold months.
For buildings in climates with significant seasonal variation, a natural ventilation system that adapts throughout the year isn't just convenient—it's essential. Fixed ventilation strategies designed for one season will inevitably fail during others. The most successful passive ventilation designs incorporate adjustable components—from simple operable windows to sophisticated automated dampers—that allow occupants to fine-tune airflow as conditions change.
Understanding how climate affects your ventilation approach sets the stage for the next crucial decision: whether you're designing a new building with passive ventilation from the ground up or retrofitting an existing structure to breathe more naturally.
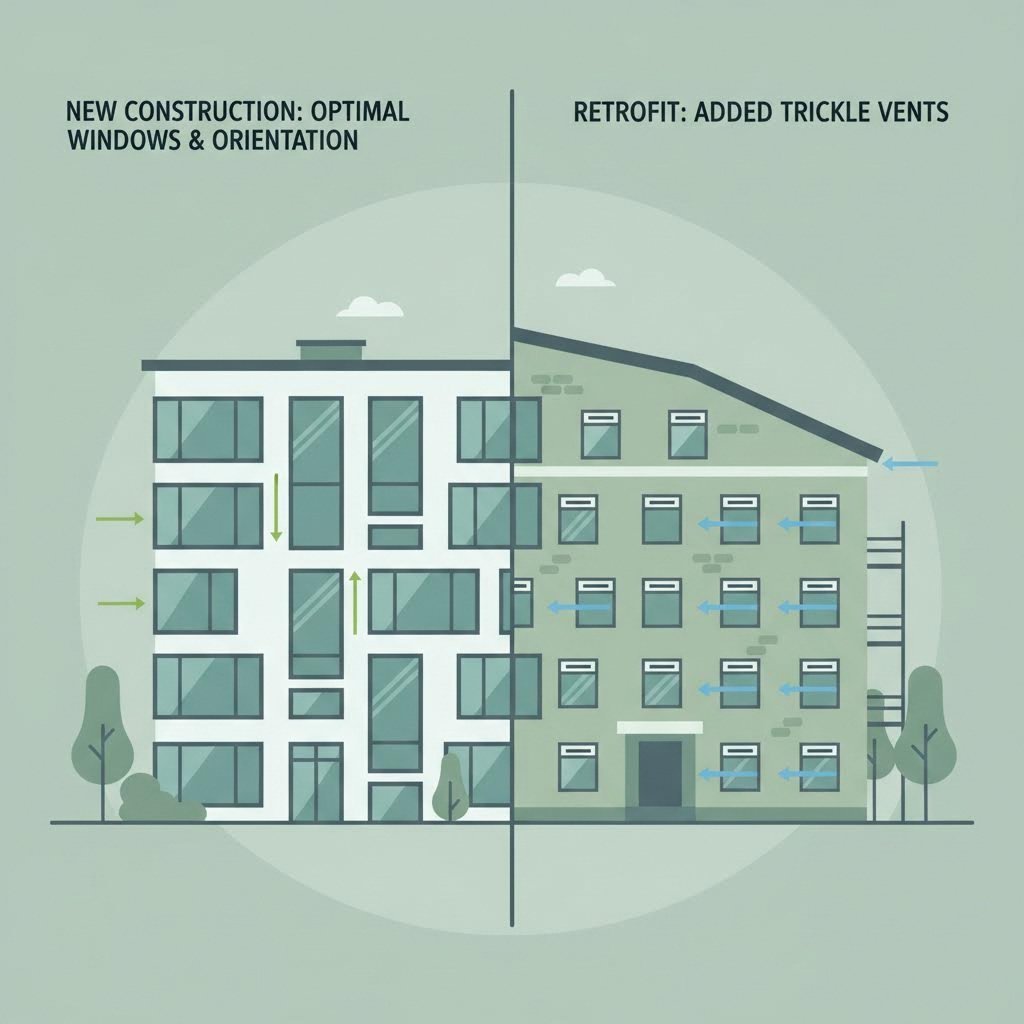
Here's a question that shapes every passive ventilation project: are you starting from scratch or working with what you've got? The answer fundamentally changes your approach, budget, and potential outcomes. New construction offers a blank canvas where architects can orient buildings, position windows, and design internal layouts specifically for natural airflow. Retrofitting existing structures presents different challenges—but also unique opportunities to transform energy-hungry buildings into naturally breathing spaces without complete reconstruction.
When you're designing passive ventilation systems for houses from the ground up, you have advantages that retrofit projects simply cannot match. Every decision—from lot orientation to room placement—can prioritize natural airflow. According to research from Construction Executive, designing natural ventilation strategies requires highly accurate modeling tools that allow architects and engineers to converge on an optimal design before breaking ground.
Building orientation serves as the foundation of effective passive house ventilation design. Position your structure to capture prevailing winds while minimizing exposure to extreme sun angles. In most North American locations, this means orienting the longest facade toward the south for solar gain control while placing operable windows on east and west walls to capture cross-breezes.
Strategic window placement transforms a standard home into a naturally ventilated building:
Internal layout decisions profoundly impact airflow patterns. Open floor plans allow air to move freely between spaces, while strategically placed stairwells can serve as vertical airways that enhance stack ventilation. Avoid creating dead-end rooms where air stagnates—every space should connect to a ventilation pathway.
The Passive House Institute US (PHIUS) emphasizes that passive house ventilation works hand-in-hand with building envelope optimization. Superinsulation, airtight construction, and high-performance windows create a controlled environment where ventilation openings—not random air leaks—determine airflow. This integration means spending upfront on insulation actually enables more effective natural ventilation by eliminating uncontrolled infiltration that would otherwise disrupt designed airflow patterns.
New construction also allows proper coordination between passive ventilation and insulation strategies. Continuous insulation wrapping the building envelope prevents thermal bridging while maintaining the airtightness that makes controlled ventilation possible. When the building envelope performs as designed, exterior vents and operable windows become the only pathways for air exchange—giving occupants complete control over indoor air quality.
What if your building already exists? Retrofitting passive ventilation systems into existing structures requires creativity, careful assessment, and realistic expectations. According to EkoBuilt, retrofit renovations can cost significantly more than new construction—sometimes up to 50% higher—because of unknowns hidden within existing walls and the complexity of working around established systems.
Before adding any ventilation openings, assess your current airflow patterns. Walk through the building on a moderately windy day with interior doors open. Notice where you feel air movement and where spaces feel stagnant. Identify which windows create cross-breezes when opened together. This informal survey reveals existing ventilation pathways that you can enhance rather than fighting against your building's natural tendencies.
Identifying optimal locations for new ventilation openings requires balancing airflow science with practical constraints:
Wall thickness presents a particular challenge in retrofit applications. Older homes typically have thinner walls than modern construction, making it difficult to install the deep ventilation channels that maximize airflow while maintaining weather protection. Adding exterior vents may require extending wall cavities—a process that can become costly if it triggers cascading modifications to siding, insulation, and interior finishes.
Aesthetic considerations often determine retrofit feasibility. Homeowners understandably hesitate to add visible vents or modify window configurations that alter their home's character. Fortunately, modern trickle vents and slimline window ventilators offer low-profile solutions that provide controlled ventilation without dramatic visual changes. These components integrate into existing window frames or install discretely in wall sections where they're barely noticeable.
| Factor | New Construction | Retrofit |
|---|---|---|
| Cost per Square Foot | Lower overall; ventilation integrated into standard construction budget | Higher; may reach 50% premium over comparable new construction |
| Design Flexibility | Complete freedom to optimize orientation, layout, and opening placement | Limited by existing structure, utilities, and aesthetic constraints |
| Ventilation Effectiveness | Maximum; designed as integrated system from inception | Variable; depends on existing layout and modification extent |
| Envelope Integration | Airtight construction with controlled ventilation points | Challenging; existing air leaks may undermine designed ventilation |
| Project Complexity | Straightforward; follows standard construction sequence | High; unknowns in existing structure often cause delays and cost overruns |
| Timeline | Predictable; ventilation included in construction schedule | Unpredictable; discovery of hidden issues extends project duration |
| Permit Requirements | Included in new construction permitting | May require separate permits; historic districts add restrictions |
Despite these challenges, retrofitting passive ventilation into existing buildings remains worthwhile for many homeowners. Starting with modest improvements—adding trickle vents to existing windows, installing adjustable wall vents in strategic locations, or replacing solid interior doors with louvered alternatives—can meaningfully improve air circulation without major construction. These incremental upgrades often reveal which additional modifications would provide the greatest benefit, allowing you to prioritize investments based on real-world performance rather than theoretical calculations.
Whether you're building new or retrofitting existing spaces, the ultimate goal remains the same: creating buildings that breathe naturally, efficiently, and comfortably. Understanding the trade-offs between these approaches helps you make informed decisions that balance performance aspirations with practical constraints—setting the stage for meaningful comparisons between passive and mechanical ventilation systems.
So you've learned how natural airflow works and how climate affects implementation—but here's the question that ultimately matters: should you rely on passive ventilation, invest in mechanical systems, or combine both approaches? This decision affects your energy bills, comfort levels, and indoor air quality for decades to come. Let's cut through the confusion and examine what each approach actually delivers.
When it comes to operating expenses, passive ventilation holds an unbeatable advantage: it costs nothing to run. Zero electricity consumption means zero ongoing utility costs for air movement. Your whole house ventilation systems powered by natural forces work around the clock without ever appearing on your energy bill.
Mechanical ventilation tells a different story. According to industry research, active ventilation systems typically consume 0.5 to 5 kilowatts per fan, translating to monthly operating costs ranging from $200 to $2,000 depending on system size and local electricity rates. Over a building's lifespan, these costs accumulate significantly.
Consider the long-term financial picture:
The energy savings extend beyond direct electricity costs. Buildings with effective passive house ventilation systems place lower demands on heating and cooling equipment because natural airflow can reduce indoor temperatures during mild weather—eliminating the need to run air conditioning when outdoor conditions are favorable.
Here's where honesty matters: passive ventilation isn't perfect. Unlike mechanical systems that deliver precise, adjustable airflow regardless of weather conditions, natural ventilation depends on forces you can't control.
The limitations are real and worth understanding:
Research published by indoor air quality experts confirms that naturally ventilated homes often fail to meet minimum recommended air change rates during extreme weather, nighttime hours, or periods when noise concerns keep windows shut. Additionally, natural airflow rarely reaches all zones equally—corners and closed rooms can become stagnant areas where pollutants accumulate.
Mechanical systems excel at precision. Modern indoor ventilation system designs offer exact control over airflow rates, air distribution patterns, and intake ventilation timing. You can program them to respond to occupancy schedules, filter incoming air to remove contaminants, and maintain consistent conditions regardless of what's happening outside.
The trade-off? Mechanical reliability depends entirely on electricity and equipment maintenance. Power outages eliminate ventilation entirely. Motor failures require immediate service. Return air vs supply air balance must be carefully calibrated and maintained to prevent pressure imbalances that can cause moisture problems or uncomfortable drafts.
Choosing between passive and mechanical ventilation isn't about finding the "best" system—it's about matching your approach to your specific circumstances. Both have legitimate roles depending on climate, building type, occupancy patterns, and air quality requirements.
Passive ventilation works best when:
Mechanical ventilation becomes necessary when:
For many situations, ventilation in passive house designs benefits from hybrid approaches that combine both strategies. Imagine a building that breathes naturally during favorable conditions but activates mechanical backup when sensors detect inadequate airflow or declining air quality. This flexibility maximizes energy savings while ensuring consistent indoor air quality.
| Criteria | Passive Ventilation | Active/Mechanical Ventilation | Hybrid Systems |
|---|---|---|---|
| Energy Use | Zero electricity consumption | 0.5-5 kW per fan; $200-$2,000/month | Reduced; mechanical runs only when needed |
| Installation Cost | $500-$5,000 | $5,000-$50,000 | $8,000-$35,000 |
| Maintenance Requirements | Minimal; periodic cleaning of vents | Regular filter changes; motor servicing | Moderate; both components need attention |
| Control Precision | Limited; weather-dependent | Precise; adjustable to exact specifications | High; sensors optimize mode selection |
| Air Filtration | None; outdoor air enters unfiltered | HEPA, activated carbon options available | Available when mechanical mode active |
| Climate Suitability | Best in moderate climates (10-30°C) | All climates; handles extremes well | All climates; adapts to conditions |
| Noise Level | Silent operation | 50-75 dB depending on equipment | Quiet in passive mode; some noise when mechanical |
| Reliability | No moving parts; weather-dependent | Depends on power and motor condition | Redundant; one system backs up the other |
One common misconception deserves addressing: many people assume passive ventilation simply doesn't work in modern, well-insulated buildings. The reality is more nuanced. While airtight construction does eliminate the uncontrolled air leakage that older buildings relied upon, it also creates an ideal environment for designed passive ventilation—where controlled openings provide predictable airflow rather than random infiltration through gaps and cracks.
Another myth suggests that passive house ventilation systems can't provide adequate fresh air for healthy indoor environments. Research shows that well-designed naturally ventilated buildings can absolutely meet ventilation requirements—the key word being "well-designed." Success depends on proper sizing, strategic placement of openings, and occupant engagement with adjustable components.
The most effective decision-making framework considers your specific situation holistically. Climate determines baseline feasibility. Building design affects implementation options. Air quality requirements establish minimum performance thresholds. Budget constraints limit available choices. And your willingness to actively manage ventilation openings influences whether passive strategies will actually be used as intended.
Understanding these trade-offs positions you to explore the specific components and products that make passive ventilation work—from simple trickle vents to sophisticated roof ventilators designed for particular applications.
Now that you understand the principles and trade-offs of passive ventilation, let's explore the actual hardware that makes it work. Think of these components as the lungs, airways, and exhale points of your building—each playing a specific role in the breathing process. From subtle window vents to spinning rooftop turbines, the right combination of components transforms passive ventilation theory into practical, everyday comfort.
Windows and walls offer the most accessible locations for introducing fresh air into occupied spaces. These entry points work directly with cross-ventilation and stack effect strategies to create the airflow patterns you've already learned about. The key is choosing components that provide adequate ventilation without compromising security, weather protection, or energy efficiency.
Trickle vents represent the most popular passive air vent solution for modern buildings. These slim, adjustable openings integrate directly into window frames—typically at the top—allowing a continuous, controlled flow of fresh air even when windows remain closed. According to ventilation research, trickle vents can reduce condensation by 30-50% in well-ventilated spaces while maintaining security and insulation performance.
What makes trickle vents particularly effective? They work by creating small, consistent airflow rather than the large, intermittent exchanges that happen when you crack a window open. This steady background ventilation prevents moisture buildup, reduces indoor pollutant concentrations, and maintains healthy air quality without creating uncomfortable drafts or significant heat loss.
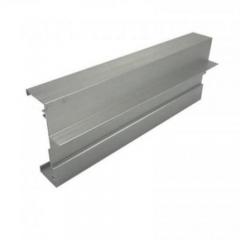
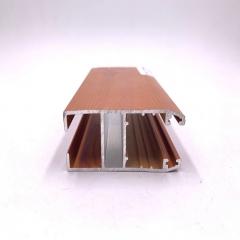
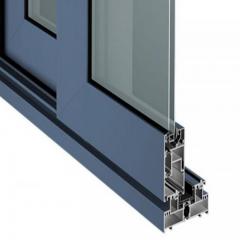
Quality manufacturers like Shengxin Aluminium offer versatile trickle vent solutions suitable for uPVC, aluminum, and timber windows. These low-profile components work seamlessly in both new builds and retrofit applications, helping prevent condensation and mold growth while maintaining the aesthetic integrity of your windows. Available in various sizes and finishes, modern trickle vents can be color-matched to virtually any frame material.
Louvered windows take a different approach by incorporating adjustable slats directly into the window design. These allow you to control both airflow volume and direction—angling slats upward directs incoming air toward the ceiling, while horizontal positioning maximizes throughput. Louvered windows excel in climates where maximum ventilation is desirable, though they offer less insulation value than solid glass with trickle vents.
Wall-mounted passive vents provide ventilation independent of window placement. These components—ranging from simple grilles to sophisticated adjustable air vent designs—install directly through exterior walls to create dedicated airflow pathways. Wall vents prove particularly valuable in rooms where window placement limits cross-ventilation options or where additional air exchange is needed beyond what windows provide.
Warm air rises—and your roof is where it wants to escape. Effective roof and attic ventilation captures this natural tendency, preventing heat buildup that can damage roofing materials, increase cooling costs, and create uncomfortable upper-floor temperatures. The right passive roof vent transforms your attic from a heat trap into a functional exhaust pathway.
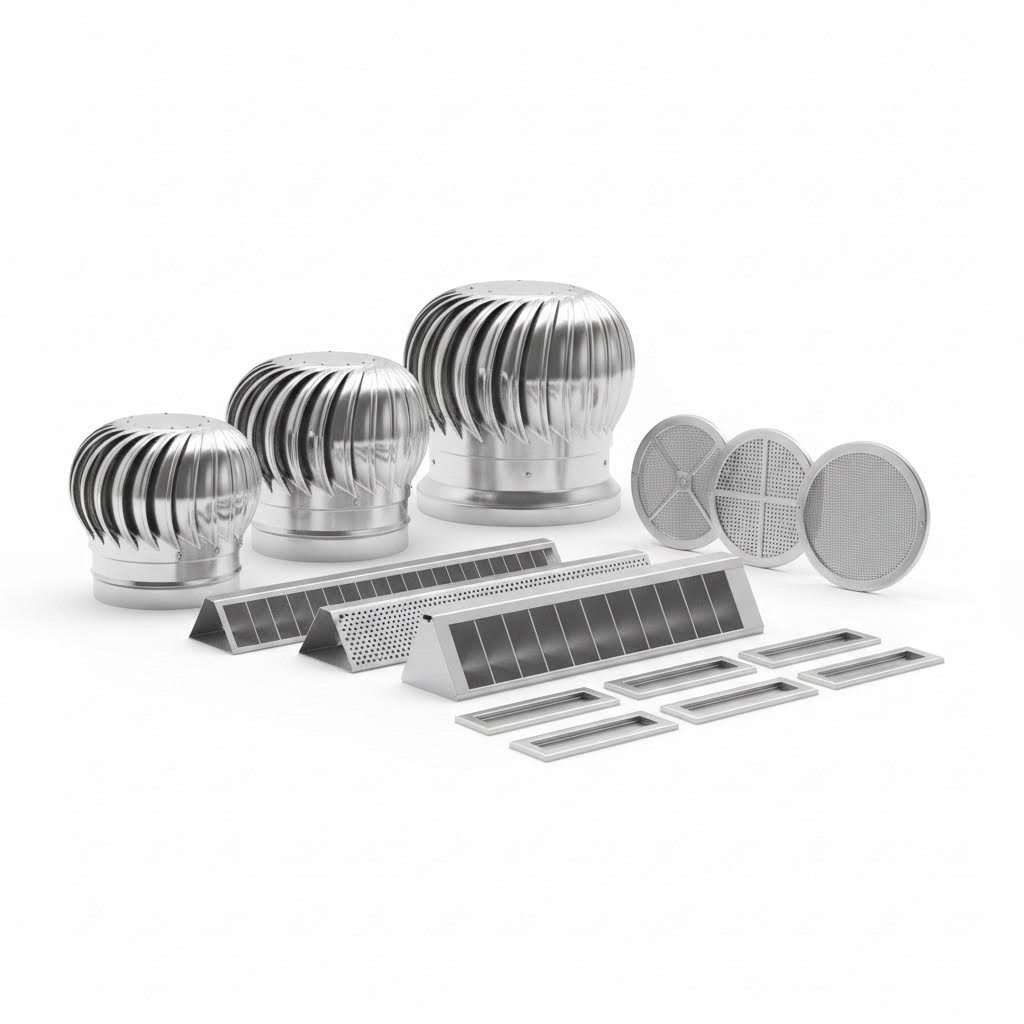
Ridge vents run along the peak of your roof, providing continuous exhaust along the entire roofline. According to roofing industry research, ridge vents work by allowing warm air to escape through a continuous opening at the roof's highest point—exactly where hot air naturally accumulates. Many feature external baffles that create low pressure above the vent, enhancing air extraction even in light wind conditions.
A static roof vent offers a simpler alternative. These box-shaped or dome-shaped vents install at strategic locations near the roof ridge, providing localized exhaust points. While multiple units are typically needed to match ridge vent performance, static vents work well for roofs where continuous ridge ventilation isn't practical due to design constraints or existing penetrations.
Whirlybird vents—also called turbine vents or wind turbines—add motion to passive ventilation. These spinning aluminum or galvanized steel units harness even light breezes to create a vacuum effect that actively pulls hot air from attic spaces. Research indicates that properly installed whirlybird vents can effectively ventilate up to 1,200 square feet of attic space, making them cost-effective solutions for many residential applications.
For roof ventilation to work effectively, intake and exhaust must be balanced. Industry standards recommend 1 square foot of net free vent area for every 300 square feet of attic floor space, split equally between intake (typically soffit vents) and exhaust (ridge, static, or turbine vents). Without adequate intake ventilation, exhaust vents may actually draw conditioned air from your living space rather than pulling in fresh outdoor air.
Beyond standard window and roof solutions, specific building zones require targeted ventilation approaches. Crawl spaces, interior rooms, and high-moisture areas each present unique challenges that specialized passive air vents address effectively.
Foundation vents protect crawl spaces from moisture accumulation that causes structural damage, mold growth, and pest infestations. These components allow air to circulate beneath raised floors, carrying away ground moisture before it condenses on structural elements. Properly sized and positioned foundation vents prevent the damp, stagnant conditions that accelerate wood rot and attract termites.
Interior spaces often suffer from inadequate air circulation because walls block natural airflow pathways. A ventilation door—or an interior door with ventilation features—solves this problem by incorporating louvers, grilles, or transfer openings that allow air to pass between rooms even when doors remain closed. These solutions prove essential for bedrooms served by central HVAC systems, home offices requiring fresh air circulation, and bathroom doors that need airflow while maintaining privacy.
Bathroom ventilation presents particular challenges because high moisture levels demand reliable exhaust pathways. While many bathrooms rely on powered exhaust fans, passive alternatives exist. High-mounted wall vents connected to vertical exhaust ducts can harness stack effect to remove humid air continuously—no electricity required. This approach works especially well in mild climates where temperature differentials provide adequate driving force for natural air movement.
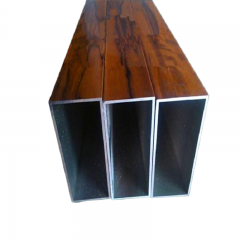
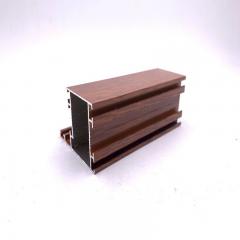
When selecting components for specialized applications, material quality matters significantly. Crawl space and garage environments expose vents to moisture, temperature extremes, and potentially corrosive conditions. Aluminum ventilation products offer excellent corrosion resistance and durability, reducing long-term maintenance needs while ensuring consistent performance over decades of service.
The right combination of window vents, roof exhausts, and specialized components creates a complete passive vent system tailored to your building's specific needs. Each component works with natural forces—wind pressure and thermal buoyancy—to maintain healthy air circulation without consuming electricity or requiring complex controls. But even the best components need occasional attention to perform optimally, which brings us to the often-overlooked topic of maintenance and troubleshooting.
You've invested in a passive vent system that harnesses natural forces to keep your building breathing—but here's something most guides won't tell you: even systems with no moving parts need attention. While passive ventilation requires far less maintenance than mechanical alternatives, neglecting your vents and openings can gradually degrade performance until you're wondering why your "naturally ventilated" building feels stuffy and stale.
The good news? Maintaining a passive roof ventilation system is straightforward once you know what to look for and when to look for it. Unlike mechanical systems that demand regular filter changes, motor servicing, and duct cleaning, passive attic ventilation and whole-building systems need only periodic inspection and light cleaning to perform at their best for decades.
Think of maintenance as a seasonal conversation with your building. Each time the weather shifts, your ventilation needs change—and a quick inspection ensures your system adapts accordingly. According to Kingspan's building ventilation research, natural ventilation systems require minimal maintenance compared to mechanical alternatives, but visual inspections and light cleaning remain essential for optimal performance.
How frequently should you inspect? That depends on your building's use and environment. Office buildings and typical residences need attention less often than manufacturing facilities or homes in dusty, high-pollen areas. As a general rule, seasonal inspections—four times per year—catch most issues before they become problems.
Seasonal Inspection Routine:
Cleaning Schedules for Vents and Openings:
Dust, debris, and biological growth gradually reduce the effective opening size of your vents—sometimes by 50% or more before you notice visible buildup. Regular cleaning maintains designed airflow rates and prevents the indoor air quality problems that occur when ventilation becomes restricted.
Checking for Obstructions and Damage:
Beyond routine cleaning, each inspection should include a careful check for physical damage and unexpected obstructions. Look for cracked or warped vent housings, torn or corroded screens, damaged weatherstripping, and any signs of water intrusion around vent penetrations. Pay particular attention to passive attic vent components, where temperature extremes and UV exposure accelerate material degradation.
Even well-maintained systems occasionally develop issues. Understanding the most common problems—and their solutions—helps you troubleshoot effectively before minor annoyances become major headaches.
Inadequate Airflow
Sounds familiar? You've got vents installed, but rooms still feel stuffy. This frustrating problem typically stems from one of several causes:
Solution: Walk through your building with all interior doors open, feeling for air movement at each vent location. Identify stagnant zones and trace the obstruction. Often, simply opening a few strategic doors or relocating furniture restores adequate airflow.
Uncomfortable Drafts
The opposite problem—too much airflow in the wrong places—creates drafts that make occupants uncomfortable. Cold air falling from high vents, excessive air speed across work areas, or concentrated airflow hitting seating positions all indicate ventilation that's working but poorly distributed.
Noise Infiltration
Passive vents create direct pathways between inside and outside—including for sound. Traffic noise, neighbor activities, or industrial sounds may enter through ventilation openings, particularly in urban environments.
Pest Entry
Open pathways for air are also open pathways for insects, birds, and small rodents. If you're finding pests inside, your ventilation openings may be the entry point.
Beyond basic maintenance and troubleshooting, fine-tuning your passive vent system can meaningfully improve comfort and air quality. These optimization strategies help you extract maximum performance from your existing components—or identify where additional modifications would provide the greatest benefit.
Adjusting Opening Sizes:
The relationship between inlet and outlet sizes profoundly affects airflow patterns. Larger outlets than inlets increase air velocity through the space—beneficial when you want maximum cooling effect. Equal sizes provide balanced, moderate airflow. Larger inlets than outlets slow air movement and can help temper incoming cold air during winter.
Experiment with adjustable components to find the sweet spot for each season. Many homeowners discover that partially closing inlet vents while leaving exhaust fully open creates faster-moving air that feels cooler without actually increasing the volume of air exchange.
Adding or Relocating Vents:
If troubleshooting reveals persistent dead zones or inadequate airflow despite clear pathways, your building may simply need additional ventilation openings. Consider these strategic additions:
Maintenance Checklist for Passive Ventilation Systems:
The Value of Quality Components:
Here's a maintenance reality worth emphasizing: component quality directly determines long-term maintenance burden. Cheap vents with thin materials, weak screens, and poor weatherproofing require frequent attention—and often fail entirely within a few years. Quality components with durable construction, such as aluminum ventilation products, dramatically reduce long-term maintenance needs while ensuring consistent performance over time.
According to building performance research, regular maintenance ensures ventilation systems operate at optimal performance levels while extending equipment lifespan. Addressing minor issues promptly prevents major breakdowns and costly repairs. When you invest in robust components initially, those maintenance intervals stretch longer, inspections reveal fewer problems, and your passive ventilation system delivers reliable performance decade after decade.
Aluminum construction deserves particular mention for exterior-exposed components. Unlike steel that rusts or plastic that degrades under UV exposure, aluminum maintains its structural integrity and appearance through decades of weather exposure. Trickle vents, wall grilles, and roof vents constructed from quality aluminum alloys resist corrosion even in coastal environments—continuing to function smoothly long after lesser materials would require replacement.
With maintenance fundamentals covered, you're ready to explore how passive ventilation integrates with other building systems—from insulation and HVAC coordination to smart sensors that optimize natural airflow based on real-time conditions.

Here's a paradox that confuses many homeowners and even some building professionals: how can a passive system that relies on natural airflow work effectively in today's tightly sealed, highly insulated buildings? The answer lies in thoughtful integration—designing passive ventilation to complement rather than compete with other building systems. When done correctly, a natural air ventilation system becomes part of a coordinated whole, working seamlessly with your insulation, HVAC equipment, and even smart home technology to deliver superior comfort and efficiency.
Imagine trying to control water flow through a sponge versus through a pipe. That's essentially the difference between ventilating a leaky building versus a properly air-sealed one. Modern energy-efficient construction emphasizes airtight building envelopes—and this actually makes passive home ventilation more effective, not less.
According to building science experts at Green Maine Homes, an airtight home has been properly sealed from foundation to roof, creating a continuous air barrier that prevents unwanted pollutants from entering via basements, attics, crawlspaces, or connected garages. Without attention to air sealing, air enters and leaves through random gaps and cracks in an uncontrolled manner—moving much more quickly as weather turns windier and colder.
Why does airtightness matter for natural air ventilation systems? Consider these key points:
The relationship works both ways. Building science expert Jon Riley notes that finding the right balance of insulation, ventilation, and indoor air quality is essential. Dense pack cellulose in stud walls combined with continuous outer layers of rigid foam board creates the airtight envelope that makes passive ventilation work as designed—rather than fighting against uncontrolled air movement.
One way ventilation strategies become particularly effective in airtight buildings. By designing inlet openings on one side of a building and exhaust openings on another, you create predictable one-way airflow pathways that work with stack effect and wind pressure rather than being disrupted by random infiltration. This controlled approach means every cubic foot of air entering through your natural ventilation products serves a purpose—delivering fresh air exactly where occupants need it.
Importantly, a well-sealed home that includes passive ventilation must also include adequate ventilation points to prevent moisture issues and contaminant buildup. Maine's building code, for example, requires any dwelling with less than 5 air changes per hour during a blower door test to include some form of mechanical or passive ventilation. The principle is clear: seal the envelope tight, then ventilate deliberately through controlled openings.
Your passive system doesn't exist in isolation—it interacts constantly with heating and cooling equipment. Understanding this relationship helps you maximize energy savings while maintaining comfort throughout the year.
Research published in Frontiers in Built Environment demonstrates that hybrid ventilation approaches—prioritizing natural ventilation during mild conditions and switching to mechanical systems during extreme heat—can achieve energy savings of 10% to 40% compared to fully mechanical cooling. In hot, arid climates, hybrid systems have shown cooling reductions up to 50% while maintaining acceptable comfort levels.
How does this coordination work in practice?
The hybrid approach works best when systems can transition smoothly between modes. Buildings designed for this flexibility include both operable passive ventilation openings and mechanical backup systems, with controls that manage the transition based on indoor and outdoor conditions. Occupants of naturally ventilated buildings tend to tolerate broader temperature ranges than those in mechanically conditioned spaces—a psychological benefit that further reduces energy consumption.
Modern hybrid systems go beyond simple either/or switching. Advanced approaches coordinate natural and mechanical ventilation simultaneously—using fans to boost natural airflow when stack effect or wind pressure alone proves insufficient, or using mechanical systems to condition a portion of incoming air while passive openings provide the bulk of fresh air volume. This nuanced coordination maximizes the benefits of both approaches while minimizing their individual limitations.
What if your building could tell you exactly when to open the windows? Smart ventilation systems leveraging technologies like the Internet of Things make this possible, dynamically adjusting passive ventilation openings based on real-time data from sensors throughout your space.
According to research on smart building systems, IoT sensors distributed throughout buildings can measure various environmental parameters including temperature, humidity, CO2 levels, and volatile organic compounds. This real-time data, collected and analyzed through connected networks, allows for a more accurate and dynamic understanding of indoor conditions—and when natural ventilation would be beneficial.
Practical air quality monitoring integration includes:
AI-powered algorithms can predict future ventilation needs based on weather forecasts, occupancy patterns, and building thermal characteristics. Imagine receiving a notification suggesting you open specific windows tonight because tomorrow's forecast predicts high temperatures—allowing overnight cooling to reduce tomorrow's air conditioning needs. This proactive approach ensures optimal energy performance without requiring constant attention from building occupants.
The integration extends to learning systems that optimize over time. Machine learning models analyze how your building responds to different ventilation strategies, gradually refining recommendations based on actual performance. These data-driven approaches can identify patterns that humans might miss—perhaps discovering that opening the east-facing windows 30 minutes before sunset provides better overnight cooling than waiting until bedtime.
For green building certifications like LEED and Passive House standards, integrated ventilation monitoring provides documentation of indoor air quality performance. Continuous monitoring generates data demonstrating that your building meets or exceeds fresh air requirements—valuable for both certification and ongoing building performance verification.
Passive ventilation supports green building certifications by reducing mechanical system energy consumption while maintaining healthy indoor air quality—a combination that earns points in virtually every major certification program.
The convergence of passive ventilation with smart building technology represents an evolution rather than a replacement. Natural forces still do the work of moving air; technology simply helps optimize when, where, and how much those natural forces are harnessed. The result is buildings that breathe intelligently—responding to conditions in real-time while consuming minimal energy and requiring minimal occupant intervention.
With a clear understanding of how passive ventilation integrates with insulation, HVAC systems, and smart monitoring, you're ready to take the final step: planning and implementing your own passive ventilation project.
You've learned the science, explored the components, and understand how passive ventilation integrates with modern building systems. Now comes the exciting part—actually implementing these principles in your own building. Whether you're tackling a weekend DIY project or planning a comprehensive whole-building ventilation upgrade, success depends on systematic assessment, careful planning, and smart product selection.
Think of this final step as assembling a puzzle where every piece must fit precisely. Rush the assessment phase, and you'll install vents in suboptimal locations. Skip the sizing calculations, and your system may underperform or create uncomfortable drafts. Choose bargain-basement components, and you'll be repeating this process in a few years when they fail. Let's walk through the complete implementation journey—from initial evaluation to final installation.
Before purchasing a single vent or cutting any openings, you need an honest evaluation of what you're working with. What is a passive vent going to accomplish in your specific building? The answer depends entirely on factors unique to your property—factors that no generic guide can predict without your direct observation.
Start by understanding your building's orientation relative to prevailing winds and sun paths. According to building science research from Level.org.nz, orientation, layout, and location on site all influence the amount of sun a building receives and therefore its year-round temperatures and comfort. For passive air ventilation to work effectively, you need to understand how wind and solar exposure affect your specific structure.
Orientation Evaluation Checklist:
Local climate determines which passive venting strategies will work best for your situation. Hot and humid climates favor maximum airflow through large openings, while cold climates require controlled, minimal ventilation to prevent heat loss. Temperate regions need adaptable systems that can scale airflow with seasonal changes.
Your existing openings—windows, doors, and any current vents—form the foundation of your passive ventilation potential. Walk through your building systematically, documenting:
For properties where passive cooling is more of a priority than passive heating, the building should be oriented to take advantage of prevailing breezes. However, if your building's existing orientation isn't ideal, don't despair—strategic vent placement can often compensate for less-than-perfect positioning.
With assessment complete, you're ready for the planning phase—where general observations translate into specific decisions about what to install and where. What is a passive air vent going to contribute at each potential location? This question guides every placement decision.
According to the U.S. Department of Energy's Building America research, proper passive vent sizing requires calculating Net Free Area (NFA)—the actual unobstructed opening through which air can flow, accounting for screens, grilles, and internal baffles that reduce effective opening size.
Net Free Area Principles:
The standard formula for roof and attic ventilation provides a useful starting point: you need approximately 1 square foot of net free vent area for every 300 square feet of floor space, split equally between intake and exhaust openings. For whole-building ventilation windows and wall vents, similar principles apply—total inlet area should roughly equal total outlet area for balanced airflow.
However, passive ventilation EMT (effective mechanical transport) calculations become more complex when you factor in building airtightness, exhaust system interactions, and desired airflow rates. The DOE research notes that for well-sealed buildings, the relationship between vent area, exhaust flow, door leakage, and building airtightness determines actual airflow through passive openings.
For practical DIY implementation, follow these key sizing guidelines:
Vent Placement Strategy:
Location matters as much as size. The DOE research emphasizes that passive vents should be placed near ceilings to minimize uncomfortable drafts—allowing incoming air to mix with room air before reaching occupied zones. For cross-ventilation, position inlet and outlet openings on opposite or adjacent walls to create clear airflow pathways through occupied spaces.
Consider the nature vent relationship—how natural airflow patterns will interact with your planned openings. Inlets should face prevailing winds when possible; exhausts should be positioned at high points where warm air naturally accumulates. Interior door placement and typical usage patterns (open versus closed) affect how air moves between rooms and should inform your vent positioning decisions.
Step-by-Step Implementation Process:
Here's where many passive ventilation projects succeed or fail: component selection. The most carefully planned system delivers disappointing results if built from inferior products. Conversely, quality components properly installed provide decades of reliable, maintenance-free performance.
What separates quality ventilation products from budget alternatives? Several factors determine long-term success:
For window-based ventilation solutions, trickle vents offer the most practical option for both new construction and retrofit applications. These slim, adjustable openings provide continuous background ventilation while maintaining window security and insulation performance.
When selecting trickle vents, look for products offering:
Shengxin Aluminium's window trickle vents exemplify these quality characteristics. Designed for versatility across uPVC, aluminum, and timber windows, these components offer easy installation suitable for both DIY retrofits and professional new build applications. Available in multiple sizes and finishes, they provide the low-profile ventilation solution that prevents condensation and mold growth while maintaining your windows' aesthetic integrity.
The aluminum construction deserves particular emphasis. Unlike plastic vents that become brittle with age or steel components that eventually rust, aluminum maintains structural integrity and smooth operation through decades of weather exposure. For homeowners investing in long-term building performance, material quality directly translates to reduced maintenance burden and extended service life.
Beyond trickle vents, ensure all passive ventilation components throughout your system meet similar quality standards. Roof vents, wall grilles, and foundation vents all face environmental exposure that quickly degrades inferior materials. The small premium for quality components pays dividends through reliable performance, reduced replacement frequency, and consistent ventilation effectiveness year after year.
As you finalize your product selections and prepare for installation, remember that passive ventilation represents an investment in your building's long-term health and efficiency. The natural forces driving these systems—wind pressure and thermal buoyancy—have powered building ventilation for millennia. By combining this timeless approach with modern materials and thoughtful design, you're creating a building that truly breathes—silently, efficiently, and without consuming a single watt of electricity.
A passive ventilation system moves air through buildings using only natural forces—wind pressure and thermal buoyancy—without mechanical fans or electricity. It works by allowing warm, stale air to rise and exit through high openings while drawing fresh, cooler air in through lower vents. This creates continuous air circulation using strategically placed windows, trickle vents, wall grilles, and roof vents. Quality components like Shengxin Aluminium's window trickle vents provide controlled background ventilation suitable for uPVC, aluminum, and timber windows in both new builds and retrofits.
Passive ventilation and natural ventilation are essentially the same concept—both describe air movement driven by natural forces rather than mechanical systems. The terms are used interchangeably in building science. Both rely on wind-driven cross-ventilation and stack effect (thermal buoyancy) to circulate fresh air. The key distinction is from active or mechanical ventilation, which uses powered fans and ductwork to move air. Passive systems offer zero energy consumption, silent operation, and lower maintenance compared to mechanical alternatives.
Passive vents are highly effective when properly designed and installed in suitable climates. They excel in moderate temperatures (10-30°C), provide zero-cost operation, and require minimal maintenance. However, effectiveness depends on building design, vent placement, and occupant engagement. In well-designed buildings, passive ventilation can reduce condensation by 30-50% and maintain healthy indoor air quality. The main limitations include weather dependency and less precise control compared to mechanical systems. For optimal results, choose quality aluminum components that resist corrosion and maintain performance over decades.
In emergency medical services (EMS), passive ventilation refers to a resuscitation technique that allows gas exchange during chest compressions without active bag-mask ventilation. With open airways and occasional gasping, the passive recoil of the chest during CPR creates some air movement. This differs from building passive ventilation but shares the core principle of air movement without active mechanical intervention. In building contexts, passive ventilation medical facilities have historically used natural airflow to reduce airborne contamination—a strategy modern healthcare design is rediscovering.
Selecting the right components requires assessing your building's orientation, climate, existing openings, and ventilation goals. For window-based solutions, trickle vents offer excellent background ventilation for bedrooms and living spaces—look for products compatible with your frame type (uPVC, aluminum, or timber) with adequate net free area. Roof ventilation needs balanced intake and exhaust—approximately 1 square foot per 300 square feet of attic space. Prioritize durable aluminum construction over plastic for longevity. Shengxin Aluminium offers versatile trickle vents in multiple sizes and finishes suitable for DIY retrofits and professional installations.


 dịch vụ trực tuyến
 0086 136 3563 2360
 sales@sxalu.com
 +86 136 3563 2360
 Việt
Việt English
 français
 Deutsch
 русский
 español
 português
 العربية
 ไทย
ไทย Українська