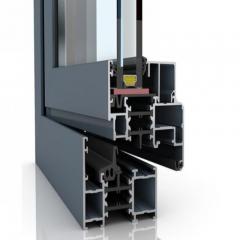

A trickle vent for window is a narrow, controllable opening built into a window frame that allows fresh air to circulate continuously, even when the window itself remains closed. Think of it as your home's built-in breathing system—quietly refreshing indoor air without compromising security, insulation, or comfort. These small but mighty features have become essential in modern homes, where improved energy efficiency often means reduced natural airflow. If you've ever noticed water droplets forming on your windows or experienced a stuffy room despite keeping everything sealed, you're witnessing the problems that window trickle vents are specifically designed to solve.
So, what is a trickle vent exactly? It's a slim, adjustable slot integrated into the upper section of your window or door frame. Unlike opening a window wide, a trickle vent delivers background ventilation—a gentle, constant flow of outdoor air that helps maintain healthy indoor conditions without creating uncomfortable drafts or security risks.
The mechanics are surprisingly straightforward. When you open the vent using its slider or control mechanism, outdoor air is drawn through an external grille, passes through a channel cut into the frame, and enters your living space via the internal vent cover. This process happens naturally, driven by pressure differences between the inside and outside of your home. You won't hear fans or motors—trickle ventilation relies entirely on passive airflow principles.
Here's what makes the system work so effectively:
Most modern trickle vents are fully adjustable, letting you control exactly how much airflow enters your space. You can open them fully during cooking or showering, partially for everyday use, or close them during extreme weather—giving you complete flexibility over your home's ventilation.
You'll typically find trickle vents positioned at the very top of window frames. This placement isn't random—it's carefully chosen to optimize natural air movement and maximize ventilation effectiveness. When fresh air enters at ceiling height, it mixes with room air before descending, which prevents the cold drafts you might experience from floor-level ventilation. This strategic positioning also keeps the vent away from potential water ingress during rain.
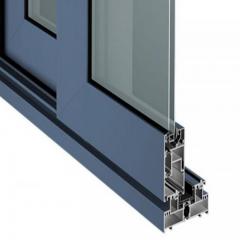
Window trickle vents can be installed on virtually any frame material, including uPVC, timber, and aluminum windows. Some designs even work with small vent windows in heritage properties where maintaining original aesthetics is crucial. Whether you're dealing with casement windows, tilt-and-turn models, or traditional sash designs, there's a trickle vent solution that fits.
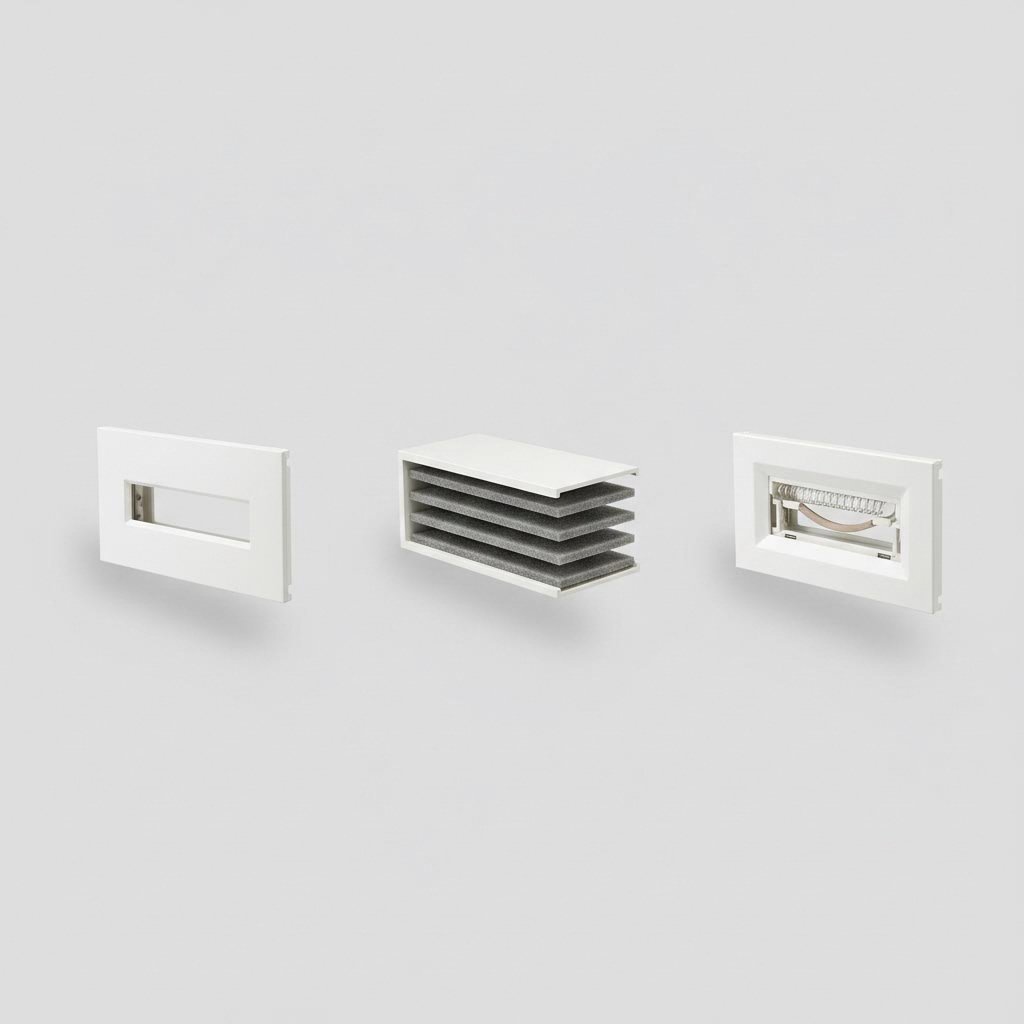
Every window trickle vent system consists of these key components:
This simple yet effective design ensures that trickle vents work reliably for years with minimal maintenance, providing the continuous background ventilation that modern, airtight homes desperately need.
Understanding when window ventilation is legally required can save you from costly compliance issues down the road. In the UK, two key building regulations govern how homes must be ventilated: Part F (ventilation) and Part O (overheating). Whether you're a homeowner replacing windows, a landlord upgrading rental properties, or a developer constructing new builds, knowing these rules helps you make informed decisions about trickle ventilation windows and other vented windows solutions.
Part F of the Building Regulations prioritizes achieving good indoor air quality while minimizing energy consumption related to ventilation. According to Building Energy Experts, this is especially critical for new homes with airtight building envelopes designed for better thermal performance.
So, when are trickle vents legally required? The answer depends on your project type:
The regulations use equivalent area (EA) measurements to specify minimum ventilation requirements. EA represents the effective free area through which air can pass, accounting for any obstructions or resistance in the vent design. Different room types have different EA requirements—bedrooms and living rooms typically need background ventilation, while kitchens and bathrooms require both background and extract ventilation to handle moisture and cooking odors.
Interestingly, the same principles apply to internal door vents, which help air circulate between rooms. Proper ventilation for doors ensures that fresh air entering through house window vents can flow throughout your entire home rather than getting trapped in individual rooms.
Introduced more recently, Part O of the Building Regulations addresses a growing concern in modern construction: overheating. As homes become more airtight and energy-efficient, they can trap heat during warm months, creating uncomfortable and potentially unhealthy living conditions.
Part O applies specifically to new residential buildings—not extensions, conservatories added after construction, or buildings undergoing a change of use. The regulation requires designers to limit unwanted solar gains and provide adequate means for removing excess heat, using passive measures as far as reasonably practicable.
Where do trickle vents fit into Part O compliance? They contribute to the overall ventilation strategy by:
Part O uses equivalent area calculations to determine whether a building's ventilation openings are sufficient. The regulations specify minimum free areas as percentages of floor area, varying based on room type, building location (moderate or high-risk overheating zones), and whether cross-ventilation is achievable.
Modern energy-efficient homes need a careful balance: maximizing natural ventilation wherever possible while utilizing mechanical systems as a complementary solution when passive measures alone cannot achieve adequate fresh air intake.
The requirements differ significantly depending on whether you're dealing with new construction or existing properties. Here's a clear breakdown:
| Scenario | Trickle Vent Requirement | Key Considerations |
|---|---|---|
| New build residential properties | Required | Must meet Part F and Part O standards; EA calculations mandatory |
| Full window replacement in dwellings | Required | Must match or exceed original ventilation provision |
| Like-for-like window repairs | Optional | No upgrade required if not replacing entire window unit |
| Commercial to residential conversion | Recommended but not Part O regulated | Part O does not apply to change of use; Part F still applies |
| Extensions and conservatories (post-build) | Part F applies; Part O does not | Background ventilation still required under Part F |
| Rental properties (existing) | No retrofit requirement | Landlords should ensure adequate ventilation for tenant health |
For property developers, staying ahead of regulatory changes is essential. The upcoming Future Homes Standard will introduce stricter building regulations ventilation requirements, making early adoption of robust ventilation strategies a smart investment. Developers should consider whether mechanical ventilation with heat recovery (MVHR) systems might be necessary alongside or instead of traditional trickle vents in highly airtight new builds.
Landlords, while not legally required to retrofit trickle vents into existing properties, should recognize that adequate ventilation protects both tenant health and property condition. Condensation and mold problems—often preventable with proper ventilation—can lead to costly repairs and potential legal disputes.
With regulatory requirements established, you might be wondering exactly how these vents prevent the condensation and air quality problems they're designed to address.
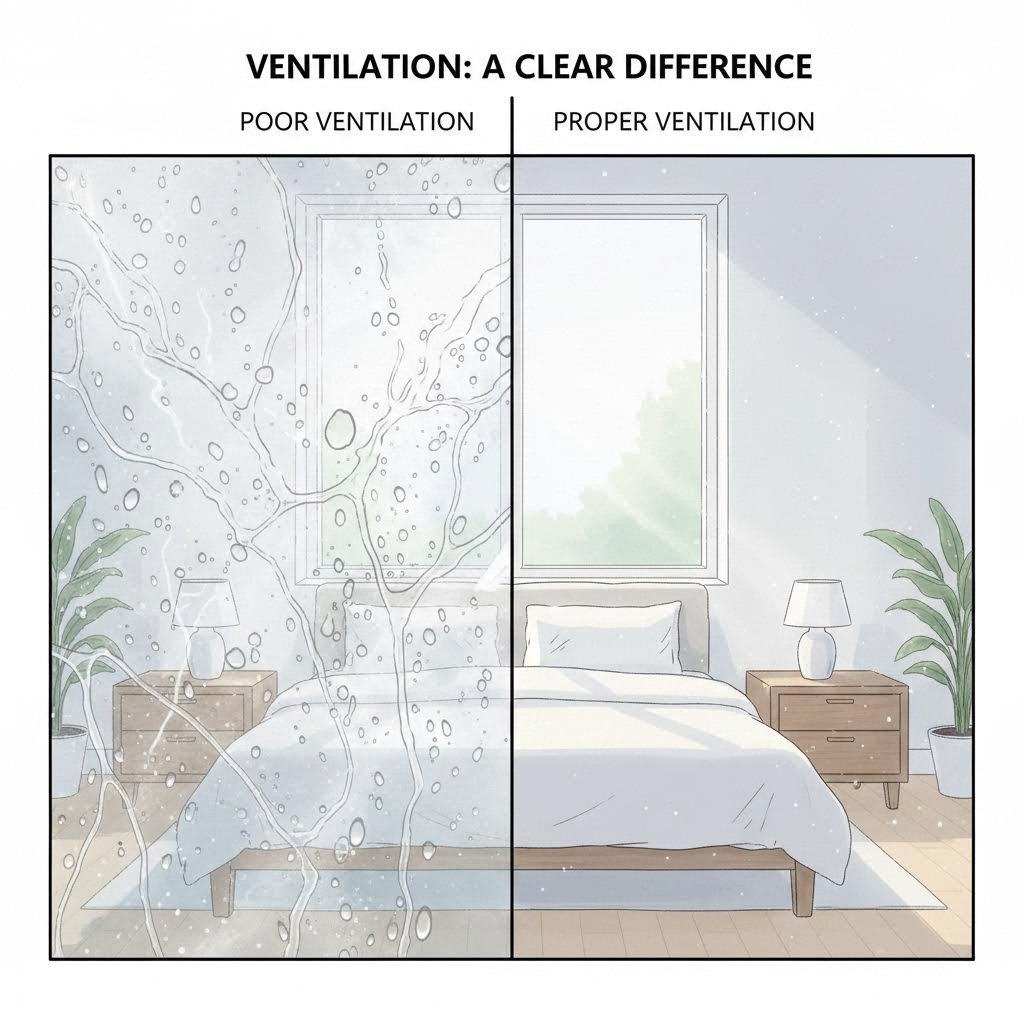
Ever woken up to find water streaming down your windows, or noticed dark spots creeping into the corners of your rooms? These aren't just cosmetic annoyances—they're warning signs that your home isn't breathing properly. Modern homes, built or retrofitted for energy efficiency, often trap moisture and pollutants inside. Trickle air vents for windows offer a simple, effective solution that works around the clock without requiring any energy input. Understanding exactly how these unassuming devices protect your home helps you appreciate why building regulations now mandate their installation.
Condensation forms when warm, moisture-laden indoor air meets a cold surface—typically your window glass or frames. Imagine breathing onto a cold mirror: that instant fogging demonstrates exactly what happens inside your home on a larger scale. According to The Window Doctor, in the UK's damp climate—where homes are sealed tighter than a drum to keep out the chill—windows can quickly become condensation hotspots without proper ventilation.
The science behind moisture buildup involves three interconnected factors:
Drip vents in windows break this cycle by maintaining continuous air exchange. Fresh outdoor air—typically drier during colder months—enters through the window air vent, diluting indoor humidity. Simultaneously, moisture-laden indoor air escapes through natural pressure differences and extract fans in kitchens and bathrooms. This constant, gentle turnover prevents humidity from building to problematic levels.
The consequences of unchecked condensation extend far beyond foggy windows. Persistent moisture creates ideal conditions for mold and mildew growth, which can trigger allergies, respiratory issues, and asthma symptoms. Left untreated, mold spreads behind furniture, into wall cavities, and throughout soft furnishings—often causing damage that's expensive to remediate. Air vents in double glazed windows act as your first line of defense, keeping humidity controlled before problems develop.
Sounds complex? It's actually remarkably straightforward. Passive ventilation relies entirely on natural forces—wind pressure and temperature differences—to move air through your home. Unlike mechanical systems requiring electricity and regular maintenance, trickle vents work silently and continuously without consuming any energy.
Indoor air quality often surprises homeowners who assume their sealed homes are protecting them from outdoor pollution. In reality, research shows that indoor air can be significantly more polluted than outdoor air. Without adequate ventilation, your home accumulates:
Trickle vents address these issues by ensuring a constant supply of fresh outdoor air. As clean air enters through your window vents, it displaces stale, pollutant-laden indoor air. This process happens so gradually that you won't feel drafts, yet the cumulative effect transforms your indoor environment. Many homeowners notice that rooms feel fresher, odors dissipate faster, and that persistent stuffiness disappears once proper background ventilation is established.
The beauty of passive ventilation lies in its simplicity. There are no filters to replace, no motors to maintain, and no energy costs to consider. Your trickle vents work whether you're home or away, awake or asleep, maintaining healthy air quality without any input from you.
Here's where many homeowners hesitate. You've invested in double glazing, insulation, and draft-proofing to reduce heating bills—won't adding vents undo all that effort? This concern is understandable but largely unfounded when you examine how properly sized trickle vents actually perform.
Modern trickle vents are engineered to provide necessary ventilation with minimal thermal impact. The key lies in their design and sizing:
The heat loss from properly sized trickle vents is typically minimal compared to the energy costs of dealing with condensation damage, mold remediation, and the health impacts of poor indoor air quality. Background ventilation is an investment in your home's longevity and your family's wellbeing.
Consider this perspective: the energy required to maintain slightly warmer indoor temperatures with vents open is far less than the energy—and expense—needed to run dehumidifiers, replace mold-damaged materials, or treat health conditions aggravated by poor air quality. Vistaza notes that trickle vents play a crucial role in energy savings by regulating temperature and humidity levels through controlled ventilation, effectively reducing the need for excessive heating or cooling.
Many homeowners wonder about related ventilation decisions, such as whether to leave a window ac unit vent open or closed. The principle is similar: controlled ventilation that prevents moisture buildup while minimizing energy loss offers the best balance. With trickle vents, you don't have to choose between a healthy home and an energy-efficient one—properly installed vents deliver both.
Now that you understand the benefits these vents provide, you're probably wondering which type would work best for your specific situation and requirements.
Not all trickle vents in windows are created equal. Just as you'd choose different tools for different jobs, selecting the right window vent depends on your specific circumstances—whether you're battling traffic noise, managing high humidity, or simply need reliable background ventilation on a budget. The market offers three main categories, each engineered to address particular challenges. Understanding what sets them apart helps you make an informed decision that balances performance, cost, and your home's unique requirements.
Standard trickle vents—sometimes called basic slot vents—represent the most common and cost-effective option for typical residential settings. These straightforward devices do exactly what their name suggests: they allow a controlled trickle of air to pass through your window frame, providing the background ventilation that modern building regulations require.
According to Titon's technical guide, standard trickle vents typically cover ventilation areas between 2000mm² and 8000mm² equivalent area (EA), making them suitable for most room types when properly sized. They feature manual open/close operation, giving you straightforward control over airflow through a simple sliding mechanism.
You'll find standard vents installed in several configurations:
These vents work beautifully in suburban homes, rural properties, and any location where external noise isn't a primary concern. They're compatible with uPVC, timber, and aluminum frames, and manufacturers offer a wide range of colors and finishes to match virtually any window design.
Imagine trying to sleep while traffic rumbles past your window, or concentrate on work with aircraft overhead. For properties near busy roads, flight paths, railway lines, or entertainment districts, standard vents simply won't cut it. Acoustic trickle vents are specifically engineered to allow fresh air in while blocking unwanted noise—a balancing act that requires sophisticated internal design.
What makes acoustic vents different from standard models? According to Titon's guide to acoustic ventilation, these specialized vents incorporate several noise-attenuating features:
Acoustic performance is measured using Dn,e,w values (element-normalized level difference, weighted), expressed in decibels. Higher numbers indicate better sound reduction—a vent rated at 44 dB will block significantly more noise than one rated at 35 dB. When reviewing product specifications, look for frequency response charts that show how effectively the vent handles different noise types, from low-frequency traffic rumble to higher-pitched sounds.
Building regulations add another layer to consider. BS 8233:2014 recommends that noise levels in habitable rooms shouldn't exceed 35 dB, with restful sleep only achievable below 30 dB. Local planning authorities may impose additional requirements for developments near known noise sources, making acoustic vents not just desirable but potentially mandatory.
These vents function similarly to a screen vent in principle—allowing air through while filtering out unwanted elements—but with sound rather than insects as the target. The internal structure creates a labyrinth that air navigates easily while sound waves lose energy at every turn.
What if your vents could think for themselves? Humidity-controlled trickle vents—sometimes called smart vents or automatic vents—do exactly that. They respond automatically to moisture levels in your home, opening wider when humidity rises and closing partially when conditions normalize. This hands-off approach appeals to homeowners who want optimal ventilation without remembering to adjust their vents manually.
These intelligent vents use humidity-sensitive strips or sensors that expand and contract based on moisture content in the air. When you're showering, cooking, or drying laundry, the rising humidity triggers the vent to open more fully, increasing airflow precisely when it's needed most. As humidity drops, the vent gradually closes, reducing heat loss during drier periods.
Humidity-controlled vents prove particularly beneficial in:
The automatic response also enhances energy efficiency. Rather than leaving vents fully open around the clock, humidity-controlled models provide ventilation proportional to actual need—maximum airflow during high-moisture activities, reduced airflow when the home is unoccupied or conditions are stable.
With three distinct categories to choose from, how do you determine which trickle vents windows in your home actually need? The following comparison breaks down the key specifications and ideal applications:
| Feature | Standard Trickle Vents | Acoustic Trickle Vents | Humidity-Controlled Vents |
|---|---|---|---|
| Typical EA Range | 2000-8000mm² | 2500-5000mm² | 2500-5000mm² |
| Noise Reduction | 5-10 dB | 30-45 dB | 5-15 dB |
| Operation | Manual open/close | Manual open/close | Automatic humidity response |
| Approximate Cost | £10-30 per unit | £40-100+ per unit | £25-50 per unit |
| Frame Compatibility | uPVC, timber, aluminum | uPVC, timber, aluminum | uPVC, timber, aluminum |
| Installation Complexity | Low | Medium to High | Low to Medium |
| Ideal Applications | Quiet suburban/rural locations; budget-conscious projects | Properties near roads, airports, railways, or nightlife areas | High-moisture rooms; rental properties; automated homes |
Premium manufacturers like Velfac integrate trickle vent options directly into their window systems, ensuring seamless compatibility and optimal performance. A Velfac trickle vent, for instance, is designed specifically for their composite window range, maintaining the clean aesthetic lines these high-end products are known for while delivering reliable background ventilation.
When selecting your vents, consider the specific challenges each room presents. A bedroom facing a busy street might benefit from acoustic vents, while a bathroom could perform best with humidity-controlled models. Standard vents often work perfectly well for living rooms and bedrooms in quieter locations. Many homeowners opt for a mixed approach—installing different vent types throughout their property based on each room's unique requirements.
With the right type selected, the next crucial decision involves determining what size and specifications your particular rooms require for adequate ventilation.
You've chosen the right type of trickle vent for your situation—but how do you know what size you actually need? Getting this wrong means either inadequate ventilation that fails to prevent condensation or oversized vents that create uncomfortable drafts and unnecessary heat loss. The good news? Building regulations provide clear guidance through a measurement system called equivalent area. Understanding this system transforms what seems like guesswork into a straightforward calculation that ensures your ventilation windows perform exactly as intended.
When shopping for window air vents, you'll encounter the term "equivalent area" (EA) repeatedly. But what does it actually mean? Simply put, equivalent area measures the aerodynamic performance of a ventilator—how much air can genuinely pass through it under real-world conditions.
Here's why this matters: a trickle vent's physical opening size doesn't tell the whole story. Modern vent designs include baffles, grilles, and internal channels that slow and redirect airflow. These features serve important purposes—reducing drafts, blocking rain ingress, and attenuating noise—but they also restrict how much air actually moves through the vent. According to Norrsken, equivalent area accounts for these limiting factors, giving you an accurate picture of true ventilation capacity rather than just the hole's dimensions.
You'll see EA expressed in square millimeters (mm²), and this figure appears on the internal section of compliant trickle vents. When comparing products or calculating your requirements, always use equivalent area values rather than "free area" measurements, which don't account for airflow restrictions.
The relationship between physical size and equivalent area varies by vent design. For example, ERA's technical specifications show that their 5000 Link Vent achieves 5000mm² EA on a 13mm rout but only 4000mm² EA on a 10mm rout—same vent, different installation, different performance. This is precisely why understanding EA matters: it's the only measurement that accurately predicts real ventilation outcomes.
Building regulations specify minimum equivalent areas based on room function, not room size. This approach recognizes that kitchens generate more moisture than bedrooms, and bathrooms need robust ventilation regardless of their square footage. When you're replacing windows or installing tickle vents in a new build, these minimums form your baseline requirements.
According to the LABC guidance on replacement windows, the updated Part F regulations specify the following minimum equivalent areas:
| Room Type | Minimum Equivalent Area | Notes |
|---|---|---|
| Habitable rooms (bedrooms, living rooms) | 8000mm² EA | Multi-story dwellings |
| Kitchen | 8000mm² EA | Multi-story dwellings |
| Habitable rooms and kitchens | 10000mm² EA | Single-story dwellings only |
| Bathroom (with or without toilet) | 4000mm² EA | All dwelling types |
| WC and utility rooms | No minimum specified | Must still be vented |
Notice the difference between multi-story and single-story dwellings? Single-story homes require higher equivalent areas because they lack the natural stack effect that helps drive ventilation in taller buildings. Without multiple floors creating pressure differences, bungalows and ground-floor flats need larger vent openings to achieve comparable air exchange rates.
Beyond minimum room requirements, regulations also specify minimum vent quantities for entire dwellings:
For open-plan spaces combining kitchen and living areas, you'll need at least three ventilators providing the same equivalent area as required for other habitable rooms. If your dwelling has 70% or more of its openings on a single facade, or your kitchen lacks windows or external walls for vent installation, these standard calculations don't apply—seek professional guidance for alternative solutions.
Properties with continuous mechanical extract ventilation (MEV) have slightly different requirements. Where such systems are installed, background ventilators in non-wet rooms need only 4000mm² EA per habitable room, as the mechanical system handles a portion of the ventilation load.
Understanding your room's required EA is only half the equation. You also need to ensure your chosen vents physically fit your window frames while delivering adequate airflow. This is where practical considerations meet regulatory requirements.
Standard trickle vents come in common sizes designed to combine easily for different EA requirements. According to ERA's product range, typical options include:
To achieve an 8000mm² EA requirement in a habitable room, you could install two 4000mm² vents or combine a 5000mm² vent with supplementary ventilation. For bathrooms requiring 4000mm² EA, a single appropriately sized vent typically suffices.
When selecting vent length, consider your window frame width. Through-frame vents need sufficient frame depth and width for installation—typically a minimum of 10-13mm rout depth. Over-frame vents offer more flexibility for narrow frames but extend above the window opening, potentially affecting appearance or interfering with reveals.
| Room Type | Required EA | Recommended Vent Configuration | Typical Vent Length |
|---|---|---|---|
| Bedroom (multi-story) | 8000mm² | 2 x 4000mm² or 1 x 5000mm² + supplementary | 300-400mm per vent |
| Living room (multi-story) | 8000mm² | 2 x 4000mm² or 1 x 5000mm² + supplementary | 300-400mm per vent |
| Kitchen (multi-story) | 8000mm² | 2 x 4000mm² or 1 x 5000mm² + supplementary | 300-400mm per vent |
| Any room (single-story) | 10000mm² | 2 x 5000mm² or 3 x 4000mm² | 350-450mm per vent |
| Bathroom | 4000mm² | 1 x 4000mm² | 250-350mm |
For double glazed windows with ventilation requirements, ensure your specified vents are compatible with your glazing system. Some manufacturers offer glazed-in vents that integrate directly into sealed units—useful when frame space is limited but requiring coordination during window manufacture.
If technical constraints prevent achieving the full minimum equivalent area—perhaps due to narrow frames or historic window restrictions—install vents as close to the minimum value as feasible and document this for building control purposes. The LABC recommends agreeing on any such compromises with your Local Authority Building Control Team before ordering materials.
With sizing calculations complete, you might be wondering whether adding these vents to your existing windows is even possible—and if so, how the installation process actually works.

Already have windows installed and wondering if you've missed the boat on background ventilation? Here's encouraging news: you don't need a complete vent window replacement to enjoy the benefits of continuous airflow. Retrofitting a window trickle vent to existing frames is entirely achievable, whether you're dealing with uPVC, aluminum, or timber construction. This approach saves significant money compared to full window replacement while still delivering the condensation control and air quality improvements your home needs. Much like how wall vents old houses relied upon for natural airflow, modern retrofit trickle vents restore that essential breathing capacity to sealed, energy-efficient homes.
When adding ventilation to windows already in place, you have two primary approaches: surface-mounted vents and frame-integrated vents. Each has distinct advantages depending on your frame material, aesthetic preferences, and DIY confidence level.
Surface-mounted (over-frame) vents attach directly to the top of your existing window frame without cutting into the frame itself. These sit above the frame head and typically require drilling through the wall cavity above the window to create an airflow path. They're particularly useful when:
Frame-integrated (through-frame) vents require cutting slots directly into the window frame to create the air passage. According to Astraframe's retrofit guide, this approach delivers a cleaner, more discreet appearance since the vent sits flush within the frame profile. However, it demands greater precision and appropriate tools to execute successfully.
The choice between these methods often comes down to your specific frame construction. uPVC windows frequently contain steel or aluminum reinforcement within the frame chambers—hitting this during routing creates significant complications. Timber frames offer more straightforward cutting but require careful attention to weatherproofing afterward. Aluminum frames present unique challenges due to their thin wall sections and the specialized tools needed for clean cuts.
Considering a DIY approach to fitting fitted vents? Understanding the process helps you decide whether to tackle it yourself or call in professionals. Here's what the installation typically involves:
1. Measure and select appropriate vents. Before purchasing, measure your frame width to ensure the vent will fit. According to Handle Store's sizing guide, you'll need to identify the fixing centres—the distance between screw holes—and ensure your chosen vent either matches existing holes or can bridge them with new fixing positions.
2. Mark the installation points. Position your markings near the top of the window frame, ensuring alignment on both interior and exterior surfaces. Use a spirit level to keep everything straight, and double-check measurements before proceeding.
3. Prepare for drilling or routing. For through-frame installations, wrap masking tape around your drill bit to mark the correct depth—this prevents drilling too deep and damaging internal chambers or the outer skin of the frame. Choose a high-speed metal drill bit suitable for uPVC or aluminum, or a wood-appropriate bit for timber frames.
4. Create the air passage. Drill pilot holes from the inside at each marked point, keeping the drill perpendicular to the frame. Then drill from the outside to meet the pilot holes. For larger vent slots, you may need a router or multiple adjacent holes that are then cleaned up to create a continuous opening.
5. Clean and prepare the openings. Remove any rough edges, burrs, or debris using fine sandpaper or a deburring tool. Clean surfaces ensure proper vent seating and prevent future problems with water ingress.
6. Fit the vent components. Install the internal vent housing first, aligning it with the drilled holes and securing with the provided screws. Then fit the external canopy, ensuring it sits flush and provides adequate rain protection. Test the sliding mechanism to confirm smooth operation.
7. Verify weatherproofing. Check that seals sit correctly and no gaps exist around the vent edges. Quality vents include gaskets, but you may need to apply additional sealant in certain situations—particularly with timber frames where moisture protection is critical.
Professional installation is strongly recommended for aluminum frames and any situation where steel reinforcement is suspected within uPVC profiles. The cost of expert fitting is minimal compared to the expense of replacing a damaged window.
Each frame material presents unique considerations that affect how—and whether—retrofit installation should proceed.
uPVC windows are the most common retrofit candidates. The plastic material cuts relatively easily with appropriate drill bits, and the multi-chamber construction provides structural integrity even after slots are added. However, Astraframe warns that internal steel or aluminum reinforcement can complicate matters significantly. Before committing to through-frame installation, check manufacturer documentation or probe gently to identify any hidden metal components.
Aluminum windows require specialized metal-cutting tools and careful technique. The thin wall sections mean less margin for error, and incorrect drilling can compromise structural integrity or weatherproofing. Most homeowners find professional installation worthwhile for aluminum frames.
Timber windows accept modification most readily, as wood cuts cleanly with standard tools. The primary concern shifts to moisture protection—any cut through a painted or treated timber frame creates a potential water ingress point. Thorough sealing during and after installation prevents long-term rot problems.
To successfully retrofit trickle vents, you'll typically need the following tools and materials:
Maintaining window integrity throughout installation cannot be overstated. Cutting through the wrong section of a frame can compromise its strength, void warranties, or create water penetration pathways. If you're uncertain about your frame's internal construction or your ability to execute clean cuts, seeking professional assistance protects both your windows and your investment.
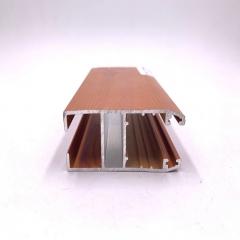
For those exploring options from reputable manufacturers, Shengxin Aluminium's range of trickle vents offers durable solutions compatible with uPVC, aluminum, and timber frames, available in various sizes and finishes to suit different retrofit scenarios.
Even with perfectly installed vents, you may occasionally encounter issues that affect performance—understanding how to troubleshoot common problems ensures your ventilation system works effectively for years to come.
Installed your venting windows but still experiencing problems? You're not alone. While trickle vents deliver genuine benefits when working correctly, they can sometimes create frustrations that make homeowners question their value. The good news? Most issues have straightforward solutions once you understand what's causing them. Whether you're battling uncomfortable drafts, unwanted noise, or persistent condensation despite having vents in place, this troubleshooting guide walks you through practical fixes that restore your window air ventilation to optimal performance.
That cold stream of air hitting your neck while you're watching television isn't just annoying—it might make you want to block window vent openings entirely. According to The Window Doctor, many homeowners report that vents can introduce unwelcome drafts, particularly noticeable during colder months. Before reaching for a trickle vent blanking plate, consider these factors and solutions.
Why do some vents cause uncomfortable drafts? Several conditions contribute to noticeable cold airflow:
To minimize drafts without sacrificing ventilation, try partially closing vents during windy periods or extreme cold. Most trickle vents feature adjustable sliders that let you reduce airflow while maintaining some background ventilation. If specific rooms feel particularly drafty, check that extract fans in bathrooms and kitchens aren't creating excessive negative pressure—running these on lower settings can balance the system.
Balancing security and ventilation presents another common concern. Many homeowners worry about leaving any opening in their windows, particularly at night or when away from home. Here's practical guidance for maintaining security while ventilating:
This approach mirrors the principle behind when to open foundation vents—providing necessary airflow for building health while maintaining structural security. Your trickle vents serve the same purpose at window level, balancing fresh air needs against practical safety considerations.
Standard trickle vents prioritize airflow over sound attenuation, which becomes problematic when external noise disrupts your peace. According to Titon's acoustic ventilation guide, with the rise of denser urban housing developments, noise intrusion through vents has become an increasing problem for occupants battling rising noise levels from nearby roads, flight paths, and entertainment hubs.
If your current vents allow too much external noise, consider these solutions in order of increasing investment:
Quick fixes for existing vents:
Upgrade options for persistent noise problems:
When upgrading to acoustic vents, look for products with published Dn,e,w ratings—this standardized measurement indicates real-world sound reduction performance. Higher numbers mean better noise blocking. For properties near major roads or airports, vents rated at 40 dB or higher typically satisfy both building regulations and occupant comfort requirements.
Perhaps the most frustrating situation: you've installed trickle vents specifically to combat condensation, yet water still streams down your windows every morning. Before concluding that vents don't work, investigate these common causes.
According to Refresh Property Services, blocked trickle vents preventing continuous background ventilation rank among the primary factors affecting window condensation. Many homeowners don't realize these vents should remain permanently open for effective moisture control.
Why condensation persists despite having vents:
Work through this troubleshooting checklist to identify and resolve your specific condensation causes:
If condensation persists after addressing these factors, the issue may extend beyond ventilation capacity. The Window Doctor recommends checking that window handles operate correctly, locks function properly, and opening windows seal tight to the frame without gaps around the gasket. Any of these faults can contribute to condensation problems that trickle vents alone cannot solve.
With troubleshooting complete and your vents working optimally, maintaining this performance requires regular attention—a straightforward routine that takes just minutes but extends your vents' effective lifespan significantly.
Your trickle vent window system works quietly in the background, day after day, keeping air circulating without demanding attention. But like any component of your home, these unassuming vents benefit from occasional care. Neglected windows vents gradually lose effectiveness as dust accumulates, moving parts stiffen, and seals deteriorate. The good news? Maintaining optimal performance requires minimal effort—just a few minutes of attention several times a year keeps your air ventilation window functioning at peak efficiency for years to come.
Ever wondered why your vents seem less effective than when first installed? The answer often lies in accumulated debris. According to GFD Homes, dust and debris can accumulate over time, blocking airflow and reducing vent performance significantly. This buildup happens gradually—so gradually you might not notice until condensation returns or rooms feel stuffy despite open vents.
What exactly accumulates inside your vents? Consider the particles floating through your home's air:
Cleaning your trickle vents requires nothing more sophisticated than tools you already own. Use a soft brush attachment on your vacuum cleaner to remove loose debris from both internal and external vent covers. For stubborn buildup, a damp cloth with mild detergent works effectively—just ensure components dry completely before closing adjustable vents.
How often should you clean? Most homes benefit from quarterly cleaning, though certain situations warrant more frequent attention:
Your ventilation needs shift with the seasons, and your vent settings should adapt accordingly. While trickle vents are designed for year-round operation, thoughtful seasonal adjustments optimize comfort without sacrificing air quality.
Winter adjustments: During cold months, you might be tempted to close vents entirely. Resist this urge—background ventilation remains essential for preventing condensation when heating creates warm, moisture-laden indoor air. Instead, consider partially closing vents during extreme cold snaps or when rooms feel uncomfortably drafty. Check that external canopies remain clear of ice or snow that could block airflow.
Spring preparations: As weather warms, open vents fully to flush out stale winter air. This is an ideal time for thorough cleaning, removing any debris accumulated during months of reduced outdoor activity. Inspect moving parts for smooth operation after winter dormancy.
Summer considerations: Fully open vents support natural cooling during warm months, working alongside open windows to maximize cross-ventilation. Pay attention to pollen levels if household members suffer allergies—you may need to balance ventilation needs against allergen exposure.
Autumn checks: Before heating season begins, confirm all vents operate correctly. Clean external canopies of fallen leaves and debris that autumn weather deposits. Verify that seals remain intact before weather conditions become harsh.
Even well-maintained vents eventually reach the end of their effective service life. According to Unitests, it's recommended to consider changing vents every 15-20 years, as new vents not only enhance aesthetics but also come with improved designs that can improve airflow efficiency.
Watch for these signs indicating replacement is needed:
Upgrading to modern designs—such as easy glaze trickle vents integrated into sealed units—offers several advantages over older models. Contemporary vents typically feature improved equivalent area ratings, better weather sealing, smoother operation, and more attractive aesthetics. If you're experiencing persistent noise issues, upgrading to acoustic models during replacement makes practical sense.
Keeping your trickle vents in optimal condition doesn't require complex planning. Follow this straightforward annual schedule:
During each maintenance session, test all moving parts by opening and closing vents fully. Controls should move smoothly without sticking or excessive force. Examine seals around vent edges—they should be pliable rather than brittle or cracked. Check that external canopies sit securely against frames with no visible gaps where water could penetrate.
This minimal investment of time protects your home's ventilation performance and extends vent lifespan significantly. A few minutes of attention each quarter prevents the gradual performance decline that leaves many homeowners wondering why their supposedly ventilated homes still suffer condensation problems.
While trickle vents serve most homes admirably, some situations call for alternative or supplementary ventilation solutions—understanding your options helps you make informed decisions about your property's overall ventilation strategy.
Choosing the right ventilation strategy for your home isn't a one-size-fits-all decision. While a trickle vent for window installations works beautifully in many situations, certain properties benefit from alternative or complementary approaches. Perhaps you're building a new highly insulated home, renovating a period property, or struggling with persistent moisture problems that basic background ventilation can't resolve. Understanding the difference between window and ventilator systems—from passive trickle vents to sophisticated mechanical recovery units—empowers you to make informed decisions that match your property type, budget, and specific ventilation challenges.
The fundamental distinction between these two approaches lies in their operating principles. Windows with vents rely entirely on natural forces—pressure differences and temperature gradients—to drive air exchange. Mechanical ventilation with heat recovery (MVHR) actively draws air through a network of ducts using fans, recovering heat from exhausted air to warm incoming fresh air.
According to BWS Windows, heat recovery ventilation reduces energy demand by reclaiming 50-90% of heat from extracted air. This directly translates to lower primary energy consumption, making it easier to meet building standards. A home with MVHR requires neither ventilation chimneys nor window trickle vents—a saving that partially offsets the higher system cost.
When does MVHR make more sense than trickle vents?
The cost difference is substantial. According to BWS Windows' analysis, MVHR installation costs €4,000-6,500 for a 120-150m² home, while trickle vents typically cost £10-30 per unit. However, MVHR eliminates the need for ventilation chimneys and individual window vents, partially offsetting the upfront investment.
Consider this critical point: combining MVHR with trickle vents isn't recommended. MVHR operates as a closed system—introducing cold outside air through window vents bypasses the central unit and heat exchanger. This air doesn't pass through filters, isn't warmed by recovered heat, and disrupts the airflow balance. System efficiency drops significantly. The rule is straightforward: either airtight windows plus MVHR, or windows with trickle vents plus natural ventilation.
Sometimes the problem isn't general background ventilation—it's concentrated moisture or pollutants generated in specific locations. According to Truframe Direct, extractor fans are generally best suited in the kitchen and bathroom, where there's high moisture during certain activities rather than a continuous need for fresh air.
While a door vent or trickle vent provides steady, gentle air exchange throughout your home, extractor fans deliver targeted, powerful extraction precisely when and where you need it. Picture the steam billowing from a hot shower or smoke rising from a sizzling pan—these intense, localized emissions require active removal rather than passive dilution.
Scenarios favoring extractor fans over trickle vents:
Modern extractor fans have evolved considerably from the noisy, manually-switched units of previous decades. Humidity-sensing models activate automatically when moisture levels rise, ensuring ventilation occurs precisely when needed—even if occupants forget to switch them on. Timer functions allow continued extraction after bathroom use, clearing residual moisture effectively.
That said, Truframe Direct notes a significant drawback: extractor fans require sufficient wall or ceiling space and may not suit older homes with small kitchens and bathrooms where adequate room doesn't exist. They're also perceived as somewhat old-fashioned, with many still requiring manual operation that loses benefits when users forget to switch them on.
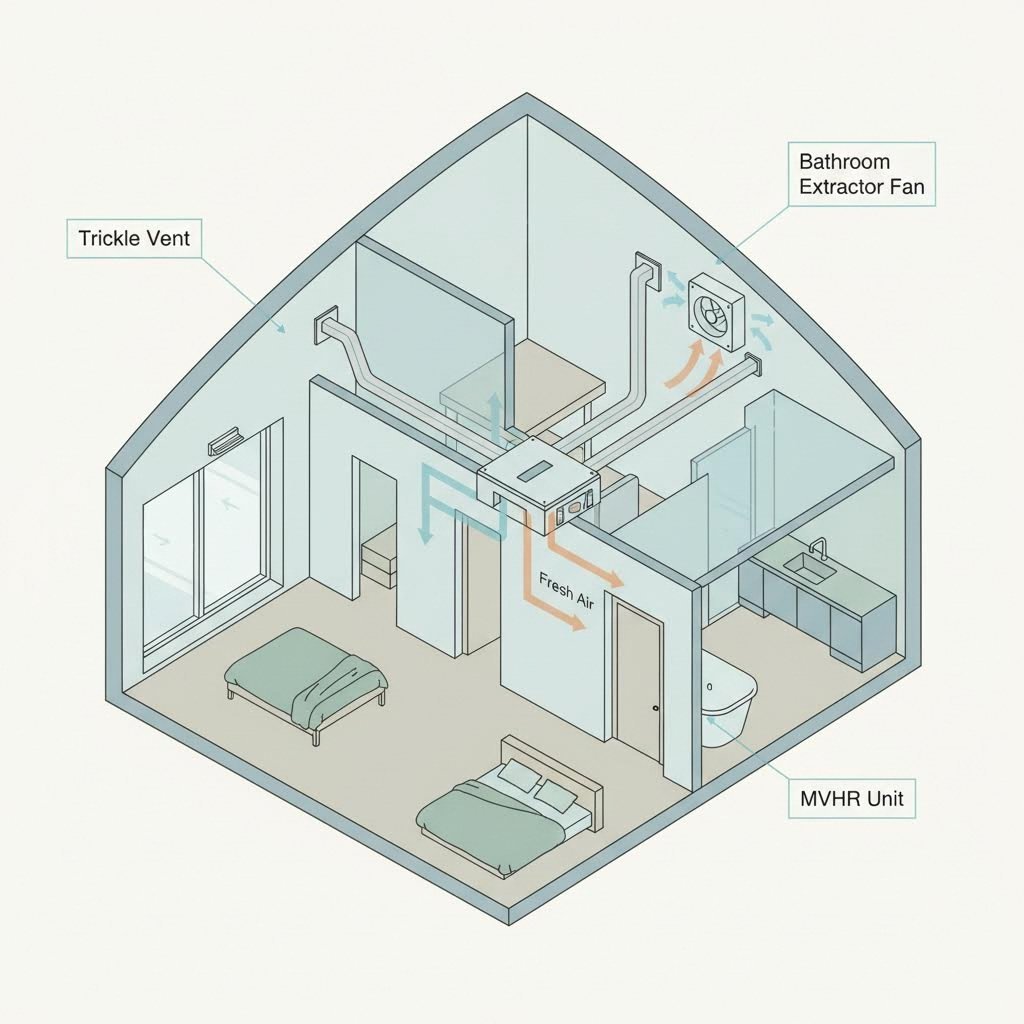
The most effective whole-house ventilation strategies rarely rely on a single solution. Think of it like heating—you wouldn't expect a single radiator to warm your entire home, and similarly, different ventilation needs call for complementary approaches.
A balanced strategy for typical residential properties might include:
This layered approach recognizes that different spaces have different ventilation demands. Your bedroom needs gentle, continuous fresh air for healthy sleep—perfectly suited to trickle vents. Your bathroom needs rapid moisture extraction during and after showers—requiring an extractor fan. The connection between rooms benefits from interior door ventilation solutions, whether through undercuts, transfer grilles, or purpose-designed door vents.
Even utility considerations like a cabinet door vent in kitchens or bathrooms contribute to overall airflow, preventing moisture buildup in enclosed spaces where pipes or appliances generate humidity. These small additions complement your primary ventilation system, addressing micro-environments that main systems might miss.
According to Panasonic's IAQ resource center, indoor environmental professionals and air quality experts generally agree that a balanced ventilation strategy is best—one that both actively exhausts polluted indoor air and actively draws in fresh outdoor air in a controlled ratio. While a basement window with vent or standard trickle installation handles many situations adequately, combining passive and active approaches delivers optimal results in demanding environments.
When evaluating your options, consider how each solution performs across the factors that matter most for your situation:
| Factor | Trickle Vents | MVHR Systems | Extractor Fans | Passive Stack Ventilation |
|---|---|---|---|---|
| Initial Cost | £10-30 per unit | £4,000-6,500 for typical home | £50-200 per unit installed | £500-1,500 for complete system |
| Running Cost | Zero—passive operation | £50-150 annually for electricity | £10-40 annually per unit | Zero—passive operation |
| Energy Efficiency | No heat recovery; minimal heat loss when properly sized | 50-90% heat recovery; highly efficient | No heat recovery; localized heat loss during operation | No heat recovery; steady heat loss through ducts |
| Maintenance Requirements | Quarterly cleaning; minimal effort | Annual filter changes; professional servicing recommended | Periodic cleaning; occasional motor replacement | Annual duct inspection; minimal ongoing needs |
| Ventilation Effectiveness | Good for background ventilation; depends on natural conditions | Excellent—controlled, consistent airflow regardless of weather | Excellent for localized extraction; intermittent operation | Good—relies on temperature differential for airflow |
| Installation Complexity | Low—fits into existing window frames | High—requires ductwork throughout property | Medium—needs external wall or roof penetration | Medium—requires vertical duct installation |
| Noise Level | Silent operation | Low hum from central unit; silent at room level | Audible during operation; varies by model quality | Silent operation |
| Retrofit Suitability | Excellent—easily added to existing windows | Challenging—requires significant building work | Good—straightforward installation in most properties | Moderate—needs suitable vertical route through property |
With the comparison complete, you might wonder which approach best matches your specific circumstances. Here's guidance based on property type and homeowner priorities:
Trickle vents are ideal for:
MVHR systems suit:
Extractor fans work best for:
Passive stack ventilation complements:
Whatever combination you choose, remember that effective ventilation isn't optional—it's essential for both building longevity and occupant health. As BWS Windows emphasizes, problems with ventilation—condensation on windows, mold in room corners, morning grogginess—don't disappear on their own. Acting now, whether through simple trickle vents or comprehensive mechanical systems, protects your home and your family's wellbeing for years to come.
For those seeking reliable, versatile trickle vent solutions compatible with various window types and installation scenarios, Shengxin Aluminium offers a comprehensive range of durable vents designed to improve indoor air quality while preventing condensation. Their products suit uPVC, aluminum, and timber frames, making them suitable for both new builds and retrofit applications where cost-effective background ventilation is the priority.
Trickle vents are highly beneficial for modern homes, particularly those with double glazing. They provide continuous background ventilation that prevents condensation buildup, reduces mold growth, and improves indoor air quality without compromising security or creating significant heat loss. For new builds and replacement windows, they're now required by UK Building Regulations Part F. Shengxin Aluminium offers durable trickle vents suitable for uPVC, aluminum, and timber windows that effectively balance ventilation with energy efficiency.
Yes, retrofitting trickle vents to existing windows is entirely possible. You have two main options: surface-mounted vents that attach above the frame without cutting into it, or frame-integrated vents that require routing slots directly into the window frame. The best approach depends on your frame material—uPVC and timber frames are generally easier to modify than aluminum. Professional installation is recommended for aluminum frames or when steel reinforcement is present in uPVC profiles.
Heat loss through properly sized trickle vents is minimal and typically unnoticeable. Modern vents are engineered to provide necessary ventilation while minimizing thermal impact. The upper frame positioning allows incoming air to mix with warm room air before reaching living zones. The marginal heat loss is far outweighed by benefits including prevented condensation damage, reduced mold remediation costs, and improved indoor air quality. Most vents also feature adjustable controls for extreme weather conditions.
Several alternatives exist depending on your property type and needs. Mechanical Ventilation with Heat Recovery (MVHR) systems actively circulate air while recovering up to 90% of heat—ideal for new airtight builds. Extractor fans provide targeted moisture extraction in bathrooms and kitchens. Passive stack ventilation uses vertical ducts to draw air naturally. However, trickle vents remain the most cost-effective solution for most homes, costing just £10-30 per unit compared to thousands for MVHR installation.
Trickle vent sizing depends on room type and building configuration. UK Building Regulations specify minimum equivalent areas: 8000mm² for habitable rooms in multi-story dwellings, 10000mm² for single-story homes, and 4000mm² for bathrooms. You can achieve these requirements by combining vents—for example, two 4000mm² units or one 5000mm² vent with supplementary ventilation. Always check that your chosen vent physically fits your window frame width before purchasing.


 dịch vụ trực tuyến
 0086 136 3563 2360
 sales@sxalu.com
 +86 136 3563 2360
 Việt
Việt English
 français
 Deutsch
 русский
 español
 português
 العربية
 ไทย
ไทย Українська