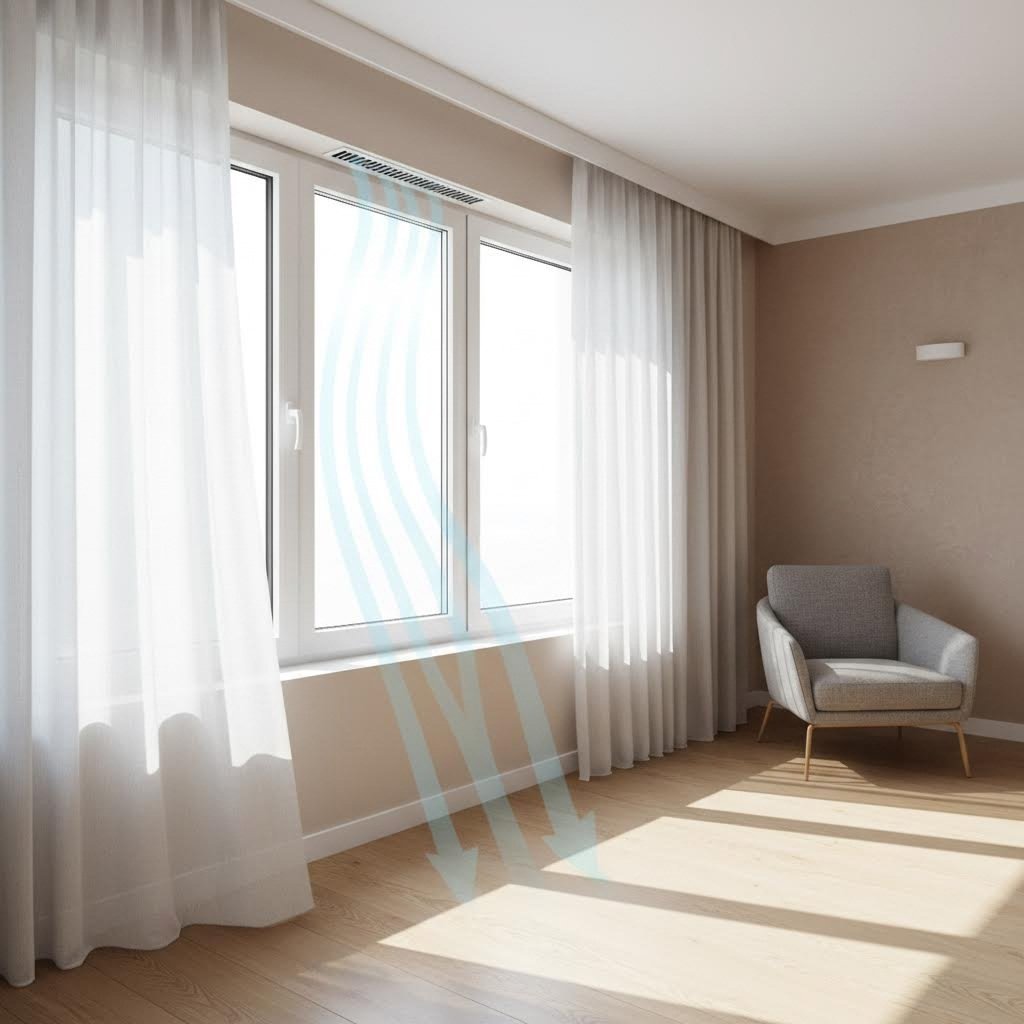
When you think about home improvement projects, window vent installation might not be the first thing that comes to mind. Yet these small, often overlooked features play a crucial role in maintaining a healthy, comfortable living environment. A window vent is essentially a controlled opening integrated into your window or door frame that allows fresh outdoor air to flow into your home while stale indoor air escapes. Sounds simple, right? The reality is that proper installation makes all the difference between effective ventilation and wasted effort.
Whether you're looking to install window vents in a new construction project or retrofit them into existing windows, understanding the fundamentals will help you achieve optimal results. This guide walks you through everything you need to know about installing window vents correctly, from basic principles to material-specific techniques.
Imagine your home as a sealed container. During winter, we keep windows and doors tightly shut to conserve heat. While this saves energy, it also traps indoor pollutants like volatile organic compounds (VOCs) from cleaning products, dust particles, and moisture from everyday activities such as cooking and showering. According to the National Center for Healthy Housing, proper ventilation helps control indoor humidity and airborne contaminants that either contribute to or act as health hazards.
Window vents create a pathway for continuous background ventilation without requiring you to open your windows fully. This consistent air exchange dilutes indoor pollutants with cleaner outdoor air, regulates humidity levels, and reduces the concentration of harmful chemicals that accumulate in well-sealed homes. For specialized applications like window dryer vent installation, the principles remain similar: creating a controlled pathway for air movement while maintaining your home's thermal envelope.
Here are the primary benefits of properly installed window vents:
You might wonder why installation technique matters so much for something as straightforward as a vent. The answer lies in understanding how ventilation systems work. A poorly installed vent can create drafts, leak water during rain, compromise your window's structural integrity, or simply fail to provide adequate airflow. Each of these issues defeats the purpose of installing window vents in the first place.
Proper installation ensures that your vents integrate seamlessly with your window frames without creating weak points. This means selecting the right size vent for your room's ventilation needs, positioning it correctly within the frame, drilling precise holes that don't damage surrounding materials, and sealing everything to maintain weatherproofing. When you get these elements right, your vents will provide years of trouble-free service while genuinely improving your home's air quality.
One common misconception is that more ventilation is always better. In reality, excessive ventilation can lead to heat loss in winter and humidity problems in warmer climates where HVAC systems pull warm, moist air inside. The goal isn't maximum airflow but rather the right amount of airflow for your specific living situation, room size, and local climate conditions.
Another myth worth addressing: many homeowners believe that modern, well-insulated windows eliminate the need for additional ventilation. The opposite is actually true. Highly efficient double and triple-glazed windows are so effective at sealing your home that they can trap pollutants inside, making dedicated ventilation solutions even more important for maintaining healthy indoor air quality.
Throughout this guide, you'll learn how to assess your ventilation needs, choose appropriate vent types for different applications, work with various window frame materials, and complete installation projects that deliver real results. Whether you're tackling this as a DIY project or preparing to work with professionals, the information ahead will help you make informed decisions every step of the way.
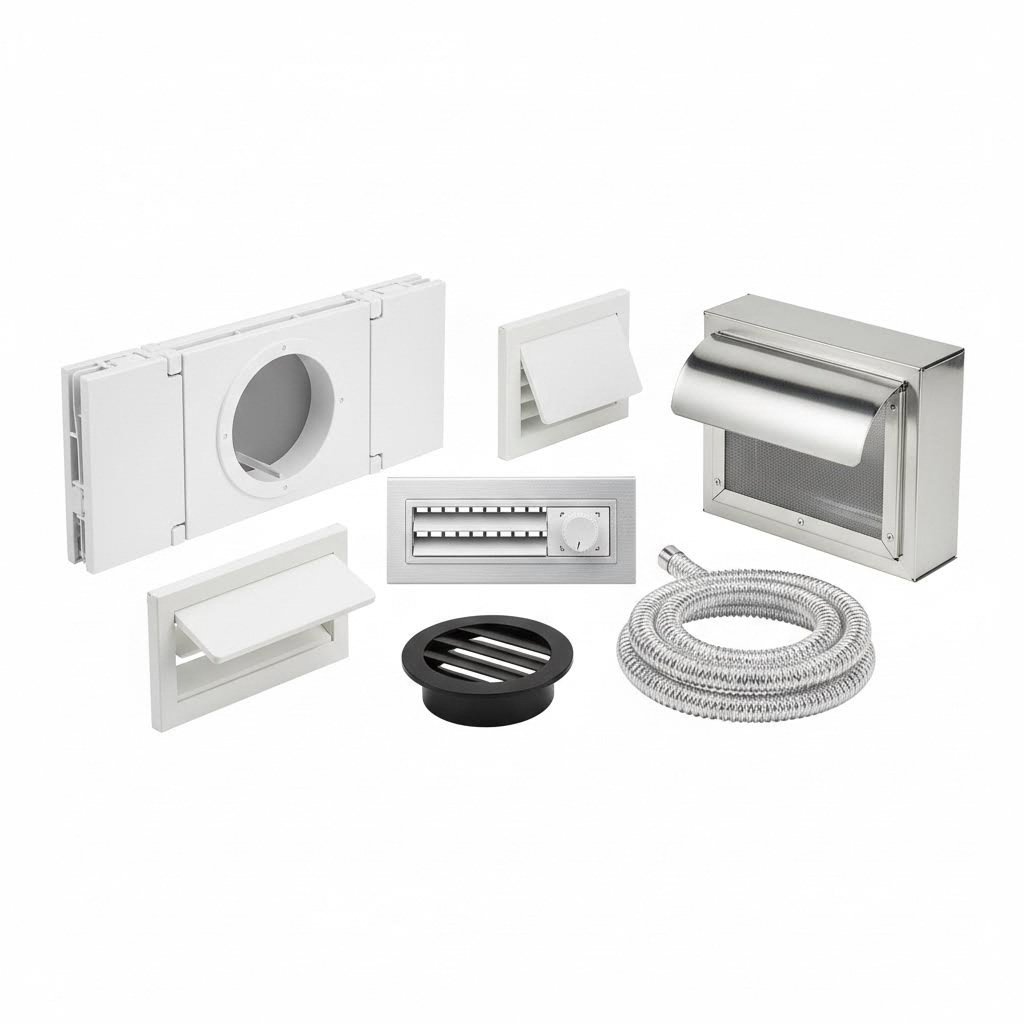
Not all window vents serve the same purpose, and choosing the wrong type for your situation can lead to frustrating results. Whether you need constant background airflow, a way to exhaust appliance heat, or climate control for a portable cooling unit, there's a specific vent designed for the job. Understanding the differences will help you install trickle vents in windows for passive ventilation, run exhaust systems for dryers, or set up cooling solutions that actually work.
Let's break down the main categories of window vents, their ideal applications, and what each installation involves. By the end of this section, you'll know exactly which option matches your needs.
If you've ever noticed small slotted openings at the top of modern window frames, you've seen trickle vents in action. These narrow, unobtrusive units provide continuous passive ventilation without requiring you to open your windows. They work on a simple principle: warm indoor air rises and escapes through upper vents while cooler outdoor air enters through lower openings, creating natural air circulation.
Trickle vent window installation is particularly common in newer constructions where building regulations require adequate background ventilation. However, they're equally valuable for retrofit projects in older homes suffering from condensation problems or stuffy indoor air. Most trickle vents feature manual sliders that let you control airflow, from fully open to completely closed, giving you flexibility based on weather conditions and personal comfort.
The installation process for trickle vents typically involves cutting a slot into the top of your window frame, inserting the vent unit, and sealing everything to maintain weatherproofing. While this sounds straightforward, the specific approach varies significantly depending on your frame material, which we'll cover in detail in the next section.
What happens when your laundry room doesn't have exterior wall access for traditional dryer venting? Many homeowners face this exact challenge, especially in apartments, condos, or older homes with unconventional layouts. The solution is to install dryer vent through window openings using specialized kits or custom panel inserts.
Understanding how to install dryer vent through window properly is essential because improper installation creates serious safety hazards. Clothes dryers produce hot, moist air loaded with lint particles. If this exhaust doesn't exit your home efficiently, you risk moisture damage, mold growth, and significantly, fire hazards from lint accumulation. A properly installed window dryer vent directs all exhaust outside while maintaining a tight seal against weather and pests.
The typical installation involves replacing a window pane with an acrylic or plexiglass panel, cutting a 4-inch diameter hole for the vent connection, and sealing everything with silicone caulk. Some homeowners prefer pre-made adjustable window dryer vent kits that slide into the window opening like a window fan, eliminating the need for cutting and permanent modifications.
For those looking to install dryer vent in basement window locations, the process follows similar principles but may require additional considerations for moisture control in below-grade spaces. Basement windows often sit closer to ground level, making proper hood placement and drainage important for preventing water intrusion during rain.
Portable air conditioners offer flexible cooling solutions for rooms without central air or window AC units, but they require proper exhaust venting to function effectively. When you're installing window vent for portable air conditioner units, you're creating a pathway for hot exhaust air to exit your space. Without this, the AC essentially pumps heat back into the room you're trying to cool.
Most portable AC units come with basic window installation kits featuring adjustable plastic panels that extend to fit standard window widths. These work well for temporary setups, but they often leave gaps that allow warm air to seep back inside, reducing cooling efficiency. For better performance, consider upgraded options like plexiglass inserts cut to your exact window dimensions or insulated panel systems that minimize air exchange around the exhaust hose.
Installation difficulty for portable AC vents ranges from minimal to moderate. Basic kits require only opening your window, extending the panels to fit, and connecting the exhaust hose. Custom solutions involve measuring, cutting materials, and ensuring proper sealing, but they deliver noticeably better cooling performance and reduced energy waste.
Glass block windows present unique challenges for vent installation because you can't simply drill through or modify individual blocks without specialized equipment and expertise. However, glass block window vent installation has become increasingly popular, especially for basement applications where these windows are common.
The solution typically involves using pre-manufactured glass block vent units that replace one or more blocks in your existing window panel. These specialty blocks feature built-in vent openings and come in standard sizes including 6"x6", 6"x8", and 8"x6" configurations. For dryer venting specifically, manufacturers offer vinyl glass block dryer vents designed to integrate seamlessly with existing installations while providing proper exhaust capacity.
This approach offers significant advantages: glass block vents maintain the security and insulating properties that make these windows popular while adding functionality. Installation typically requires removing existing blocks, fitting the vent unit into the opening, and sealing with appropriate mortar or adhesive compounds. Given the specialized nature of this work, many homeowners opt for professional installation to ensure structural integrity and proper waterproofing.
Choosing the right vent type depends on your specific needs, skill level, and available time. Here's a detailed comparison to help you decide:
| Vent Type | Primary Use | Installation Difficulty | Typical Installation Time | Best For |
|---|---|---|---|---|
| Trickle Vents | Continuous passive background ventilation | Moderate - requires precise cutting into frame | 1-2 hours per window | Whole-house air quality improvement, condensation control, building code compliance |
| Window Dryer Vents (DIY Panel) | Exhausting dryer heat and moisture | Moderate to High - cutting, fitting, sealing required | 2-4 hours | Permanent installations where wall venting isn't possible |
| Window Dryer Vents (Adjustable Kit) | Exhausting dryer heat and moisture | Easy - slides into window opening | 15-30 minutes | Rentals or temporary solutions needing quick setup |
| Portable AC Vents (Basic Kit) | Exhausting portable air conditioner heat | Easy - minimal tools required | 15-30 minutes | Seasonal cooling, temporary setups, renters |
| Portable AC Vents (Custom Panel) | Exhausting portable air conditioner heat | Moderate - measuring and cutting required | 1-2 hours | Long-term installations prioritizing efficiency |
| Glass Block Window Vents | Adding ventilation to glass block windows | High - specialized materials and techniques | 2-4 hours (professional recommended) | Basements, bathrooms with glass block windows |
Still unsure which option fits your situation? Consider these scenarios:
Each vent type serves distinct ventilation needs, and the right choice depends on balancing installation complexity against long-term performance. Now that you understand what's available, let's examine how different window frame materials affect installation approaches and techniques.
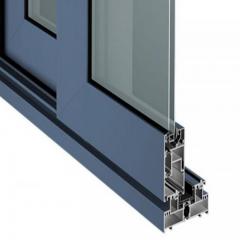
Your window frame material dramatically affects how you approach vent installation. What works perfectly on a wooden frame could crack a uPVC window or cause corrosion issues in aluminum. Before picking up any tools, you need to identify exactly what you're working with and understand how that material responds to drilling, cutting, and sealing procedures. Getting this wrong doesn't just mean a failed installation—it can permanently damage your windows.
Each frame type has distinct structural properties, thermal characteristics, and weatherproofing requirements. Installing trickle vents on windows successfully means adapting your techniques to match these differences. Let's examine the three most common frame materials and the specific approaches each one demands.
uPVC (unplasticized polyvinyl chloride) dominates modern window construction because it's affordable, low-maintenance, and offers excellent insulation. However, these frames present unique challenges when you're installing trickle vents in uPVC windows. The material is relatively soft compared to wood or metal, which makes drilling easier but also increases the risk of cracking if you apply too much pressure or use incorrect speeds.
Understanding how to install trickle vents in uPVC windows starts with recognizing the frame's internal structure. Most uPVC profiles contain multiple hollow chambers separated by thin walls. These chambers provide insulation and structural rigidity, but they also mean you must be careful not to drill through internal walls that could weaken the frame or create water penetration pathways.
Here are the essential tools required for uPVC window vent installation:
When drilling into uPVC, maintain steady pressure without forcing the bit through. The material tends to grab drill bits as they exit, which can cause cracking on the back side. Placing a piece of scrap wood behind your drilling point helps support the material and produces cleaner holes. Keep your drill speed moderate—high speeds generate enough heat to melt the plastic, creating rough, deformed holes that compromise seal integrity.
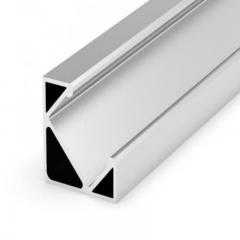
Aluminium frames offer exceptional durability and a sleek, modern appearance, but they require different handling than plastic or wood. The metal is harder to cut and drill, conducts heat rapidly, and creates sharp edges that need attention for both safety and weatherproofing. Additionally, aluminium's thermal conductivity means these frames can experience significant temperature-related expansion and contraction, affecting how you approach sealing.
According to Titon's guide on acoustic trickle vents, manufacturers recommend aluminium vents for maximum durability, making proper installation even more critical for long-term performance. The frame and vent materials should ideally match to prevent galvanic corrosion—a chemical reaction that occurs when dissimilar metals contact each other in the presence of moisture.
Here are the specific tools you'll need for aluminium frame installations:
Before drilling, use a center punch to create a small indent at each hole location. Aluminium's smooth, hard surface causes drill bits to wander, potentially damaging visible areas of your frame. Start with a smaller pilot hole, then step up to your final size—this two-stage approach produces cleaner results than forcing a large bit through in one pass. Always apply cutting lubricant to reduce heat and extend bit life.
After cutting your vent opening, file all edges smooth. Sharp aluminium edges slice through sealant over time, creating water infiltration points that lead to corrosion and interior damage. This step takes only a few minutes but significantly impacts installation longevity.
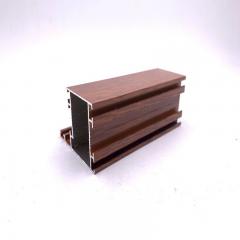
Wooden frames offer natural beauty and excellent insulation properties, but they're also the most susceptible to moisture damage if installation isn't executed properly. When learning how to install trickle vents in wooden windows, moisture management becomes your primary concern. Any cut or drilled hole creates a potential entry point for water, which causes swelling, warping, rot, and eventually structural failure.
Wood species matters significantly for installation difficulty. Softwoods like pine cut easily but split more readily, while hardwoods like oak require sharper tools and more patience but hold fasteners better and resist damage. Older painted frames may also contain lead paint, requiring appropriate safety precautions during any cutting or drilling operations.
These tools are essential for installing trickle vents in windows with wooden frames:
The critical step that many DIYers skip? Priming and sealing all cut surfaces before installing the vent. Exposed raw wood wicks moisture like a sponge, and once water penetrates the frame's interior, damage progresses invisibly until repair becomes major. Apply wood primer to every cut edge, let it dry completely, then add a coat of exterior paint before mounting your vent unit. This preparation adds an hour to your project but potentially adds years to your frame's lifespan.
Regardless of frame material, every vent installation creates a penetration in your window's weather barrier. Your goal is adding ventilation while preserving the window's ability to keep rain, drafts, and pests outside. This balance requires attention to three key areas: proper sizing, quality sealants, and correct installation sequence.
First, never enlarge a vent opening beyond manufacturer specifications trying to force a fit. Oversized cuts weaken frame structure and create gaps that no amount of sealant can permanently bridge. If your measurement is off, it's better to start fresh with a new vent unit than to compromise weatherproofing.
Second, use sealants specifically formulated for your frame material. As noted in Titon's guidance on acoustic ventilation, high-performing gaskets improve sealing against adverse weather while enhancing the vent's efficiency. Cheap all-purpose caulks may work initially but often fail within a few years, especially on aluminium where incompatible chemistry accelerates breakdown.
Finally, follow the correct installation sequence: prepare the opening, dry-fit the vent to verify alignment, apply sealant to the frame (not the vent), press the unit firmly into place, and secure with appropriate fasteners. Wiping away excess sealant immediately produces cleaner results than trying to remove cured material later.
Understanding your window frame's structural limitations prevents costly mistakes. uPVC frames have hollow sections that shouldn't be over-drilled. Aluminium frames lose strength if too much material is removed from critical areas. Wooden frames with active rot or insect damage need repair before any vent installation. When in doubt, consult a window professional to assess whether your frames can accommodate the ventilation solution you're planning.
With your frame material considerations sorted, the next step is ensuring you measure and size your vents correctly—because even perfect installation technique can't compensate for a vent that's too small or too large for your space.
You've identified your frame material and selected the right vent type for your needs. Now comes the step where many installations go wrong: measuring and sizing. Choose a vent that's too small, and you'll struggle with persistent condensation and stale air. Go too large, and you risk uncomfortable drafts, wasted energy, and potential structural issues with your window frame. Getting this right isn't complicated, but it requires understanding how to install window vents with the correct capacity for your specific space.
The relationship between room size, window dimensions, and vent capacity follows logical principles that apply whether you're working on a small bathroom or a large living area. Let's walk through the measuring process step by step, then explore how to calculate your actual ventilation requirements.
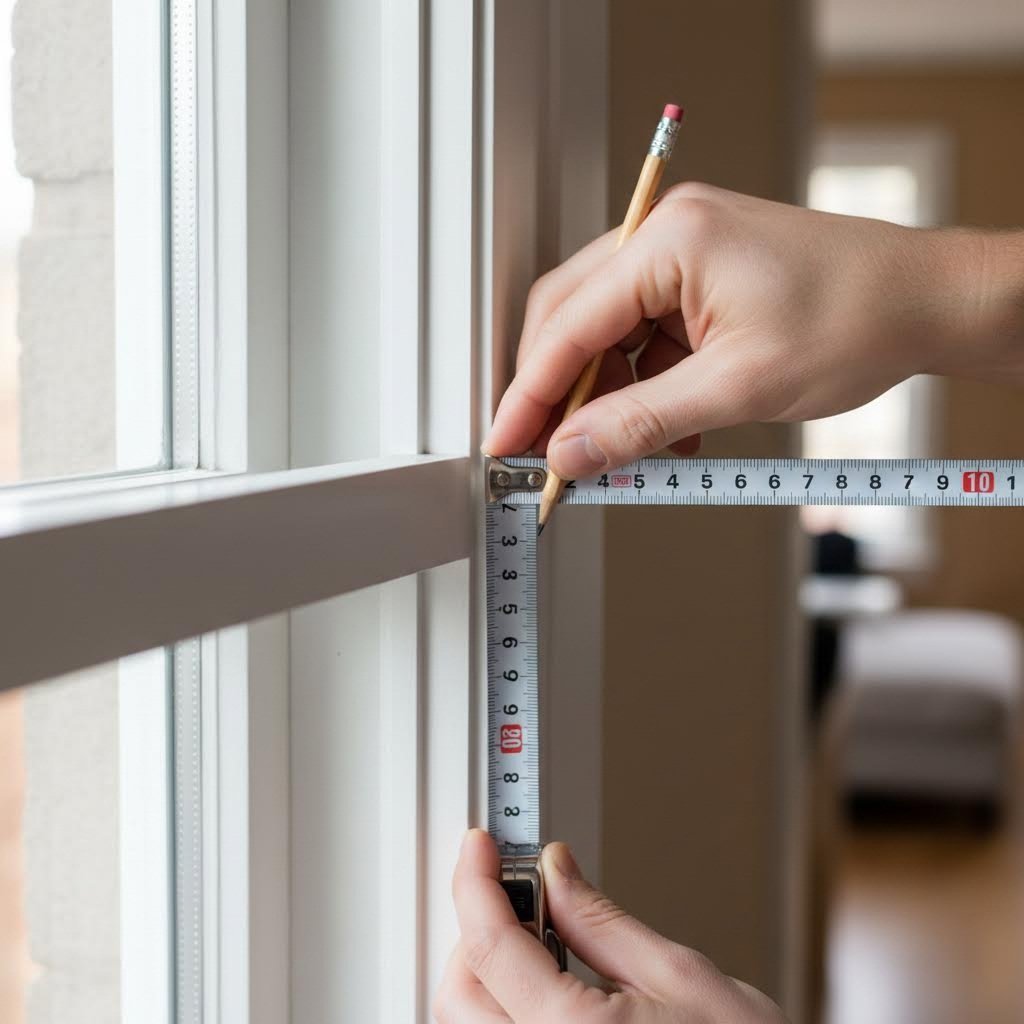
Before purchasing any vent unit, you need three categories of measurements: your window frame dimensions, the available installation space, and your room's floor area. Missing any of these leads to ordering mistakes and frustrating returns. Here's how to measure everything correctly:
When measuring window frames, always take readings at multiple points. Older windows especially can be slightly out of square, and assuming uniform dimensions leads to vents that don't fit properly. Record the smallest measurement in each dimension—this ensures your vent will fit even at the tightest point.
How much ventilation does your room actually need? Building regulations provide specific guidance, though requirements vary by location and room type. The International Mechanical Code specifies that natural ventilation openings should equal at least 4 percent of the floor area being ventilated—a useful benchmark even when installing mechanical or passive trickle vents.
Trickle vent capacity is measured in Equivalent Area (EA), expressed in square millimeters. This rating indicates the vent's effective open area for airflow. For residential applications, building codes typically require:
To determine how many vents you need, divide your room's ventilation requirement by the EA rating of your chosen vent. For example, a bedroom requiring 5,000mm² EA could use one 5,000mm² vent or two 2,500mm² vents distributed across different windows. Multiple smaller vents often provide better air distribution than a single large unit.
Room usage significantly affects ventilation needs. High-moisture areas like bathrooms and kitchens require more airflow to prevent condensation problems. Bedrooms occupied by multiple people need greater capacity than single-occupancy rooms. When in doubt, sizing slightly larger than minimum requirements provides a safety margin without creating draft issues—most quality trickle vents include adjustable controls that let you reduce airflow when full capacity isn't needed.
Even if your ventilation calculations indicate you need a specific EA rating, your window frame must physically accommodate the vent unit. This is where window vents installation planning becomes a balancing act between airflow requirements and structural constraints.
Standard trickle vents typically range from 250mm to 400mm in length, with EA ratings between 2,500mm² and 5,000mm². Longer vents generally provide higher airflow capacity. However, your vent length should never exceed the available frame width minus approximately 30mm on each side for mounting clearance and weatherproofing.
Consider these common sizing scenarios:
Understanding how to install a window vent properly means learning from others' errors. These mistakes appear repeatedly in failed installations:
Measuring only the visible frame: Window frames often have hidden sections behind trim or internal linings. Before cutting anything, confirm the full frame depth and any obstructions like reinforcement bars or glazing seals.
Ignoring multiple openers: When determining ventilation requirements, the Handles and Hinges guide emphasizes counting how many opening sashes exist in each room. Three windows with openers allow you to use smaller, easier-to-install vents on each rather than struggling with one oversized unit.
Forgetting about acoustic requirements: Standard vents work fine in quiet neighborhoods, but homes near busy roads may need acoustic-rated units that maintain airflow while reducing noise transmission. These units often require more frame depth, so check specifications before measuring.
Overlooking room interconnections: Building codes consider how rooms connect when calculating ventilation. A windowless room that opens to a ventilated adjacent space may draw ventilation from that connection, potentially affecting your overall calculations.
Assuming all vents are equal: A 400mm vent from one manufacturer may have a different EA rating than a 400mm vent from another. Always check the specific EA specification rather than assuming length directly correlates to capacity.
Taking time to measure accurately and calculate requirements properly sets you up for installation success. With your sizing confirmed, you're ready to move on to the actual installation process—where technique and attention to detail determine whether your vents perform as intended.
So you've measured your windows, selected the right vent size, and gathered your tools. Now comes the moment of truth: actually installing trickle vents in existing windows. Can you install trickle vents to existing windows without professional help? Absolutely—with proper preparation and careful execution, this is a manageable DIY project that delivers significant improvements to your home's ventilation.
Whether you're retrofitting vents to older windows or completing a new build installation, the fundamental process follows the same logical sequence. The key differences lie in how you approach frame preparation and what challenges each scenario presents. Let's walk through the complete window trickle vent installation process, from initial preparation through final testing.
Proper preparation prevents most installation problems. Before drilling a single hole, you need to ensure your workspace is ready and your window frame can safely accommodate the vent. Rushing this stage leads to misaligned cuts, damaged frames, and vents that leak or rattle.
Start by gathering all necessary tools and materials. According to Astraframe's installation guide, you'll need:
Next, inspect your window frame thoroughly. Look for existing damage, rot in wooden frames, or cracks in uPVC that could worsen during installation. Check whether your frame has steel reinforcement by tapping along its length—reinforced sections produce a duller sound than hollow areas. If you discover structural problems, address these before proceeding.
For retrofit installations on existing windows, clean the top rail area where your vent will sit. Remove any dirt, cobwebs, or loose paint that could interfere with marking accuracy or seal adhesion. If working with painted wooden frames, note whether the paint contains lead (common in pre-1980 homes) and take appropriate safety precautions.
New build installations typically offer cleaner working conditions, but you'll still want to remove any protective films from the frame surface and verify that glazing seals won't interfere with your planned vent position.
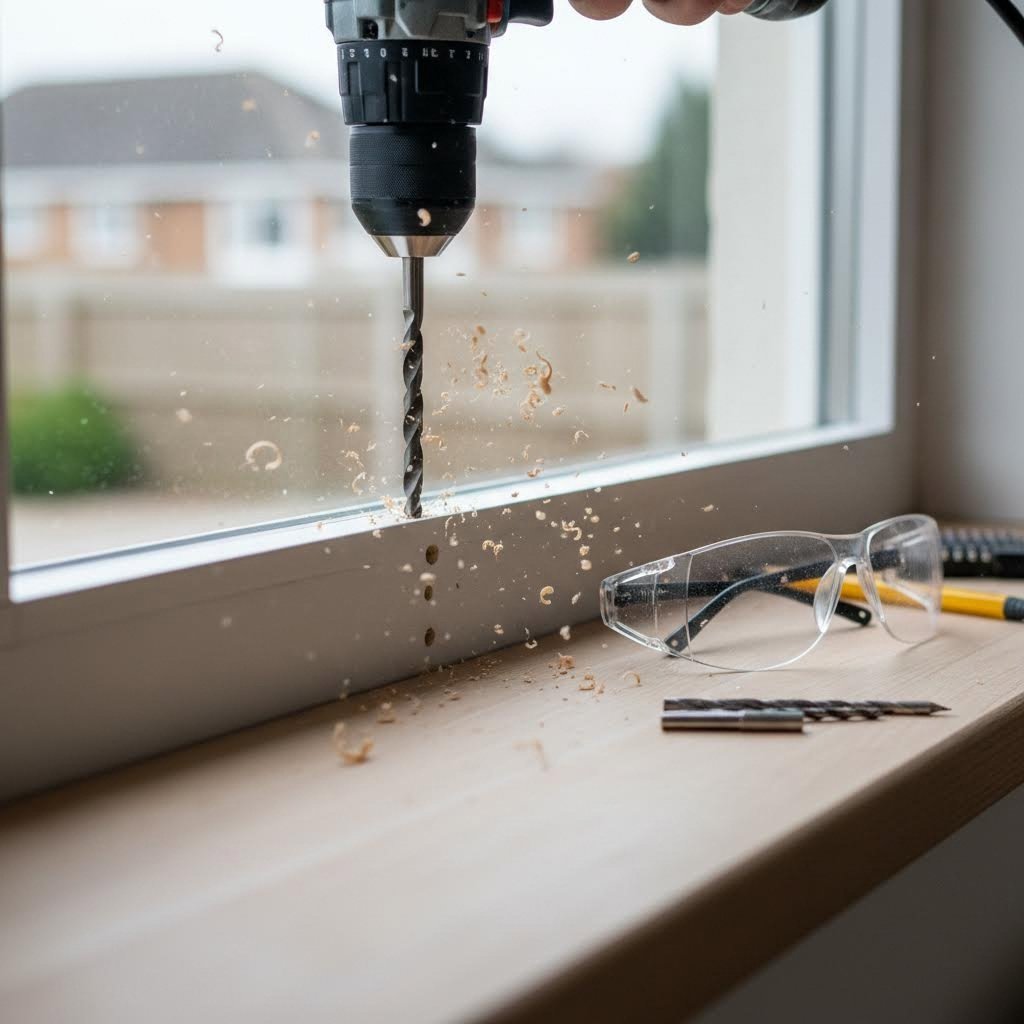
Accurate marking determines whether your vent fits perfectly or creates problems you'll notice every time you look at your window. Take your time here—measuring twice genuinely does prevent cutting once in the wrong place.
Follow this sequence for marking and drilling your trickle vent opening:
If you encounter steel reinforcement while drilling (common in modern uPVC windows), don't panic. Switch to your TCT drill bit and continue at a slower speed. The reinforcement actually improves your installation's structural integrity—you're just adding a few extra minutes to the process.
With your slot drilled, the physical installation moves quickly. However, proper sealing technique determines whether your vent remains weatherproof for years or develops leaks within months.
Can I install a trickle vents to existing windows that weren't designed for them? This question concerns many homeowners, and the answer is generally yes—with some important caveats.
Retrofit installations on existing windows present a few additional challenges. Older frames may have thinner profiles with less material for drilling, requiring extra care to avoid weakening the structure. Paint layers on wooden frames need scoring along cut lines to prevent chipping. Some older uPVC windows use different internal chamber configurations that affect drilling approach.
The main advantage of retrofit projects is that you're working with settled, stable frames. New build installations on recently installed windows occasionally encounter frames that haven't fully seated into their openings, which can affect measurements slightly.
For new constructions, building regulations in many regions now require trickle vents as standard. If you're installing windows without vents in a new build, check local codes—you may need to add them regardless of personal preference.
Window trickle vent installation is relatively low-risk, but a few precautions protect you from common hazards:
If you encounter unexpected obstacles during installation—hidden wiring, structural reinforcement in unusual places, or frame damage you hadn't noticed—stop and assess before continuing. Some situations genuinely require professional evaluation, and recognizing when you've reached that point prevents costly mistakes.
Completing your first trickle vent installation builds confidence for future projects. Each subsequent window goes faster as you develop familiarity with your tools and techniques. But what about situations where DIY isn't the best approach? Understanding when to call in professionals—and what that decision involves—helps you make informed choices about how to proceed with your overall ventilation project.
You've learned the techniques, gathered your tools, and feel ready to tackle your window vent project. But here's the question that separates successful installations from expensive mistakes: should you actually do this yourself? The honest answer depends on several factors that go beyond just your confidence level. Understanding when DIY makes sense—and when calling a professional saves you money in the long run—helps you make the right choice for your specific situation.
Let's break down the key considerations that determine whether your project belongs in DIY territory or professional hands.
For homeowners with basic tool skills and patience, many window vent installations are genuinely achievable. According to SoCo Wood & Windows, DIY installation works best when performing simple retrofits on existing openings where you have ample tools, instructions, and standard operating procedures to follow.
DIY trickle vent installation is particularly feasible because these projects involve straightforward drilling and mounting rather than structural modifications. If you've successfully completed home improvement projects requiring precision measurements and power tool use—installing shelving, hanging doors, or basic carpentry—you likely possess the skills needed for standard vent installations.
Consider tackling your project yourself when:
Portable AC window vent kits represent the easiest DIY category—most require no drilling and install in under 30 minutes. Basic adjustable dryer vent kits that slide into window openings also fall into beginner-friendly territory.
Some installations genuinely demand professional expertise. Recognizing these scenarios before you start prevents costly damage and ensures your ventilation system performs correctly.
Ideal HVAC Services emphasizes that proper ventilation installation requires extensive knowledge of airflow systems, compliance with building codes, and specialized tools not typically found in homeowner toolboxes. While their focus is ductwork, the same principles apply to complex window vent scenarios.
Call a professional when facing these situations:
Understanding how to install glass block window with vent properly typically means hiring someone with specific experience in this material. The mortar work, block alignment, and waterproofing techniques differ significantly from standard frame installations.
Similarly, if you're researching the cost to install vent in basement bathroom no window situations, you're looking at more complex ventilation solutions that route through walls or ceilings—projects firmly in professional territory requiring permits and code compliance.
Money often drives the DIY versus professional decision, but upfront savings don't tell the complete story. Consider the total cost including potential rework, warranty implications, and your time investment.
| Factor | DIY Installation | Professional Installation |
|---|---|---|
| Skill Requirements | Basic power tool proficiency, ability to follow instructions precisely | None required from homeowner |
| Time Investment | 1-4 hours per window depending on type and experience | Your time limited to scheduling and supervision |
| Material Costs | $15-$80 per trickle vent; $30-$150 for dryer vent kits | Same material costs, often with trade discounts |
| Tool Costs | $50-$200 one-time if purchasing; rental options available | Included in service |
| Labor Costs | Your time only | $75-$200 per window typical; glass block work $150-$400+ |
| Risk of Damage | Higher—mistakes may require frame replacement | Lower—professionals carry liability insurance |
| Warranty Impact | May void window manufacturer warranty | Typically preserves or includes installation warranty |
| Rework Likelihood | Higher for first-time installers | Minimal with reputable contractors |
The real cost calculation extends beyond the invoice. A DIY installation that damages your window frame could cost $300-$800+ for frame replacement—far exceeding what professional installation would have cost initially. Conversely, paying $150 for professional installation of a $40 trickle vent may not make financial sense when the DIY process is straightforward.
For installing dryer vent in glass block window applications, professional costs typically range from $200-$500 depending on complexity and your location. Given the specialized materials and techniques required, this often represents good value compared to DIY risks.
Evaluate your specific project honestly. Standard trickle vents in accessible, modern uPVC or wooden frames? Most handy homeowners manage these successfully. Glass block modifications, structural changes, or warranty-sensitive installations? Professional expertise pays dividends.
When in doubt, consider a middle path: hire a professional for one installation while observing their techniques, then tackle remaining windows yourself with that knowledge. Many contractors welcome this approach and may offer guidance for your subsequent DIY work.
Whatever you decide, timing your installation correctly maximizes success—and as we'll explore next, climate and seasonal factors significantly influence when you should schedule your window vent project.
Timing matters more than most homeowners realize when it comes to window vent installation. The temperature outside your window affects everything from how sealants cure to how materials behave under your drill bit. Planning your project around seasonal conditions isn't just about convenience—it directly impacts installation quality and long-term performance. Whether you're learning how to install in channel window vents or tackling a more complex trickle vent retrofit, understanding climate factors helps you achieve professional-grade results.
Beyond timing, your local climate also determines which vent specifications will serve you best year-round. A vent that performs perfectly in Arizona's dry heat may struggle with moisture control in Florida's humidity. Let's explore how to schedule your installation for success and select vents matched to your regional conditions.
When should you schedule your window vent project? The answer depends primarily on temperature and humidity conditions that affect both your working comfort and the materials you're using.
According to Hotmelt.com's silicone sealant guide, silicone sealants require curing temperatures between 50 and 100 degrees Fahrenheit, with humidity levels between 5 and 95 percent for proper curing. This process typically takes 24 hours for thin applications, but thicker sealant beads may need up to 48 hours to cure completely. Working outside these parameters risks weak seals that fail prematurely.
Spring and fall consistently offer the best conditions for window vent installations. As Air Vent Installation notes, spring provides moderate weather that allows efficient work without the challenges of extreme heat or cold, while fall offers cooler temperatures and reduced humidity that benefit installation work before winter arrives.
Here are the optimal installation conditions to target:
Summer installations remain feasible but require additional planning. Longer daylight hours help complete projects efficiently, yet high temperatures create challenges. uPVC frames become more pliable in extreme heat, potentially affecting drilling precision. Sealants may cure too quickly, reducing working time for proper tooling. If summer is your only option, schedule work for early morning hours when temperatures remain moderate.
Winter presents the greatest challenges for most regions. Cold temperatures make uPVC frames brittle and more prone to cracking during drilling. Sealants cure slowly or incompletely below 50°F, compromising weatherproofing. However, in regions with mild winters, this season can still work—just verify your sealant specifications and plan for extended curing times.
For those wondering about the best temp to install WeatherTech window vents or similar adhesive-mounted products, the same principles apply. These products typically use pressure-sensitive adhesives that bond best between 60-80°F. Installing in cold conditions often leads to poor initial adhesion, while excessive heat can make adhesives too aggressive, complicating positioning adjustments.
Your regional climate significantly influences which vent specifications will perform best in your home. McCloud Windows' climate zone guide emphasizes that different climates demand thoughtful consideration when selecting ventilation components, just as they do for windows themselves.
In hot and sunny climates, ventilation needs center on preventing heat buildup while managing occasional humidity spikes. Select vents with higher equivalent area (EA) ratings to maximize airflow during peak heat. Consider units with UV-resistant materials that won't degrade under intense sun exposure. Reflective or light-colored external canopies help prevent solar heat gain through the vent opening itself.
Cold climate regions require a different approach. While ventilation remains important for moisture control, you want to balance airflow against heat retention. Look for trickle vents with adjustable controls that allow you to reduce airflow during the coldest months. Some manufacturers offer thermal break designs that minimize heat transfer through the vent body—particularly important when learning how to install window vent visors or external-mounted options that create direct thermal bridges.
For humid climates like coastal areas or tropical regions, moisture management becomes your primary concern. McCloud Windows notes that good ventilation options and moisture-resistant frames are essential in these environments. Select vents with corrosion-resistant materials—stainless steel or high-grade plastics rather than bare aluminum. Higher ventilation capacity helps prevent the condensation problems that plague humid-climate homes, so err toward larger EA ratings when sizing your installation.
Mixed climate zones, including much of the continental United States, benefit from versatile vent selections. The McCloud guide recommends balancing solar heat gain and insulation with components that adapt to varying weather conditions. Adjustable trickle vents with moderate EA ratings offer flexibility—open fully during mild seasons, partially closed during temperature extremes. This adaptability proves especially valuable if you're installing how to install window vent shades or combination products that serve multiple functions.
Beyond vent type selection, different climates may require different total ventilation capacities to maintain healthy indoor air quality. High-humidity regions typically need 20-30% more ventilation capacity than dry climates to adequately control moisture levels. Homes in areas with significant temperature swings benefit from vents with wider adjustment ranges, allowing occupants to fine-tune airflow seasonally.
Consider your local weather patterns when planning multi-window installations. If your region experiences frequent rain with wind, prioritize vents with robust weather hoods and drainage features. Areas prone to insect activity during warm months should specify fine-mesh screening on all external vent openings.
The investment in climate-appropriate vent selection pays dividends through improved performance and reduced maintenance needs. A vent matched to your regional conditions operates efficiently year-round, while a mismatched choice may struggle during certain seasons or require premature replacement due to environmental stress.
With your installation timing optimized and vent specifications matched to your climate, you're positioned for long-term success. However, even the best installation requires ongoing attention to maintain performance—which brings us to the essential maintenance practices that keep your window vents functioning effectively for years to come.

You've invested time and effort into proper window vent installation—now what? Like any home component, window vents require ongoing attention to deliver the performance you expect. Neglected vents accumulate debris, develop seal failures, and eventually stop providing adequate airflow. The good news? Maintenance is straightforward, takes minimal time, and dramatically extends your vents' functional lifespan. A few minutes of care each season prevents the condensation problems, stuffiness, and air quality issues that prompted your installation in the first place.
Think of vent maintenance like changing your HVAC filter. SS&B Heating & Cooling emphasizes that dirty filters are one of the simplest yet most overlooked causes of poor airflow—the same principle applies to your window vents. Regular attention keeps air moving freely and prevents small problems from becoming expensive repairs.
Dust, pollen, insects, and outdoor debris inevitably accumulate in your window vents. This buildup restricts airflow gradually—so gradually that you might not notice the decline until ventilation becomes noticeably inadequate. Establishing a simple cleaning routine prevents this creeping performance loss.
For trickle vents, cleaning involves both the interior canopy (the part with adjustable controls) and the exterior hood with its protective mesh. Start by opening the vent fully to access internal surfaces. Use a soft brush attachment on your vacuum cleaner to remove loose dust and debris from both components. For stubborn buildup, a damp microfiber cloth works well—avoid harsh chemicals that might degrade plastic components or damage finish coatings.
When learning how to install vent window rubber seals or replacing worn gaskets, you'll notice these components also benefit from regular cleaning. Wipe rubber seals with a damp cloth to remove grit that causes premature wear. A light application of silicone-based lubricant keeps rubber supple and extends seal life, particularly in climates with temperature extremes.
External vent hoods require attention to their drainage pathways. Many designs include weep holes or channels that direct rainwater away from interior components. Clear these passages of debris—a blocked drainage path allows water to pool and potentially infiltrate your frame. A pipe cleaner or compressed air effectively clears small drainage openings.
For dryer vents routed through windows, lint accumulation demands regular attention. Check the exterior hood flap for lint buildup that prevents proper closure. Disconnect the flexible duct annually and clean the entire pathway—lint accumulation creates fire hazards and reduces dryer efficiency significantly.
Beyond regular cleaning, seasonal inspections catch developing problems before they cause damage. Advantage Pro Services recommends seasonal maintenance approaches for window-related components, noting that different seasons present unique challenges requiring specific attention.
Use this comprehensive maintenance checklist for your seasonal inspections:
During each seasonal check, pay attention to how to install vent window glass or surrounding glazing shows any signs of moisture infiltration. Water staining, mold growth, or visible condensation between glass layers indicates potential seal failure that may relate to vent installation issues.
Even well-maintained vents occasionally develop problems. Knowing how to identify and address common issues saves money and prevents air quality deterioration.
Blocked or restricted airflow: If your vents seem less effective despite cleaning, check for obstructions you might have missed. Insect nests, particularly wasp nests, frequently block exterior hoods. Paint overspray from nearby projects can seal mesh openings. For trickle vents, verify the adjustable control actually moves—mechanisms sometimes seize after extended periods in one position.
Seal degradation: Weatherstripping and gaskets deteriorate over time, especially with UV exposure and temperature cycling. Signs include visible gaps between vent components and frames, drafts when vents are closed, or water infiltration during rain. If you're comfortable with the process of installing vent window glass gaskets, seal replacement is typically a DIY repair. Replacement gaskets are available from vent manufacturers and general hardware suppliers. Remove the old seal completely, clean the mounting surface, and press the new gasket firmly into place.
Operational failures: Adjustable controls that stick, rattle, or won't stay in position usually result from debris accumulation or worn pivot mechanisms. Clean the control mechanism with compressed air and apply a small amount of silicone lubricant to moving parts. If the mechanism remains problematic, replacement control units are often available separately from complete vent assemblies.
Noise issues: Whistling or rattling sounds indicate air leakage or loose components. Check that all mounting screws remain tight—vibration gradually loosens fasteners over time. Whistling typically results from gaps in seals or incorrectly positioned control flaps. A vent window seal installation tool helps ensure replacement seals sit properly in their channels, eliminating air gaps that cause noise.
Condensation around vents: Some condensation on vent surfaces during cold weather is normal. However, excessive moisture, water dripping, or condensation on surrounding frame areas suggests problems. Check that exterior drainage paths are clear. Verify seals remain intact. In severe cases, the vent may be undersized for your room's ventilation needs, causing moisture buildup rather than proper air exchange.
Not every problem justifies complete vent replacement. Understanding the difference between repairable issues and replacement indicators saves money while ensuring your ventilation system performs adequately.
Consider repair when:
Replacement becomes necessary when:
Quality window vents typically last 15-25 years with proper maintenance. If your vents approach this age and require frequent repairs, proactive replacement often makes more financial sense than continued repair investments. Modern vents offer improved airflow efficiency, better acoustic performance, and enhanced weatherproofing compared to older designs—benefits that may justify earlier replacement even when existing vents remain functional.
Consistent maintenance protects your installation investment and ensures your home continues enjoying the air quality benefits that motivated your project. With your vents performing optimally, the final consideration is selecting quality products that deliver reliable long-term performance—which we'll explore in our concluding section on choosing professional-grade ventilation solutions.
You've learned how to measure, install, and maintain window vents—but none of that matters if you start with substandard products. The difference between a quality vent and a cheap alternative becomes obvious within the first year of use. Inferior products develop seal failures, corrode prematurely, or simply don't deliver the airflow ratings their packaging promises. Investing a few extra dollars upfront in proven ventilation products saves frustration and replacement costs down the road.
Whether you're completing a single bathroom retrofit or specifying vents for an entire new build project, understanding what separates quality products from budget compromises helps you make purchasing decisions you won't regret. Let's examine the key indicators of quality and explore professional-grade solutions that deliver reliable long-term performance.
Walk into any hardware store and you'll find window vents at dramatically different price points. What justifies the cost difference? Several measurable quality factors directly impact performance and longevity.
Material construction forms the foundation of vent quality. According to the Complete Vent Window Buying Guide, aluminum and uPVC are the most common frame-compatible materials, with aluminum offering superior corrosion resistance and uPVC providing better insulation properties. Stainless steel components enhance longevity in coastal environments where salt exposure accelerates deterioration. Avoid vents with thin plastic housings that flex under pressure—they won't maintain proper seals over time.
Airflow ratings determine whether your vent actually delivers adequate ventilation. Quality manufacturers provide tested Equivalent Area (EA) ratings in square millimeters, verified under standardized conditions. As the buying guide emphasizes, you should check manufacturer specifications for tested values under standard conditions rather than relying on marketing claims. Products lacking independent airflow testing data represent a significant red flag—if a manufacturer won't verify their claims, you have no assurance the vent performs as advertised.
Adjustability features provide flexibility for varying conditions. Can the vent be opened, closed, or set to intermediate positions? Adjustable vents offer better climate control throughout the year. The best designs feature smooth-operating mechanisms that maintain their set position without drifting.
Here are essential features to evaluate when selecting window vents:
When learning how to install window vent for portable ac units or similar exhaust applications, material quality becomes even more critical. These installations face temperature extremes from exhaust air that accelerate degradation in inferior materials. Similarly, understanding how to install portable ac window vent systems effectively requires products designed to handle thermal stress without warping or seal failure.
For readers seeking reliable passive ventilation systems designed for seamless integration into uPVC and aluminium frames, the choice of manufacturer matters as much as product specifications. Professional-grade solutions come from companies with rigorous quality testing protocols and comprehensive OEM capabilities that ensure consistent performance across production runs.
What distinguishes professional-grade ventilation technology from consumer products? Several factors:
Energy-efficient trickle vents that provide continuous, draft-free airflow offer ideal solutions for moisture control in both new builds and retrofit projects. The Federation of Master Builders notes that trickle vents play a critical role in reducing condensation by letting controlled fresh air flow into homes, diluting and removing pollutants while contributing to healthier living environments.
For specialized applications like learning how to install window vent for air conditioner exhaust or how to install vent in existing glass block window locations, product quality directly impacts installation success. Inferior products often require modifications that compromise weatherproofing or simply don't fit standard openings correctly. Professional-grade products include precise tolerances and complete installation hardware that simplifies the fitting process.
When evaluating manufacturers, look for companies offering:
For projects requiring how to install a dryer vent through a window, quality becomes a safety consideration beyond mere convenience. Properly designed dryer vent products include appropriate hood mechanisms, lint-resistant screening, and heat-tolerant materials that maintain safe operation over years of use. Budget products in this category may create fire hazards or allow pest entry that compromises your home's envelope.
The comparative analysis from the Complete Vent Window Buying Guide reveals that customer satisfaction correlates strongly with product quality—users who install multiple quality units across their homes report greater satisfaction than those relying on single, cheaper alternatives. This pattern suggests that investing in proven products for your complete ventilation project delivers better outcomes than mixing quality levels.
Consider these final selection criteria:
| Selection Factor | Budget Products | Professional-Grade Products |
|---|---|---|
| Typical Lifespan | 5-10 years | 15-25 years |
| Seal Performance | Basic rubber strips, prone to early failure | Compression seals with verified weather resistance |
| Airflow Verification | Often unverified marketing claims | Independent laboratory testing with published results |
| Frame Compatibility | Generic fit requiring modification | Precise engineering for specific frame types |
| Warranty Coverage | Limited or none | Multi-year coverage with manufacturer support |
| Installation Support | Basic instructions only | Detailed guides, technical specifications, customer service |
Your window vent installation represents a long-term investment in your home's air quality, moisture control, and energy efficiency. Selecting quality products matched to your specific needs—whether standard trickle vents for background ventilation or specialized solutions for how to install ac vent in window applications—ensures that investment delivers returns for years to come.
For those ready to explore professional-grade ventilation technology, manufacturers specializing in passive ventilation systems offer comprehensive product lines designed for both residential and commercial applications. Shengxin's window trickle vents exemplify this professional approach, featuring high-performance designs backed by rigorous quality testing and comprehensive OEM capabilities. Their energy-efficient passive ventilation systems integrate seamlessly into uPVC and aluminium frames while providing the continuous, draft-free airflow essential for effective moisture control.
Whatever your specific ventilation needs, prioritize products from manufacturers who stand behind their quality claims with verified testing, meaningful warranties, and ongoing technical support. Your home deserves ventilation solutions that perform as promised—today and for decades to come.
Yes, you can retrofit trickle vents to existing windows, provided the top of the window frame is wide enough to accommodate them. The process involves carefully drilling holes into the frames to create a ventilation slot, then securing the vent unit with screws and sealant. Most modern uPVC, aluminum, and wooden frames can accept trickle vents, though installation techniques vary by material. For uPVC frames, you'll need sharp HSS drill bits and should work at moderate speeds to prevent cracking. Professional-grade trickle vents from manufacturers like Shengxin are specifically designed for seamless integration into existing uPVC and aluminium frames, making retrofit projects more straightforward.
Installing a window vent follows a systematic process: First, choose the right vent size based on your room's ventilation requirements and window frame dimensions. Measure and mark the installation position on the top rail of your window frame, centering the vent opening. Prepare the frame by applying masking tape to prevent damage, then drill a series of closely spaced holes to create the ventilation slot. Clean all drilled edges, dry-fit the vent to verify alignment, apply appropriate sealant, and secure both the interior and exterior vent components with screws. Finally, test the adjustable controls to ensure proper operation.
Window vents have some potential drawbacks to consider. They can introduce dust, pollen, and outdoor pollutants into your indoor environment, which may concern allergy sufferers. In very cold climates, even controlled ventilation can contribute to minor heat loss, though adjustable trickle vents mitigate this by allowing you to reduce airflow during extreme temperatures. Improper installation can lead to drafts, water leaks, or compromised frame integrity. However, high-quality vents with proper installation, compression seals, and thermal break designs minimize these issues while delivering essential air quality and moisture control benefits.
In many regions, building regulations now mandate trickle vents in newly installed windows and doors. For example, from June 2022, UK regulations require any newly installed windows to include trickle vents to meet Part F ventilation requirements. Similar regulations exist in various jurisdictions worldwide. While retrofit installations on existing windows may not always be legally required, they remain highly recommended for improving indoor air quality and reducing condensation problems. Always check your local building codes before starting any window vent installation project to ensure compliance.
Installing a dryer vent through a window involves either using an adjustable window vent kit that slides into the opening or creating a permanent panel installation. For adjustable kits, simply place the vent hood into an open window, extend the side panels to fit, and close the window to secure it. For permanent installations, replace a window pane with an acrylic panel, cut a 4-inch diameter hole for the vent connection, and seal everything with silicone caulk. Ensure proper hood placement with a flap that closes when not in use to prevent pests and weather intrusion. Regular lint cleaning is essential for fire safety.


 dịch vụ trực tuyến
 0086 136 3563 2360
 sales@sxalu.com
 +86 136 3563 2360
 Việt
Việt English
 français
 Deutsch
 русский
 español
 português
 العربية
 ไทย
ไทย Українська