Ever wondered how you can enjoy fresh air indoors or in your vehicle without letting rain, dust, or debris ruin your comfort? That's exactly where window vent covers come into play. These protective accessories serve as engineered barriers that allow controlled airflow while blocking out unwanted weather elements and contaminants.
Whether you're driving through a rainstorm or trying to maintain healthy indoor air quality at home, these versatile devices solve a common problem: how to ventilate a space without compromising protection. Let's break down what they are, where they're used, and why they matter.
At their core, window vent covers are protective accessories designed to facilitate air circulation while shielding interiors from rain, snow, debris, and harsh weather conditions. Think of them as guardians for your windows—they redirect precipitation away from openings and prevent moisture exposure that causes damage over time.
These devices work by utilizing sloped designs that promote efficient runoff, ensuring water flows away from frames and sills rather than pooling and seeping inside. The result? You can crack your windows for ventilation even during inclement weather without worrying about water damage or debris infiltration.
A vent window equipped with the right cover becomes far more functional. You'll maintain visibility by preventing fogging, reduce interior heat buildup, and protect against UV damage—all while enjoying fresh air circulation.
Window vent covers serve two primary markets, each with distinct product designs tailored to specific needs:
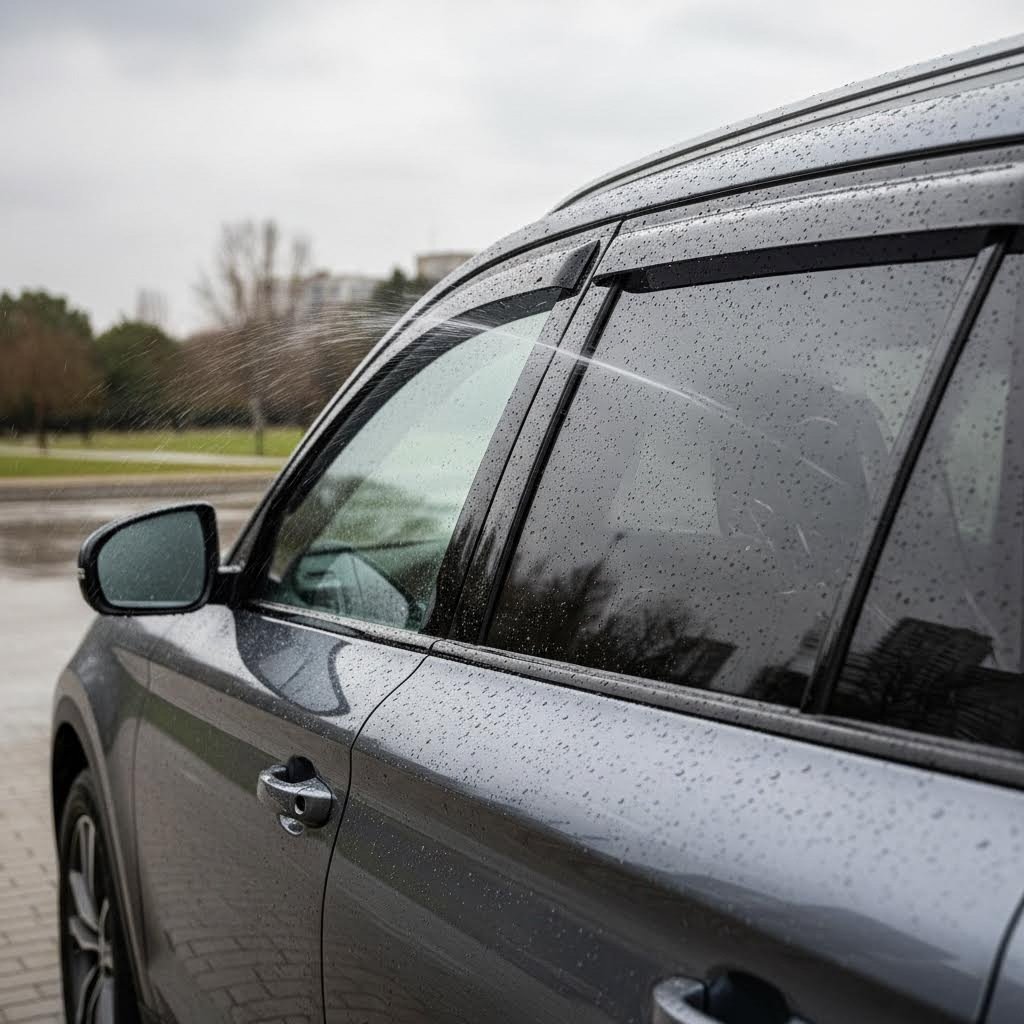
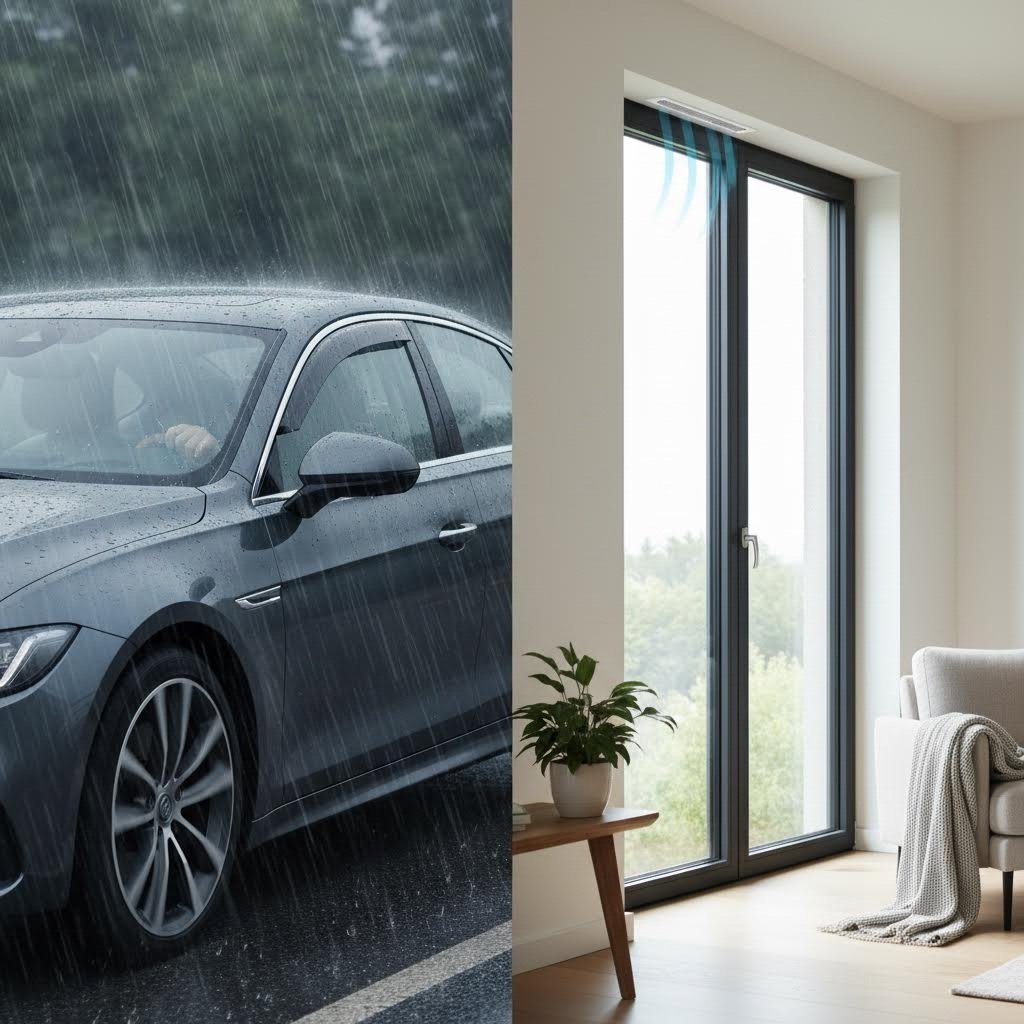
Automotive Applications: In vehicles, these products are commonly called side window deflectors, rain guards, or vent visors. They're slim, aerodynamic accessories—usually made from acrylic or polycarbonate—that attach above your car's windows. A car window vent allows you to keep windows slightly open during rain or snow, enabling continuous airflow without letting water inside. According to KSB Auto Styling, window deflectors help redirect airflow, minimizing turbulence and lowering wind noise for a quieter, more pleasant ride.
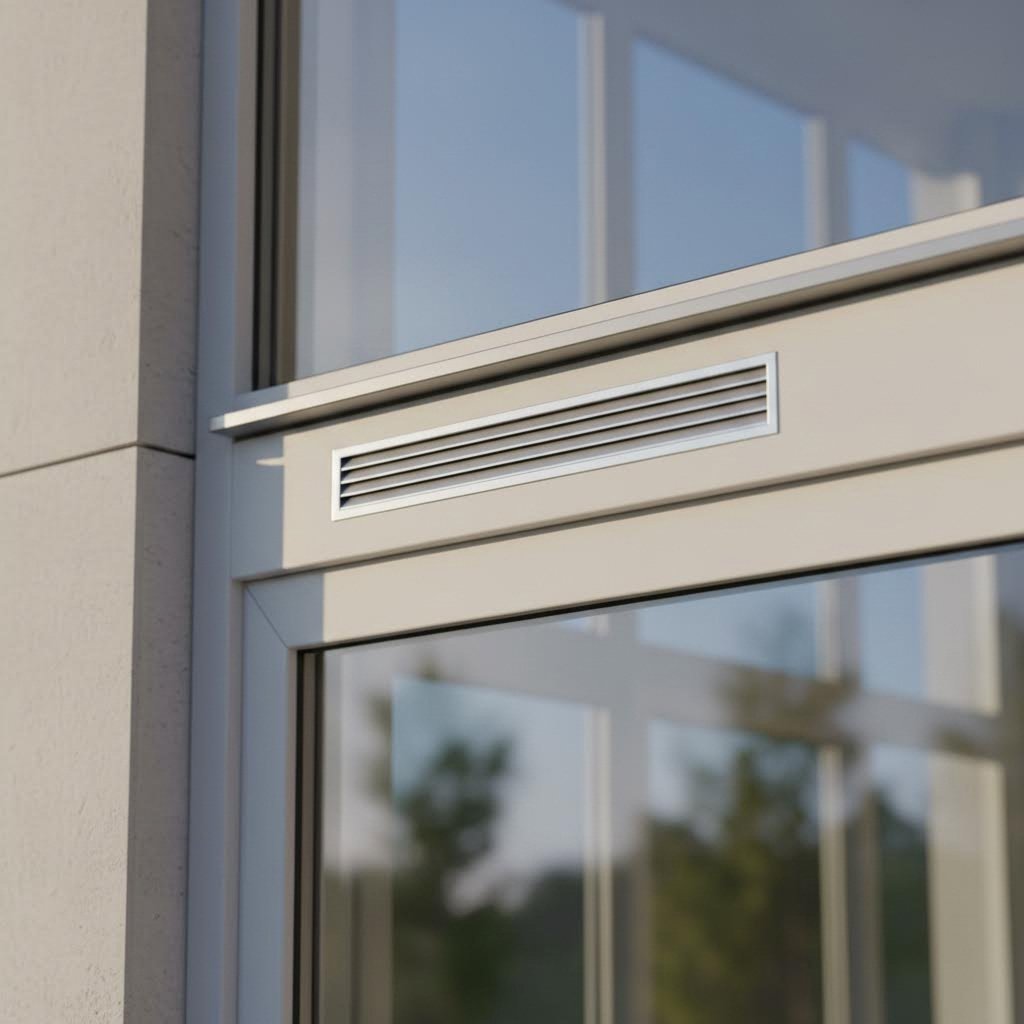
Residential and Commercial Applications: For buildings, window vent covers take forms like trickle vents, window well covers, and ventilation grilles. Trickle vents are small openings integrated into window frames that enable controlled airflow between indoor and outdoor environments, as noted by Durajoin. Window well covers protect basement windows from water infiltration while allowing light and ventilation. These solutions are increasingly important in modern, well-insulated homes where natural air exchange is limited.
Why do these covers matter so much? The answer lies in their multi-functional design. Here are the primary functions that window vent covers provide:
For window guards on vehicles, additional benefits include reduced wind noise at highway speeds, protection from sun damage, and enhanced aesthetic appeal. Building applications offer security advantages too—modern trickle vents allow you to keep windows locked while still enjoying airflow, meaning you don't have to compromise safety for fresh air.
Understanding these fundamentals sets the stage for making informed decisions about which type of vent cover suits your specific needs. Whether you're protecting your daily driver or improving your home's indoor air quality, the right window vent cover delivers comfort, protection, and peace of mind.
Now that you understand what window vent covers do, here's the next critical question: what are they made of, and why does it matter? The material composition directly determines how long your investment lasts, how well it performs under extreme conditions, and whether it maintains its appearance over time. Choosing the wrong material for your climate can result in cracked, yellowed, or warped covers within months—so let's break down your options.
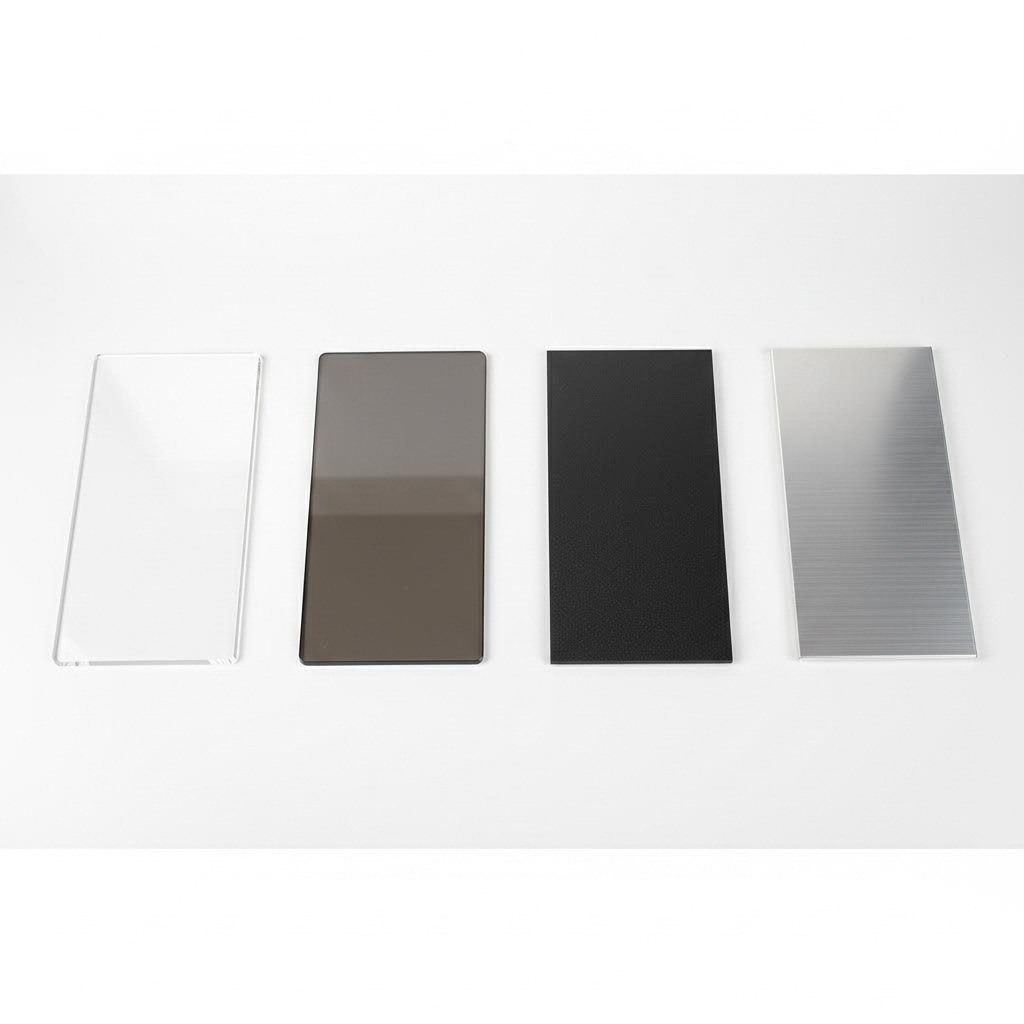
Acrylic (also known as PMMA) is one of the most common materials used in budget-friendly weathertech window covers and rain guards. Its popularity stems from good surface hardness and scratch resistance at an affordable price point.
Here's the key advantage: acrylic is inherently UV-resistant. According to SyBridge Technologies, acrylic suffers as little as 3% degradation over a 10-year period when used in outdoor applications. This makes it an excellent choice for maintaining clarity and color stability under constant sun exposure.
However, acrylic has significant limitations. It's rigid and brittle, meaning it can crack during bending, turn white when flexed, and break more easily during shipping or installation. Under intense sunlight, acrylic is more prone to warping and yellowing compared to premium alternatives. Cold environments also increase cracking risk, making it less suitable for regions with harsh winters.
Best for: Price-sensitive buyers in moderate climates who prioritize cost savings over maximum durability.
When durability and impact resistance matter most, polycarbonate (PC) stands out as the premium choice. Often called "bulletproof material," polycarbonate is 20-30 times stronger than acrylic and is widely used in high-quality window shield products, aircraft windows, and safety equipment.
What makes polycarbonate exceptional? It's highly flexible—it can bend without cracking or developing white stress marks. This flexibility makes installation safer and reduces damage risk during shipping. Polycarbonate also performs exceptionally well across extreme temperatures, functioning reliably from -40°C to 130°C without warping in hot sunlight or cracking in freezing conditions.
The trade-off? Higher cost and more demanding manufacturing requirements. Premium polycarbonate weather shield products typically use injection molding, which creates perfect-fit covers with smoother edges, stronger structures, and OEM-style appearances. While this increases price, it also extends lifespan significantly.
ABS plastic offers a middle-ground option. It provides better impact resistance than acrylic at a lower cost than polycarbonate, though it doesn't match polycarbonate's temperature tolerance or longevity. ABS works well for moderate climates where extreme temperature swings aren't common.
Best for: Polycarbonate suits buyers in hot, cold, or variable climates who want maximum durability. ABS works for budget-conscious consumers in moderate regions.
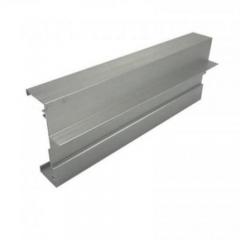
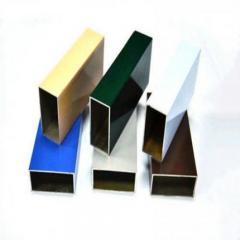
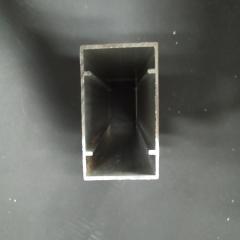
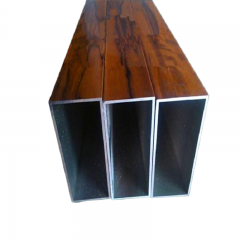
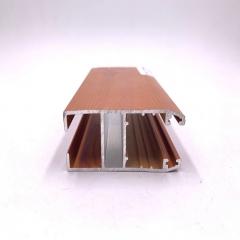
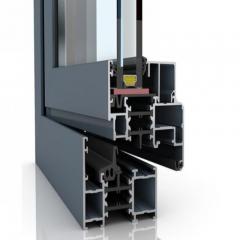
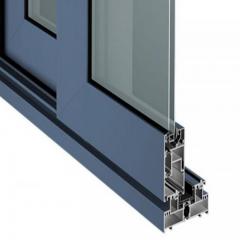
For building applications and heavy-duty rain cover needs, aluminum delivers unmatched durability. Unlike plastic options, aluminum is completely resistant to rust and corrosion, making it ideal for humid environments, coastal areas, and regions with heavy rainfall.
According to American Awning, aluminum requires minimal maintenance compared to other materials and offers excellent versatility—available in various styles and colors to complement different architectural designs. This makes aluminum vent covers particularly popular for residential and commercial buildings where long-term performance and aesthetics both matter.
One consideration: aluminum can retain heat under direct sunlight, which may be uncomfortable if your vent cover is exposed to prolonged sun. However, for most ventilation applications, this isn't a significant concern since the covers aren't directly contacted surfaces.
When pairing aluminum vent covers with your windows, also consider complementary protection like window weatherstrips to create a comprehensive seal against the elements. Similarly, car door edge protectors can extend this protective approach to your vehicle's other vulnerable areas.
Best for: Building applications, coastal regions, and anywhere long-term corrosion resistance is essential.
| Material Type | Durability Rating | UV Resistance | Best Climate Application | Typical Lifespan |
|---|---|---|---|---|
| Acrylic (PMMA) | Moderate | Excellent (3% degradation/10 years) | Moderate, low-humidity climates | 5-10 years |
| Polycarbonate (PC) | Excellent | Very Good (with UV coating) | Extreme heat, cold, or variable climates | 10-15+ years |
| ABS Plastic | Good | Moderate (requires additives) | Moderate climates without extremes | 5-8 years |
| Aluminum | Excellent | Excellent (no degradation) | Humid, coastal, heavy rainfall areas | 15-25+ years |
Your local weather conditions should drive your material selection. Here's a quick guide:
Understanding these material differences empowers you to make a purchase that truly matches your environment and usage needs. With the right material selected, your next decision involves choosing between installation methods—a choice that affects both appearance and long-term performance.
You've chosen your material—now comes the next big decision: how should your window vent covers attach to your vehicle? This isn't just about convenience. The installation method you select affects how your deflectors look, how long they last, and how easily you can remove them later. Let's explore the two primary approaches so you can pick the right one for your ride.
Imagine sliding your vent visor directly into the narrow track where your window glass travels up and down. That's exactly how in channel rain guards work. These deflectors are precision-engineered to fit snugly inside the window channel, creating a seamless, factory-style appearance that looks like it came straight from the manufacturer.
According to Husky Liners, in-channel rain guards tuck into the upper window channel and often include adhesive strips along the inside edge for extra security. The result? A low-profile, flush-mounted look that follows the natural lines of your vehicle without protruding outward.
Installation typically involves cleaning the channel, performing a dry fit to ensure proper alignment, peeling the adhesive backing, and pressing the guard firmly into place. Here's an important detail: after installation, you'll need to keep your windows rolled up for 24 to 48 hours. This allows the guards to seat properly and prevents interference with window operation.
Prefer a simpler approach? Tape-on deflectors—also called stick-on or outside-mount visors—attach directly to the exterior of your door frame using automotive-grade 3M adhesive tape. This method is popular among truck window vent visors and window vent visors for trucks because of its straightforward installation and reliable performance.
The process is remarkably simple: clean the mounting surface thoroughly, peel off the adhesive backing, and press the visor firmly into place. No tools required, no waiting period before using your windows. According to Ikon Motorsports, you should allow about 24 hours for the adhesive to fully set before exposing the installation to car washes or heavy rain.
Because tape-on visors mount outside the window channel, they provide additional coverage over the entire window frame area. This extended protection can be particularly valuable in heavy rain or when driving through construction zones where debris is common.
So which method works best for you? The answer depends on three key factors: your vehicle's design, your aesthetic preferences, and how long you plan to keep the deflectors installed.
Vehicle compatibility matters most. Before purchasing avs window visors or any other brand, verify that your make and model supports your preferred installation type. Some vehicles—particularly those with frameless windows or unconventional door designs—simply cannot accommodate in-channel deflectors. Check manufacturer fitment guides carefully, as even slight variations between model years can affect compatibility.
Consider your aesthetic priorities. If that factory-installed, low-profile look is important to you, in-channel auto vent shades deliver. They're particularly popular among enthusiasts who want subtle styling that enhances rather than changes their vehicle's appearance. However, if you're more focused on maximum weather protection and don't mind a slightly bolder presence, tape-on options provide excellent functionality.
Think about long-term plans. Planning to lease your vehicle or sell it within a few years? In-channel deflectors offer cleaner removal without adhesive concerns. Keeping your truck for the long haul? Either option works well, though tape-on installations may require more careful surface preparation to ensure lasting adhesion.
One final consideration: climate and usage. If you frequently drive in heavy rain or through dusty, debris-filled areas, the extended coverage of tape-on deflectors might provide superior protection. For highway commuters prioritizing quiet, refined aesthetics, in-channel designs typically excel.
With your installation method decided, you're ready to understand the full range of benefits these protective accessories deliver—from weather protection to improved comfort and even enhanced resale value.
You've selected your material and decided on an installation method. But here's the question that really matters: what will you actually gain from this investment? The benefits extend far beyond simply keeping rain out. From practical weather protection to surprising comfort improvements and even enhanced resale value, window vent covers deliver advantages that many vehicle and building owners overlook. Let's explore exactly what these protective accessories bring to the table.
Imagine driving through a sudden downpour but still enjoying fresh air flowing through your vehicle. That's the primary advantage rain guards deliver. By creating an angled barrier above your windows, these deflectors redirect water away from the opening, allowing you to crack your windows even during moderate rainfall without getting your interior wet.
According to KSB Auto Styling, window deflectors create a barrier that prevents rain and snow from directly hitting the window glass. This delivers two immediate benefits: better visibility during inclement weather and reduced reliance on constant windshield wiper usage. When water droplets aren't streaming across your side windows, you maintain clearer sightlines for lane changes and mirror checks.
The protection extends beyond precipitation. Window rain guards also shield your interior from:
For building applications, a rain protector car owners rely on translates to similar benefits for homes. Trickle vents and window covers prevent water infiltration that leads to frame damage, wood rot, and costly repairs. They're particularly valuable in regions with heavy rainfall or snow, where unprotected windows are vulnerable to moisture damage year-round.
Have you ever returned to a parked car on a summer day and been hit by a wave of stifling heat? Window vent covers help solve this problem. By allowing you to leave windows slightly cracked—even when parked—they enable hot air to escape rather than building up inside your vehicle.
As noted by KSB Auto Styling, window deflectors reduce interior heat buildup when parked under the sun. By partially opening the windows, hot air escapes while cooler air circulates, resulting in a more comfortable interior temperature when you return. This means less time running your air conditioning at full blast and potentially reduced fuel consumption during summer months.
Beyond temperature control, car rain guard products deliver significant improvements to driving comfort through noise reduction. When driving at highway speeds, wind noise can become a major distraction—especially with windows cracked open. Quality rainguard deflectors redirect airflow around window openings, minimizing turbulence and creating a smoother, quieter ride for everyone inside.
The ventilation benefits prove equally valuable for buildings. Car side window shades serve a similar purpose to trickle vents in homes: maintaining continuous air exchange without fully opening windows. This passive ventilation approach helps:
Proper ventilation is essential for mold prevention. Mold thrives in damp, stagnant air, and without a steady exchange of indoor and outdoor air, moisture lingers. According to Roofon, maintaining indoor humidity levels between 30-50% through effective air exchange not only prevents mold growth but also protects your health and preserves your home's structural integrity.
Let's be honest—functionality matters, but so does how your vehicle looks. Quality rain guards for car applications do more than just protect; they add a refined, sporty appearance that enhances your vehicle's overall aesthetic.
Modern deflectors come in various finishes, including smoke-tinted, chrome-accented, and matte black options that complement different vehicle styles. When properly installed, they follow the natural lines of your door frames, creating a cohesive, intentional look rather than an aftermarket add-on appearance.
This aesthetic enhancement can translate to tangible value. Vehicles with quality accessories in good condition often command higher resale prices because they suggest an owner who invested in protection and maintenance. Potential buyers recognize that rain guards for car windows indicate attention to detail—and the interior protection they provide means upholstery, dashboards, and trim are likely in better condition than unprotected vehicles.
The customization aspect shouldn't be overlooked either. With multiple styles, finishes, and brands available, you can select deflectors that match your personal taste while achieving practical benefits. Whether you prefer the sleek integration of in-channel guards or the bold presence of tape-on visors, there's an option that aligns with your vehicle's aesthetic direction.
For building applications, well-designed window vent covers contribute to curb appeal while providing functional benefits. Aluminum vent covers, for example, come in various colors and styles that complement different architectural designs. When exterior aesthetics matter—for homeowners or commercial property managers—choosing attractive ventilation solutions ensures you don't have to sacrifice appearance for functionality.
The benefits of window vent covers span practical protection, daily comfort, and visual enhancement. But to capture these advantages, you'll need to select the right product for your specific application—which means understanding compatibility factors and feature priorities before making your purchase.
You understand the benefits and you've explored installation methods—but here's where many buyers stumble: choosing a product that actually fits. A window visor that looks perfect online can become a frustrating return if it doesn't match your specific vehicle or building requirements. The good news? Following a systematic selection approach eliminates guesswork and ensures your investment delivers everything you expect.
Whether you're shopping for automotive window visors or building ventilation solutions, the selection process follows similar principles: verify compatibility first, match features to your needs, and confirm proper fitment before committing. Let's walk through exactly how to do this.
When selecting visors for car windows, compatibility isn't just about finding your vehicle's make and model—it's about matching the exact specifications that determine whether a product will fit properly. Even slight variations between model years, trim levels, or body styles can affect fitment.
Here are the critical compatibility factors to verify:
Always cross-reference the manufacturer's fitment guide against your vehicle's exact specifications. When in doubt, check your VIN (Vehicle Identification Number) against compatibility databases—many quality vent visors for cars include VIN lookup tools to confirm proper fitment before purchase.
Don't overlook special considerations for trucks. Truck window vent visors often have unique requirements due to extended cab configurations, sliding rear windows, or oversized door panels. Extended cab, crew cab, and regular cab trucks each need different deflector sets even within the same model line.
For residential and commercial applications, the selection process focuses on different factors—primarily frame compatibility, airflow requirements, and regulatory compliance.
Frame material and design: Window vent covers must integrate seamlessly with your existing window frames. Aluminum frames, vinyl frames, and wood frames each have different mounting requirements. Some trickle vents are designed specifically for certain frame types, while others offer universal mounting options.
Measuring correctly matters: According to Ventiques, accurate measurements are essential for proper fitment. Their experts recommend removing your existing vent cover and taking measurements of height, width, and depth. Note the shape and any mounting features, and consider using digital calipers or laser measurement tools for precision.
Airflow requirements: Not all spaces need the same ventilation capacity. Bathrooms, kitchens, and basements typically require higher airflow rates than bedrooms or living areas. When selecting ventilation window covers, calculate your space's ventilation needs based on room size and usage patterns.
Regulatory compliance: Building codes increasingly mandate specific ventilation standards, particularly for energy-efficient construction. The ASHRAE Handbook provides guidelines on air intake design, noting that outdoor air intakes must be placed to avoid contamination and maintain acceptable indoor air quality. Ensure your selected vent covers meet local building codes and ventilation requirements.
For car window ventilation needs, the considerations shift to ensuring your selected deflectors allow adequate airflow while maintaining weather protection. Quality automotive window visors balance these competing demands through aerodynamic design.
Beyond basic compatibility, selecting the right window vent cover means matching product features to your specific priorities. Ask yourself these questions:
For users requiring precise ventilation control, look for products with adjustable louvers or sliding mechanisms. These features let you increase airflow during mild weather and reduce it during storms or extreme temperatures—providing flexibility that fixed-opening designs cannot match.
| Application Type | Key Compatibility Factors | Feature Priorities | Budget Considerations |
|---|---|---|---|
| Automotive (Sedans/Coupes) | Make, model, year, body style, window channel depth | Aerodynamic profile, noise reduction, UV protection | $30-80 for quality acrylic; $80-150+ for premium polycarbonate |
| Automotive (Trucks/SUVs) | Cab configuration, door count, rear window type | Extended coverage, durability, debris protection | $50-100 for standard sets; $100-200+ for premium options |
| Residential Buildings | Frame material, window dimensions, mounting style | Adjustable airflow, security features, weather sealing | $20-75 per vent for standard; $75-200+ for premium aluminum |
| Commercial Buildings | Building code compliance, airflow capacity, frame integration | Regulatory compliance, durability, low maintenance | Varies widely based on scale and specifications |
Don't rely solely on product descriptions. Take these steps to confirm proper fitment:
Taking time to verify compatibility prevents the frustration of receiving products that don't fit—and ensures your window vent covers deliver the protection and performance you expect from day one. With your selection finalized, the next step is proper installation—a process that determines whether your new deflectors perform as intended or become a source of ongoing problems.
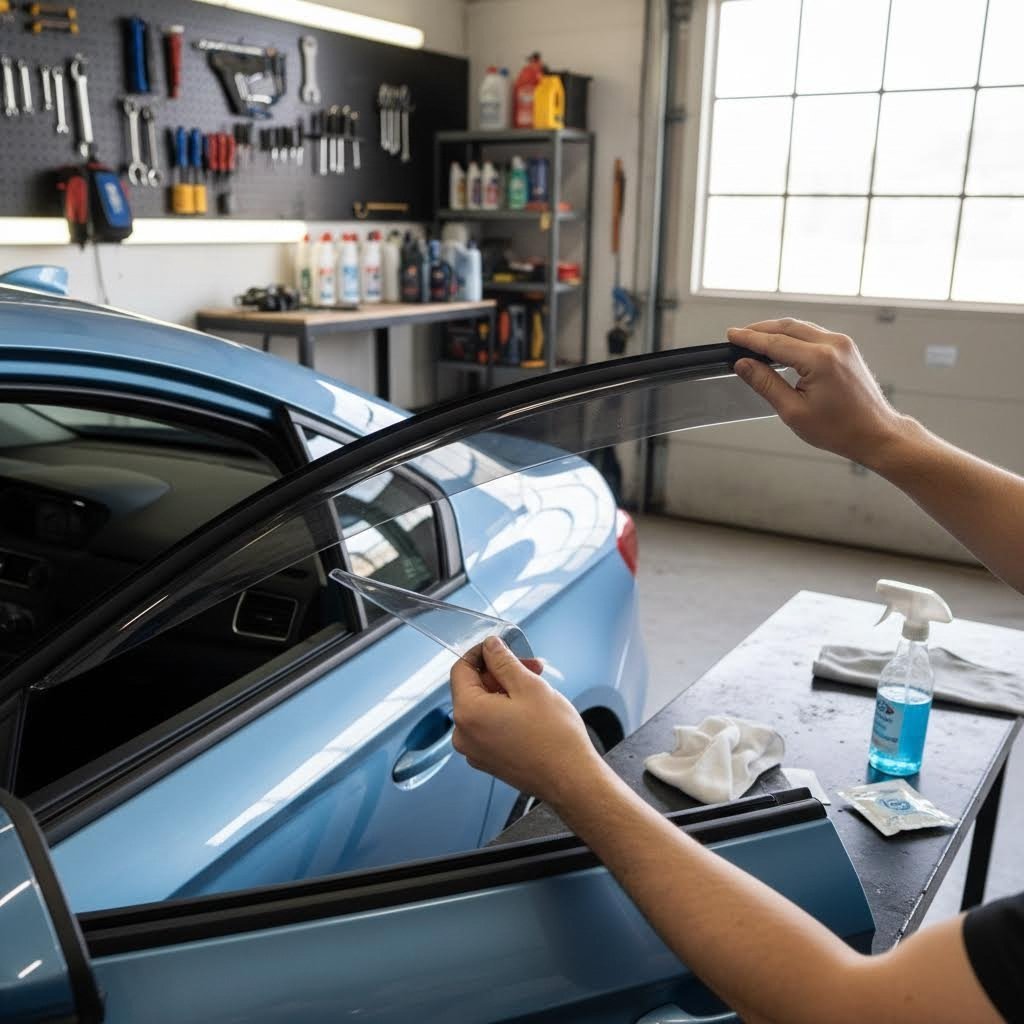
You've selected the perfect wind deflector for your vehicle and verified compatibility. Now comes the moment of truth: installation. The good news? Whether you're working with in-channel or tape-on varieties, this is genuinely a DIY-friendly project that most people complete in under 30 minutes. The key is proper preparation and avoiding the common mistakes that lead to poor adhesion, misalignment, or premature failure.
Follow this step-by-step guide, and your window wind deflectors for cars will look factory-installed and perform flawlessly for years to come.
Before you touch your new wind deflectors, gather everything you need. Rushing into installation without proper preparation is the number one cause of problems down the road.
Essential tools and materials:
Temperature matters more than you think. According to Super Auto USA, you should avoid working in extreme heat or cold, as temperature significantly affects how well automotive adhesive bonds. Ideal installation temperatures range between 60°F and 80°F (15°C to 27°C). If you're installing in cold weather—below 50°F—you'll need to warm both the mounting surface and the adhesive strip with a heat gun before application.
Park your vehicle in a shaded or covered area if possible. Direct sunlight can cause adhesive to set too quickly, preventing proper positioning adjustments.
The installation process differs slightly between auto wind deflector types, but both follow the same fundamental principles: clean thoroughly, dry fit first, then commit to final placement.
Even experienced DIYers make these errors. Knowing what to watch for saves you from frustration and potential reinstallation.
This is the most common complaint—and it's almost always caused by inadequate surface preparation. If your deflector starts peeling within days or weeks, the mounting surface wasn't clean enough. Residual wax, silicone from car washes, or natural oils from touching the surface all prevent proper bonding.
The fix: Clean more aggressively than you think necessary. Wipe the area at least twice with fresh alcohol wipes, and avoid touching the cleaned surface with bare hands afterward. In cold weather, warm the surface with a heat gun before applying the deflector.
Once automotive adhesive makes contact, repositioning becomes difficult. Rushing through installation often results in crooked deflectors that look unprofessional and may not seal properly.
The fix: Always dry fit first and mark your alignment points with masking tape. Peel adhesive backing gradually rather than all at once—this gives you control and allows minor adjustments before the full length bonds.
Sometimes deflectors don't seem to match your window contour despite being listed as compatible. This can result from manufacturing variations, shipping damage, or incorrect product selection.
The fix: Verify you have the correct product for your exact year, make, model, and body style before installation. If the deflector requires excessive force to fit, stop—forcing it can crack the material or create poor adhesion. Contact the manufacturer for guidance or a replacement.
Adhesive doesn't bond properly in cold temperatures. Installing deflectors on a cold morning often leads to failure within weeks as the adhesive never fully cured.
The fix: If you must install in cold weather, warm both the mounting surface and the adhesive strip with a heat gun or hair dryer before application. Keep the heat gun moving to avoid overheating any single spot. Alternatively, park in a heated garage for several hours before installation.
Impatience causes this mistake frequently. Testing your new deflectors by rolling windows up and down before the adhesive cures can shift their position or weaken the bond.
The fix: For tape-on installations, avoid rolling windows down for 24 hours. For in-channel types, keep windows fully closed for 24-48 hours. Yes, this requires planning—but it ensures your deflectors stay secure for years rather than weeks.
With proper preparation and attention to these common pitfalls, your new window vent covers will deliver reliable performance and that satisfying factory-installed appearance. Once installation is complete, maintaining your investment becomes the next priority—ensuring your deflectors continue protecting your vehicle through years of use.
Your window vent covers are installed and performing beautifully—but how do you keep them that way? Like any exterior accessory exposed to the elements, these protective devices require periodic attention to maintain their appearance and functionality. The good news? Maintenance is straightforward, and a few simple habits can extend your vent visor lifespan from years to decades.
Whether you're maintaining car window vents on your daily driver or caring for building ventilation systems, understanding proper cleaning techniques, recognizing wear signs, and addressing environmental challenges keeps your investment performing at its best.
Regular cleaning prevents the buildup of grime, road film, and environmental contaminants that degrade materials over time. According to OAD4X4 Accessories, maintaining your window vents involves simple steps that anyone can perform at home.
The frequency depends on your environment—vehicles in dusty areas or coastal regions need more frequent attention than those in mild climates. As a baseline, clean your window vents every time you wash your vehicle, or at least monthly for building applications.
Recommended cleaning products and methods by material type:
Here's an important tip: always rinse thoroughly after washing. Soap residue attracts dirt and can leave streaky deposits that become harder to remove over time. Dry with a clean, lint-free cloth to prevent water spots—especially important for tinted or smoked vent visors where spots are highly visible.
For vent window car applications, avoid high-pressure car washes aimed directly at your deflectors. The intense water pressure can potentially loosen adhesive bonds or force water behind in-channel installations. Hand washing or touchless car washes are gentler alternatives.
How do you know when your window vents need attention—or replacement? Regular inspection catches problems early, before minor issues become major failures.
As recommended by OAD4X4 Accessories, regularly inspect your rain guards for any signs of cracks, chips, or other damage, and address issues promptly to prevent them from worsening. Make inspection part of your routine whenever you clean.
What to look for during inspections:
For window vents car owners often overlook, check where the deflector contacts the window channel or frame. Accumulated dirt in these areas can cause scratching on your window glass or prevent proper sealing.
Environmental factors significantly impact how long your window vent covers last. Understanding these challenges helps you take protective action.
UV exposure is the primary enemy of plastic materials. Prolonged sunlight breaks down polymer chains, causing brittleness, discoloration, and eventual failure. Parking in shaded areas or garages whenever possible extends lifespan considerably. For building applications, consider UV-resistant coatings or choosing materials like aluminum that don't degrade under sunlight.
Extreme temperatures stress both the deflector material and adhesive bonds. Repeated thermal cycling—hot days by cold nights—causes expansion and contraction that weakens connections over time. Quality polycarbonate handles these swings better than acrylic, which becomes brittle in cold conditions.
Salt air and coastal environments accelerate corrosion and material degradation. If you live near the ocean, rinse your window vents more frequently to remove salt deposits. Aluminum vent covers excel in these conditions due to their corrosion resistance, while plastic options may require more frequent replacement.
Seasonal considerations: If you're storing removable vent covers during off-seasons, clean them thoroughly before storage, and keep them in a cool, dry location away from direct sunlight. Avoid stacking heavy items on top that could cause warping.
Warranty protection: Most manufacturers void warranties for damage caused by improper cleaning, harsh chemicals, or failure to follow maintenance guidelines. Using abrasive cleaners, pressure washers directly on deflectors, or neglecting to address loose attachments typically excludes you from coverage. Keep your purchase documentation and follow manufacturer care instructions to preserve warranty protection.
When replacement becomes necessary—typically after 5-15 years depending on material quality and environmental exposure—proper removal matters. For tape-on deflectors, use a heat gun to soften adhesive before gently prying, then clean residue with adhesive remover designed for automotive paint. Taking care during removal prevents damage to your vehicle's finish and prepares the surface for new deflectors.
With consistent maintenance, your window vent covers will continue delivering protection and comfort throughout their service life. However, even the best products have limitations—understanding potential drawbacks helps you set realistic expectations and make fully informed decisions.
Every product has trade-offs—and window vent covers are no exception. While we've explored the significant benefits these accessories deliver, making a truly informed decision requires understanding their limitations too. Some users discover issues only after installation, leading to frustration that could have been avoided with upfront knowledge. Let's examine the potential drawbacks honestly so you can decide whether these products align with your specific needs and expectations.
Not everyone loves how window vent covers look. While many drivers appreciate the sporty, customized appearance that a quality rain guard or deflector provides, others find them visually intrusive—especially on vehicles with clean, minimalist styling.
Tape-on varieties protrude noticeably from the door frame, creating a bolder visual presence that doesn't suit every taste. Even sleek in-channel designs alter your vehicle's original lines. If you've invested in a premium vehicle specifically for its factory aesthetics, adding aftermarket automotive rain guards may detract from the design language you're trying to preserve.
Color matching presents another challenge. While most deflectors come in universal smoke or dark tint finishes, they may not perfectly complement every paint color or trim package. Chrome-accented models work well on some vehicles but look out of place on others. Before purchasing, consider how the deflector's finish will integrate with your specific vehicle's exterior styling.
For building applications, similar concerns apply. A window guard for cars serves a different aesthetic purpose than residential ventilation covers, but both require consideration of how they'll look against existing architectural elements. Poorly matched vent covers can appear as obvious afterthoughts rather than intentional design choices.
Even properly installed car window rain guards have functional boundaries you should understand before purchasing.
Whistling and wind noise: This is perhaps the most common complaint. Improperly fitted deflectors—or those with manufacturing defects—can create an annoying whistling sound at highway speeds. According to AmericanTrucks, contact between in-channel visors and window glass may cause issues over time, and after a few years of use, these deflectors may loosen up, rattle, or even fall out. While quality products from reputable manufacturers minimize this risk, it's not entirely eliminable.
Limited protection in heavy conditions: Rain guards reduce water infiltration—they don't eliminate it completely. During heavy downpours, wind-driven rain, or high-speed driving through storms, some water may still enter through cracked windows. Setting expectations appropriately prevents disappointment.
Reduced window operation smoothness: In-channel deflectors sit within the same track your window glass travels through. While designed to avoid interference, some users report slightly increased resistance when rolling windows up and down. Over time, this friction can contribute to wear on both the deflector and window seals.
Airflow limitations in buildings: Trickle vents and residential window vent covers provide controlled ventilation—not maximum airflow. If you need substantial air exchange for workshops, industrial spaces, or rooms with high moisture output, these passive solutions may prove insufficient. They're designed for background ventilation, not primary air supply.
Truck window guards face additional challenges. Larger vehicles create more aerodynamic turbulence, and extended cab configurations or unique window shapes may limit product availability or fitment quality.
Sometimes, these products simply aren't the right solution. Here are scenarios where you might want to reconsider or explore alternatives:
Installation challenges deserve mention too. Certain vehicle models—particularly those with complex door frame geometries or integrated rain channels—make aftermarket deflector installation difficult or impossible without modifications. Always verify specific fitment for your exact year, make, and model before purchasing.
Understanding these limitations doesn't diminish the genuine value window vent covers provide—it simply ensures you enter your purchase with realistic expectations. For most applications, the benefits substantially outweigh these drawbacks. Armed with this complete picture, you're now prepared to make a final decision that truly serves your needs.
You've explored materials, compared installation methods, weighed benefits against limitations, and learned proper maintenance techniques. Now it's time to bring everything together into clear, actionable steps. Whether you're protecting your daily driver from the elements or upgrading your building's car ventilation and indoor air quality, the right window vent cover transforms how you experience your space. Let's synthesize this guide's key insights so you can move forward with confidence.
Choosing the ideal ventilation window solution comes down to matching product characteristics to your specific situation. Here's what matters most:
For automotive applications: Your vehicle's make, model, year, and body style determine compatibility—never assume a product fits without verification. Material selection should reflect your climate: polycarbonate for extreme temperatures, acrylic for moderate conditions on a budget. Installation method depends on your aesthetic preferences and long-term plans—in-channel for seamless integration, tape-on for easier application and broader compatibility.
For building applications: Frame material compatibility, required airflow capacity, and regulatory compliance drive your decision. Modern energy-efficient homes particularly benefit from controlled ventilation solutions that maintain indoor air quality without compromising thermal performance. According to the U.S. Environmental Protection Agency, inadequate ventilation is a leading cause of poor indoor air quality—making proper vent selection a health priority, not just a comfort preference.
Regardless of application, quality matters. Premium weathertech sunshade and deflector products cost more upfront but deliver superior longevity, better fitment, and fewer headaches over time. Budget options may save money initially but often require earlier replacement—especially in demanding environments.
When it comes to residential and commercial building ventilation, off-the-shelf solutions don't always meet the mark. Unique window configurations, specific airflow requirements, and strict building codes demand customized approaches. This is where professional-grade options become essential.
For property owners seeking optimal indoor climate management, Anhui Shengxin Aluminum's custom window trickle vents offer patented designs engineered to address the exact challenges discussed throughout this guide. Their weathertech window rain guards for buildings feature adjustable airflow control, allowing you to fine-tune ventilation based on seasonal conditions or room-specific needs—something fixed-opening alternatives cannot provide.
What sets these solutions apart? Seamless integration into various window frame types—whether aluminum, uPVC, or timber—ensures your vent windows function as intended without compromising aesthetics. The corrosion-resistant aluminum construction handles humid environments, coastal conditions, and decades of daily use without degradation. Perhaps most importantly, these vents meet regulatory compliance requirements for modern energy-efficient construction, addressing the building code demands that increasingly mandate controlled background ventilation.
The moisture prevention capabilities prove particularly valuable. As emphasized earlier in this guide, proper ventilation is essential for preventing mold growth and maintaining healthy indoor humidity levels. Shengxin's trickle vents provide that continuous, passive airflow that keeps condensation at bay while supporting energy efficiency—you're not sacrificing thermal performance for air quality.
Before finalizing any purchase, run through this comprehensive checklist to ensure you've covered all bases:
For vehicle owners, your local automotive accessories retailer or trusted online vendors offer extensive vent windows options with detailed fitment guides. Take advantage of customer reviews from owners with your exact vehicle configuration.
For building owners and property managers seeking custom passive ventilation solutions that meet specific requirements, professional-grade options deliver the precision, durability, and regulatory compliance that standard products cannot match. Explore Shengxin Aluminum's full range of customizable trickle vents to find solutions engineered for your exact specifications—whether you need moisture prevention for humid climates, adjustable airflow for variable conditions, or seamless integration with specialty window frames.
The investment you make in quality window vent covers pays dividends daily—in comfort, protection, air quality, and peace of mind. Armed with the knowledge from this guide, you're ready to select, install, and maintain products that serve you reliably for years to come.
Yes, keeping trickle vents open during winter is recommended. They prevent mold and condensation buildup by allowing controlled air exchange, and the impact on indoor temperature is minimal. Proper ventilation maintains indoor humidity between 30-50%, protecting both your health and your home's structural integrity even in cold months.
Window vents go by several names depending on the application. For buildings, they're commonly called trickle vents, ventilation grilles, or window well covers. For vehicles, they're known as side window deflectors, rain guards, vent visors, or wind deflectors. Each serves the same core purpose: enabling airflow while blocking weather elements.
Yes, quality window deflectors effectively redirect rain, snow, and debris away from cracked windows, allowing ventilation during inclement weather. They also reduce interior heat buildup when parked and minimize wind noise at highway speeds. However, effectiveness depends on proper installation and choosing the right product for your specific vehicle or building.
In-channel deflectors fit inside the window channel for a sleek, factory-style appearance with no adhesive on painted surfaces. Tape-on deflectors mount outside the frame using 3M adhesive, offering easier installation and wider vehicle compatibility. In-channel options remove more cleanly, while tape-on varieties provide extended frame coverage but may leave residue.
Lifespan varies by material and climate. Acrylic covers last 5-10 years, polycarbonate 10-15+ years, ABS plastic 5-8 years, and aluminum 15-25+ years. Factors like UV exposure, extreme temperatures, and coastal salt air affect longevity. Regular cleaning and proper maintenance significantly extend service life regardless of material type.


 dịch vụ trực tuyến
 0086 136 3563 2360
 sales@sxalu.com
 +86 136 3563 2360
 Việt
Việt English
 français
 Deutsch
 русский
 español
 português
 العربية
 ไทย
ไทย Українська